Bot Integrations for reimplementation-back-end Expertiza
Bot Integration for Reimplementation Expertiza
Integrating automation bots for the repository means configuring automated tools to work together within our GitHub workflow. Each of them runs every time a commit is made, and automatically reports test coverage, flags potential issues, and provides real-time feedback on pull requests (PRs) without manual intervention. This integration streamlines the development process, ensuring continuous quality checks and faster, more efficient collaboration.
Bots Used:
- Code Climate
- Danger Bot
- Custom GitHub Action for Pull Request comments
Why use these bots?
We integrate Code Climate, Danger Bot, and a Custom GitHub Action for Pull Request comments as part of our CI pipeline to enforce code quality and streamline the review process.
- Code Climate automatically reports the test coverage status whenever a pull request is created, updated, or synchronized.
- Danger Bot executes predefined checks to flag common pitfalls such as large PR sizes, missing test coverage, or changelog updates—serving as an automated gatekeeper during reviews.
- PR comment Bot runs RSpec test suites on every pull request and posts a detailed summary of test failures directly to the PR thread, supporting both internal and forked PRs.
This setup ensures continuous feedback, enforces project conventions, and maintains high engineering standards across contributions.
Why use GitHub Actions for the integration?
We use GitHub Actions for integrating bots because it seamlessly connects with our GitHub repository, allowing us to automate processes directly within the platform.
This integration simplifies our workflow by:
- Triggering actions based on pull request events
- Automatically running tests, analyzing code, and posting results
We prefer GitHub Actions over other CI tools because:
- They offers tight coupling with GitHub, reducing setup complexity and enhancing collaboration
- They allows us to define workflows as code, making it easy to manage and version control
- They supports a wide range of prebuilt actions
- The built-in runner environments are optimized for efficient execution
Overall, GitHub Actions provides a secure, scalable, and efficient solution for continuous integration.
Code Climate
Description
The Code Climate Test Coverage Bot is a tool that automates the collection, formatting, and reporting of test coverage data for a repository. It integrates with GitHub Actions to generate a coverage report using SimpleCov and uploads the results to Code Climate for visualization and tracking.
The corresponding pull request in the reimplementation-back-end repository : https://github.com/expertiza/reimplementation-back-end/pull/158
Why Use This Bot?
- Code Quality Monitoring: Helps track the percentage of code covered by automated tests.
- Continuous Integration (CI): Ensures that new code changes do not reduce test coverage.
- Team Collaboration: Provides visibility into which parts of the codebase need better test coverage.
- Automated Reporting: Eliminates manual effort in checking and uploading test coverage reports.
Process of Integration
This section outlines the detailed steps required to integrate the Code Climate workflow into the repository to enable test coverage reporting in pull requests or branches. It is intended for developers or maintainers who are setting up Code Climate for test coverage for the first time, troubleshooting an existing setup, or replicating the integration process for another project.
Step 1: Log in to Code Climate
- Go to Quality by Code Climate
- Sign in using your GitHub credentials
- Navigate to the repository
Step 2: Obtain CC_TEST_REPORTER_ID
- Navigate to the Repository Settings in Code Climate
- Go to the Test Coverage tab
- Copy the CC_TEST_REPORTER_ID
Step 3: Store the Secret in GitHub
- Go to the GitHub repository
- Navigate to: Settings > Secrets and variables > Actions
- Click New repository secret
- Set the name as CC_TEST_REPORTER_ID and paste the copied value
- Save the secret
File Changes Required
This section describes the specific modifications needed in the project files to enable Code Climate integration for reporting test coverage. It is relevant for developers who are setting up the initial environment to capture and report code coverage results, ensuring that the required gems and configurations are in place for successful integration.
Gemfile
Add the following gems to the Gemfile present in the root directory of the repo:
gem 'simplecov', require: false, group: :test
gem 'coveralls'
gem 'simplecov_json_formatter'
Why these changes are required:
simplecov: Tracks code coverage during test execution, helping identify untested parts of the codebase.coveralls: Integrates the coverage report with the Coveralls service, providing detailed online visualization and tracking of coverage over time.simplecov_json_formatter: Generates the coverage report in JSON format, which can be easily parsed and further processed if needed.
---
spec_helper.rb configuration
Add the following code to the spec/spec_helper.rb file.
require 'simplecov'
require 'coveralls'
require 'simplecov_json_formatter'

Coveralls.wear!('rails')
SimpleCov.formatter = SimpleCov::Formatter::JSONFormatter
SimpleCov.start('rails')
Why this configuration is required:
require statements: Load the necessary libraries at the start of the test suite.Coveralls.wear!('rails'): Automatically configures Coveralls to hook into the Rails test environment.SimpleCov.formatter = SimpleCov::Formatter::JSONFormatter: Sets the output format to JSON, required for external processing or integrations.SimpleCov.start('rails'): Initializes code coverage tracking tailored for Rails applications.
---
Ensure that coverage/.resultset.json is generated after running tests.
This file will be used to extract the test coverage results.
Steps of the GitHub Actions Workflow
This section explains the GitHub Actions workflow that automates test coverage reporting using Code Climate. It is intended for developers or maintainers who are responsible for setting up, maintaining, or troubleshooting automated test coverage tracking in the repository.
Understanding Test Coverage Test coverage is a metric that shows the percentage of code executed by tests. It indicates:
- Coverage Percentage: The percentage of lines executed in the test suite.
- Gaps in Coverage: Highlights untested portions of the code.
Workflow Steps:
- Set Up Code Climate Test Reporter
- Downloads and sets up the test reporter.
- Runs
./cc-test-reporter before-buildto initialize coverage tracking.
- Run Tests
- Executes model tests:
rspec spec/models - Executes controller tests:
rspec spec/requests/
- Executes model tests:
- Format Coverage Report
- Converts SimpleCov’s JSON output (
coverage/.resultset.json) to a Code Climate-compatible format. - Stores it as
coverage/codeclimate.models.json.
- Converts SimpleCov’s JSON output (
- Upload Coverage Artifacts
- Stores coverage results as GitHub artifacts for later retrieval.
- Publish Code Coverage
- Runs only on pushes to the main branch.
- Downloads the stored coverage artifacts.
- Merges coverage reports using
sum-coverage. - Uploads the final report to Code Climate.
How to Use the Bot?
This section provides a step-by-step guide for developers or reviewers on how to interact with the Code Climate test coverage workflow after a pull request is created. It explains how to locate the uploaded coverage report artifacts, download them, and interpret the coverage results to assess the quality of the tests in a PR.
Once a pull request is created targeting the main branch:
- Navigate to the Pull requests tab and open the relevant PR.

- Click on the Checks tab to view all workflows associated with the PR.
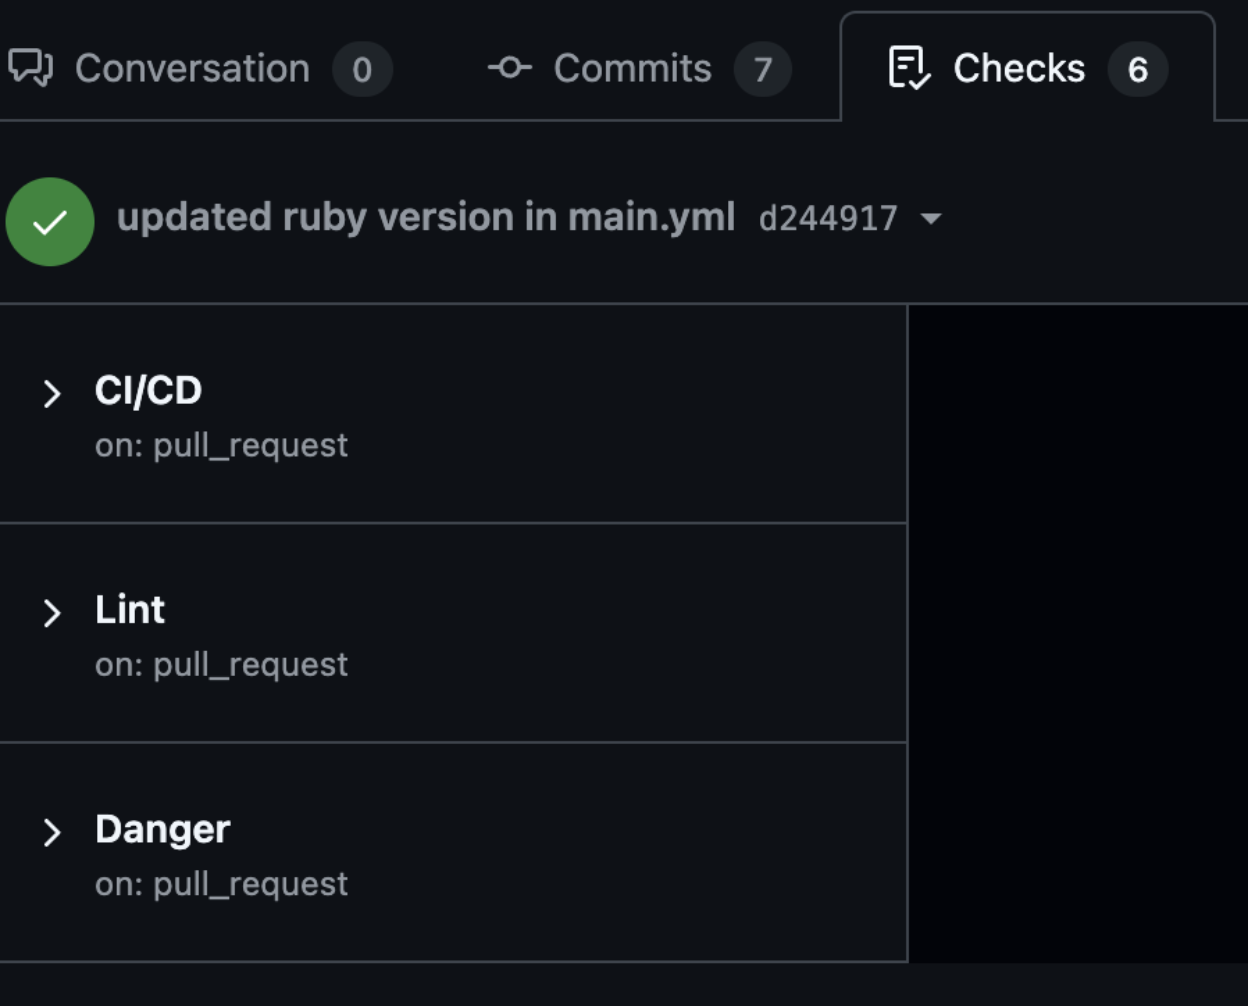

- Under the CI/CD workflow, ensure that all test runs have completed successfully.


- Locate and expand the Upload code coverage artifacts step.
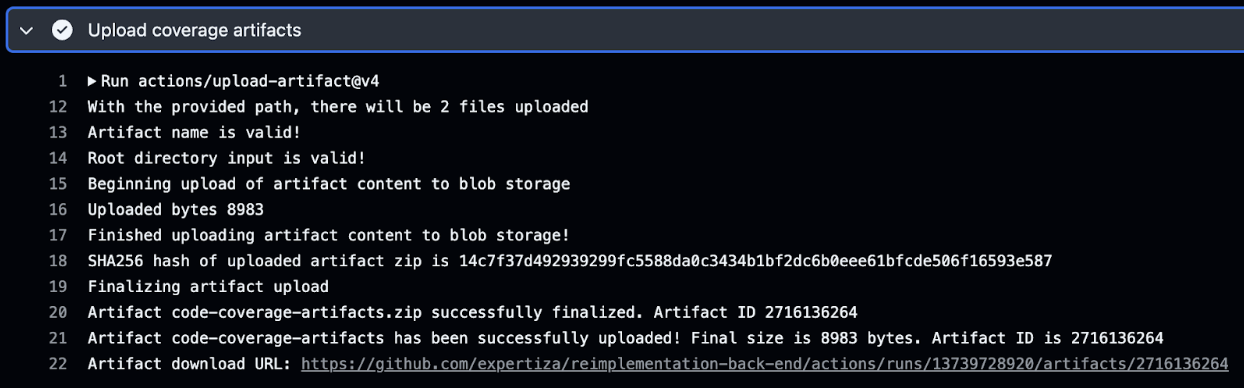

- Download the uploaded artifact (typically a .zip file).
- Unzip the file and open the
coverage.jsonfile. - Scroll to the bottom to view the percentage of code covered, along with metrics for specific parts of the codebase.


Issues Encountered
This section outlines the key challenges faced during the integration of Code Climate for test coverage reporting and their resolutions. It is particularly useful for developers troubleshooting similar problems during the setup or maintenance of the test coverage workflow.
- Issue 1: Empty resultset.json
- Description: Initially,
coverage/.resultset.jsonwas empty, leading to errors. - Solution: Ensured SimpleCov starts in
rails_helper.rband correctly formats the output.
- Description: Initially,
- Issue 2: JSON Formatting Error
- Error:
json: cannot unmarshal object into Go struct field resultSet.coverage of type []formatters.NullInt - Solution: Verified SimpleCov JSON formatting, ensuring the lines array contained only integers or null values.
- Error:
Danger Bot
Description
Danger is a tool that automates code review tasks in pull requests (PRs). It helps enforce code quality standards, catch potential issues early, and ensure consistency in contributions. Danger runs during CI/CD workflows and analyzes the code in a PR against predefined rules in a Dangerfile, leaving comments directly on the PR.
Example Danger Bot output on PR :


The corresponding pull request in the reimplementation-back-end repository : https://github.com/expertiza/reimplementation-back-end/pull/155
Why use this Bot?
We use Danger Bot to:
- Automate PR review processes.
- Enforce coding standards and team guidelines.
- Reduce manual review effort.
- Ensure consistency across PRs.
Process of Integration
This section outlines the steps required for integrating the Danger bot into the repository. It is intended for developers or maintainers setting up automated pull request (PR) reviews. Following these steps ensures that every PR is systematically analyzed against predefined rules, improving the consistency and quality of code contributions.
Step 1: Create a Dangerfile Define rules to check for code smells. Some sample rules can be related to:
- Missing changelog entries.
- Large file modifications.
- Linter warnings.
- Custom PR validation logic.
Step 2: Set Up GitHub Actions Workflows
- danger.yml: Handles PRs from the main repository using repository secrets.
- danger_target.yml: Handles PRs from forks in the context of the main repo.
File Changes Required
This section details the specific file modifications necessary to integrate the Danger bot into the repository. It is relevant for developers or maintainers responsible for setting up or updating the automated pull request review system. Making these changes ensures that Danger can be properly installed, configured, and triggered via GitHub Actions to analyze PRs according to the defined rules.
- Add Danger to the Gemfile: Add the following line to your project's
Gemfileto include Danger as a development dependency:
gem 'danger'
Why this change is required:
danger: Automates code review by enforcing rules on pull requests, such as labeling, checking for missing changelogs, enforcing description formats, and ensuring consistent PR practices.
---
- Create a Dangerfile with PR rules : Create a file named
Dangerfilein the root directory of the repository. This file defines the custom rules Danger will use to analyze pull requests.
The snapshot below represents a sample Dangerfile.


Why this change is required:
The Dangerfile defines custom rules and checks that Danger will enforce on pull requests. It centralizes all PR validation logic, improving code quality and team consistency.
---
- Add workflow files : Add the following GitHub Actions workflow files in the
.github/workflowsfolder in the main branch of the repository.
.github/workflows/danger.yml.github/workflows/danger_target.yml
Why these changes are required:
- danger.yml: Sets up GitHub Actions to automatically run Danger checks on pull requests created internally within the repository.
- danger_target.yml: Defines a separate workflow to run Danger Bot against the code in external pull requests.
Steps of the GitHub Actions Workflow
This section outlines the essential steps in the GitHub Actions workflow to integrate Danger for automated PR analysis. It is relevant for developers or maintainers responsible for configuring or maintaining the GitHub Actions pipeline. These steps ensure that the workflow is properly set up to check out the code from pull requests, install the necessary Ruby environment and dependencies, and run Danger to analyze the PR.
- Check out the PR code.
- Set up Ruby environment.
- Run
bundle installto install Danger. - Execute
bundle exec danger --verboseto analyze the PR and leave comments.
How to Use the Bot?
This section provides step-by-step instructions on how to use the Danger bot to review pull requests automatically. It is relevant for developers or contributors who are submitting pull requests and want to leverage Danger’s automated review process
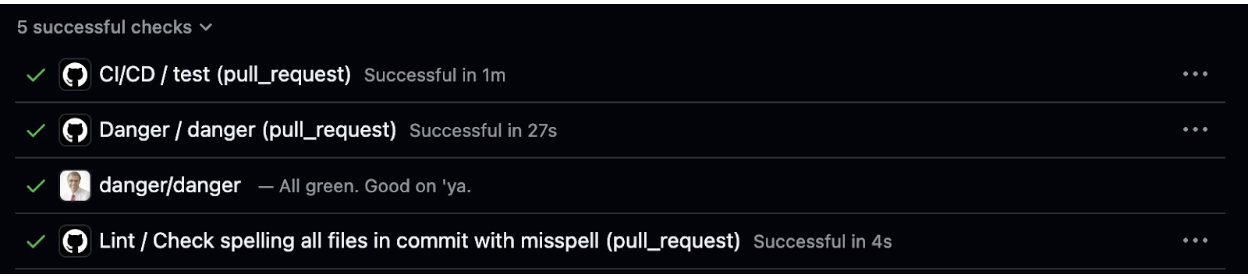
- Navigate to the corresponding PR, targeting the main branch.
- Navigate to the "Checks" tab and confirm the Danger workflow completed successfully.
- Go to the "Conversation" tab to see Danger’s comment with suggestions or warnings.

Issues & Security Considerations
This section outlines the key challenges and security considerations when integrating Danger with GitHub Actions, along with their resolutions. It is particularly useful for developers troubleshooting similar problems during the setup or maintenance of the Danger Bot workflow.
- Forked PRs can’t access secrets, causing Danger to fail.
- Solution: Use two workflows (`danger.yml` and `danger_target.yml`) to safely run Danger in the main repository context.
- Security: Never expose secrets to forks. Using `danger_target.yml` ensures safety without compromising CI analysis.
PR Comment Bot
Description
This GitHub Actions workflow suite comprises two main files: TestPR.yml and commentPR.yml. Together, they automate the process of running RSpec test cases for pull requests targeting the main branch and then posting the summarized test results directly as a comment on the respective pull request. This setup ensures compatibility with PRs from both the main repository and forks.
Example Comment Output (on PR)
RSpec Tests Report

Failing Model Test Cases:
rspec ./spec/models/course_spec.rb:22 # Course validations validates presence of name
rspec ./spec/models/course_spec.rb:26 # Course validations validates presence of directory_path
rspec ./spec/models/response_spec.rb:20 # Response#reportable_difference? when count is 0 returns false

Failing Controller Test Cases:
rspec ./spec/requests/api/v1/courses_spec.rb:57 # api/v1/courses /api/v1/courses/{id}/add_ta/{ta_id} get bad request returns a 400 response
The corresponding pull request in the reimplementation-back-end repository : https://github.com/expertiza/reimplementation-back-end/pull/186
Why use this bot?
- Enforce automatic test execution on all incoming PRs.
- Ensure high code quality and reliability.
- Provide immediate and clear test feedback to contributors.
- Seamlessly support forked repository contributions.
Process of Integration
This section outlines the process of setting up a Personal Access Token (PAT) for enabling a PR comment bot to interact with pull requests. It is particularly useful for developers or maintainers configuring the bot to ensure it has the necessary permissions to comment on PRs. By following these steps, users can securely generate and store the PAT as a repository secret, allowing the bot to function properly while maintaining security.
Setting Up a Personal Access Token (PAT)
To allow the bot to comment on PRs, a GitHub PAT (Personal Access Token) is required:
- Step 1: Generate a PAT:
- Navigate to GitHub → Settings → Developer Settings → Personal Access Tokens → Fine-grained tokens.
- Click "Generate new token".
- Select the repository and grant the following permissions - Pull requests: read & write
- Step 2: Add the PAT as a Repository Secret:
- Go to the repository → Settings → Secrets and variables → Actions → New repository secret.
- Name: GITHUB_TOKEN.
- Paste the PAT.
File Changes Required
This section outlines the file additions required to set up the PR Comment Bot in the repository. It is intended for developers or maintainers responsible for configuring automated test feedback on pull requests.
Add workflow files : Add the following GitHub Actions workflow files in the .github/workflows folder in the main branch of the repository:
.github/workflows/testpr.yml.github/workflows/commentpr.yml
Why these changes are required:
- testpr.yml: Runs automated tests when a pull request is created, updated, or reopened. It sets up the environment, executes tests, captures failures, and uploads the results as an artifact.
- commentpr.yml: Listens for the completion of the test workflow. It downloads the test results and posts a comment on the pull request with the summary of failed tests or a confirmation that all tests passed.
Steps of the Github Actions Workflow
This section outlines the steps involved in the GitHub Actions workflows, TestPR.yml and CommentPR.yml, for running tests and posting comments on pull requests. It is particularly useful for developers or maintainers setting up automated testing and feedback systems for pull requests. The TestPR.yml workflow runs tests on PR creation or updates, including database setup, test execution, and failure extraction, while CommentPR.yml posts a comment with the test results after the tests are completed. By following these steps, users can automate the testing and feedback loop for PRs, ensuring efficient and consistent code review processes.
TestPR.yml
This workflow runs tests when a PR is created, updated, or reopened, targeting the main branch.
Steps:
- Trigger: Runs on pull_request targeting the main branch.
- Setup:
- Uses ubuntu-latest runner.
- Starts a MySQL 8.0 service with predefined credentials.
- Dependencies:
- Installs Ruby 3.2.7, Node.js 18.x, and system libraries.
- Installs bundler and application Ruby dependencies.
- Database Setup:
- Creates and loads schema into expertiza_test.
- Test Execution:
- Runs RSpec tests for models and requests.
- Captures output in rspec_results.txt.
- Failure Extraction:
- Parses test results for failures using grep.
- Outputs formatted summaries to failed_tests.txt.
- Stores PR number in pr_number.txt.
- Artifact Upload:
- Uploads failed_tests.txt and pr_number.txt as an artifact named failed-tests.
CommentPR.yml
This workflow is triggered after TestPR.yml completes successfully.
Steps:
- Trigger: On completion of PR Test Workflow (workflow_run).
- Artifact Download:
- Downloads the failed-tests artifact from TestPR.yml.
- Read Output:
- Extracts PR number and failed test summary.
- Comment on PR:
- Uses thollander/actions-comment-pull-request@v3 to post a comment with test results.
How to use the bot?
This section outlines the steps for using the PR Comment Bot to review test results on pull requests. It is particularly useful for developers or contributors submitting pull requests and seeking automated feedback on test outcomes.
For Pull Request Comment Bot:
Once a pull request is created, updated or synchronized, targeting the main branch:
- Navigate to the "Pull requests" tab in the repository and open the relevant PR.
- Click on the "Checks" tab to view all workflows associated with the PR.
- Ensure that both the "PR Test Workflow" workflows have run successfully.


- Return to the "Conversation" tab of the PR.


- Look for a comment posted by github-actions[bot]. This comment will include the result of the test run — either a list of failing model and controller test cases, or a confirmation that all tests have passed.