Setting up and using TA functionality: Difference between revisions
Jump to navigation
Jump to search
(Created page with "'''Before being able to use the teaching assistant role you need to ensure that the user roles and permissions have been properly set up in Goldberg.''' # Log into the pg system...") |
No edit summary |
||
| Line 61: | Line 61: | ||
Back to [ | Back to [[expertiza_documentation]] Main page. | ||
Latest revision as of 20:03, 17 May 2016
Before being able to use the teaching assistant role you need to ensure that the user roles and permissions have been properly set up in Goldberg.
- Log into the pg system as a super-admin user
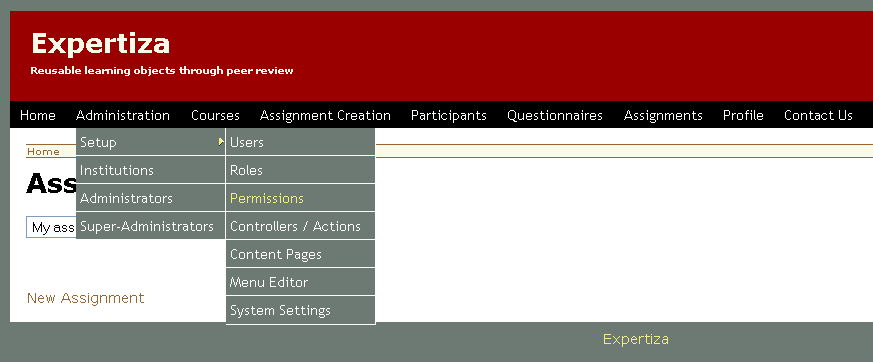
- Select Administration -> Setup -> Permissions from the top navigation menu (see figure 1) to add a new permission.
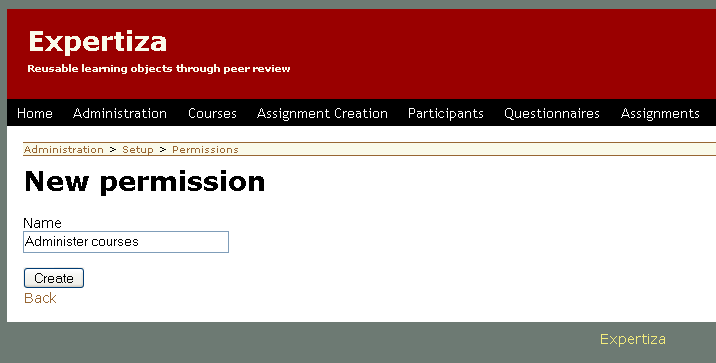
- To create a new permission, select “New permission” at the bottom of the permissions page. Name the new permission “Administer courses” and select “Create”.
- After being created, you’ll be taken back to the permissions page and you should see the new permission in the list. Click on “Administer courses” to be to its setup page, and then click “Show all Actions” under the “Actions for Permissions” header.
- This will take you to a list of available actions, at the bottom of the page click on the “New controller_action” link to specify a new action for this permission.
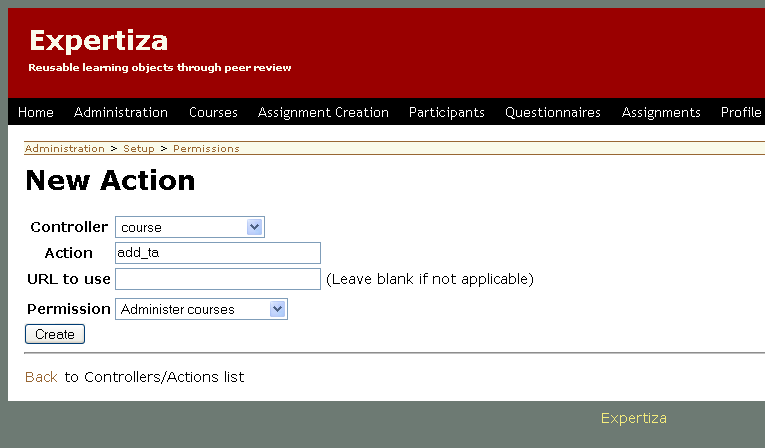
- On the new action page (figure 3), select “course” from the Controller drop down, enter “add_ta” as the action and select “Administer courses” from the Permission drop down. Leave, “URL to use” blank. Click “Create” to assign the new action.
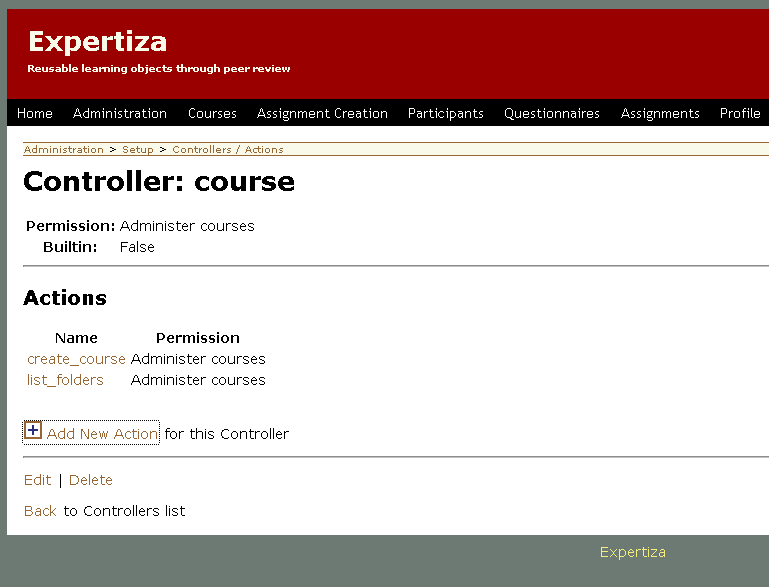
- You’ll be redirected to the details page for the course controller (figure 4 on the next page). From there, click “Add New Action” and repeat steps 6 & 7 using the following actions:
- create_course
- destroy_course
- edit_course
- list
- list_folders
- new_course
- new_folder
- remove_ta
- update_course
- view_teaching_assistants.
Next we’ll create the new teaching assistant role and modify our current Instructor role.
- Select Administration -> Setup -> Roles from the top navigation menu.
- Click “New role” at the bottom of the Roles page.
- Name the role “Teaching Assistant” and select “Student” from the “based on the role” drop down, then click “Create”.
- Click on the newly created “Teaching Assistant” role from the list of roles.
- Under the Permissions for teaching assistant header, click “Add Permissions” for this Role (figure 5 on next page)
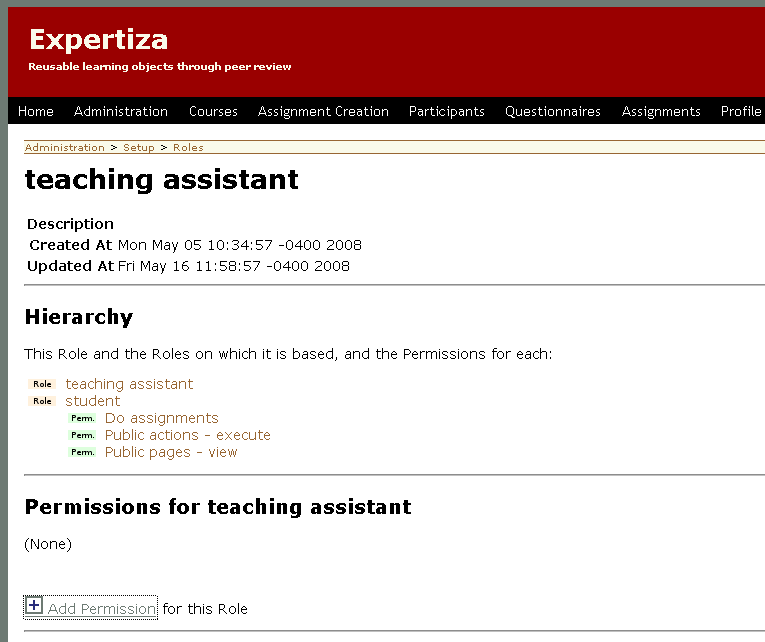
- Select “Administer assignments” from the Permissions drop down and click “Create”.
- Go back to the Roles page and click on the “Instructor” role from the list of roles.
- At the bottom of the Instructor page select “Edit”, select “Teaching Assistant” from the “Based on the role” drop down and click “Create”.
- Under the Permissions for instructor header, click “Remove” next to the “Administer assignments” permission, then click OK to confirm (if the permission does not appear skip this step).
- Under the Permissions for instructor header, click “Add Permissions” for this Role (like in step 5)
- Select “Administer courses” from the Permissions drop down and click “Create”.
A TA can now be created by an admin or instructor just like they would create any other user by selecting Administration -> Setup -> Users from the top navigation. Once the TA user is set up an instructor can log into the system and assign that TA to one or more of his courses by following these steps.
- Log in as an Instructor (or admin).
- Click “Courses” on the top navigation menu.
- Click “add TA” for the course you would like to assign a TA to.
- Type the username of the TA you wish to add in the “Enter a user login:” field. The field will auto-populate, once you have selected the correct user, click “Add TA”
- The TA should show up in the list of TA’s. To remove a TA from a course click the Remove TA radio button next to the appropriate user.
Back to expertiza_documentation Main page.