CSC/ECE 517 Spring 2024 - E2426. Create a UI for Assignment Edit page "Etc" tab in ReactJS
Expertiza
Expertiza is a web application designed to facilitate collaborative learning and peer review in educational settings. Built on the Ruby on Rails framework, it offers a versatile platform for both instructors and students. Instructors can seamlessly create and manage assignments and projects, edit them as needed, and review as well as grade student submissions. Students, on the other hand, use Expertiza to form teams, collaborate on various assignments and projects, submit their work, and engage in peer reviews of other students' submissions. This interactive approach not only streamlines the educational process but also actively encourages critical thinking, collaboration, and constructive feedback among students, making it a valuable tool in modern education.
Problem Statement
Create an Etc page that displays all the miscellaneous tasks for the Editing Assignment option. Path: Go to Manage -> Assignment -> Edit (pencil icon) -> Etc. This UI is good and can be reconstructed similarly but feel free to exercise your creativity while making this page easy to understand and navigate.
Aim
The primary objective of "Expertiza ETC Tab Reimplementation" project is to design and implement an enhanced "Etc" page within the Expertiza platform, focusing on user-friendliness and intuitive navigation while displaying all miscellaneous tasks associated with the Editing Assignment option. This new page, accessible through the path Manage -> Assignment -> Edit -> Etc, aims to streamline the process of managing various ancillary tasks related to assignment editing. The project will retain the essence of the current UI's effectiveness but infuse it with creative improvements to enhance the overall user experience. Key goals include simplifying the interface for easy understanding, ensuring efficient task management, and fostering a more engaging and less cluttered environment for both instructors and students. This endeavor seeks not just to augment the existing functionality but also to provide a more coherent and visually appealing layout that intuitively guides users through their editing tasks.
Previous Implementation
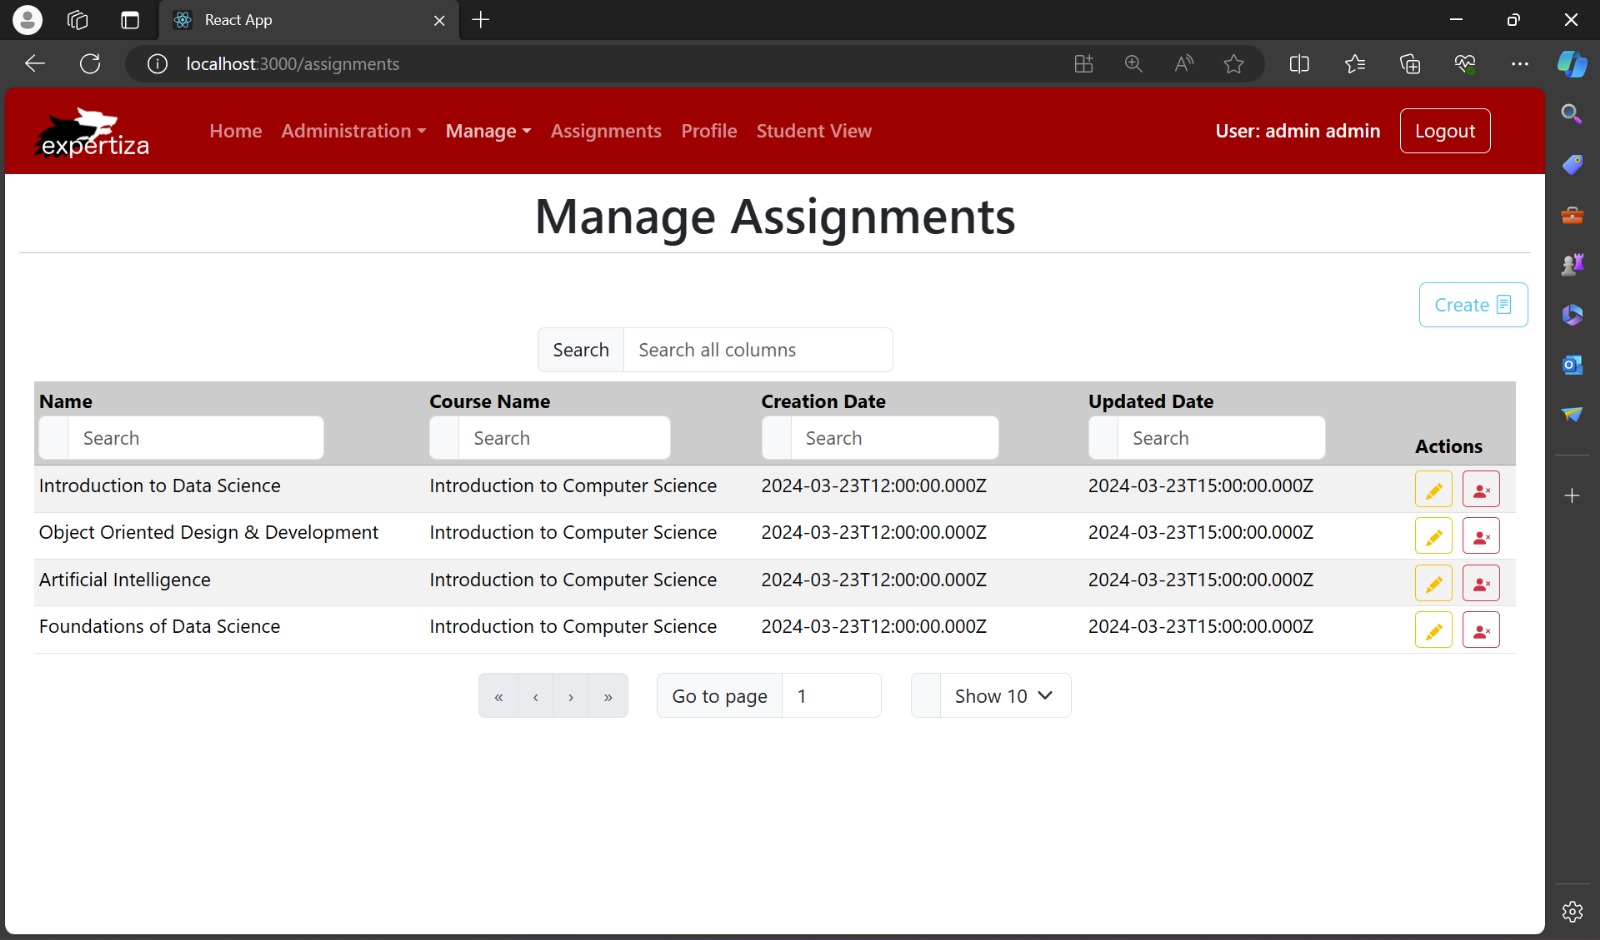
The previous implementation for managing assignments in the Expertiza platform is a table with assignment details and options for filtering and pagination, emphasizing functional simplicity. The Edit Assignment section presents a modal form for updating an assignment, with clear input fields for essential details. The design prioritizes functionality and easy navigation, utilizing a straightforward color scheme and layout that allows for quick edits without leaving the main page.
The previous implementation has the following limitations:
1. Limited styling options: Basic HTML tables have limited styling options compared to modern CSS frameworks. This can make it difficult to create visually appealing and responsive designs.
2. Lack of Dedicated "Etc" Section: There's no visible, dedicated "Etc" section in the current screenshots. Users might find it challenging to locate miscellaneous tasks relevant to editing assignments.
3. Unclear Task Grouping: Without a specific section or clear grouping, miscellaneous tasks could be scattered or mixed with primary tasks, making it difficult for users to prioritize their actions or find less common functionalities.
4. Aesthetics and Creativity: While the existing design is functional, it may lack the creativity that could make the interface more engaging. Aesthetics play a role in the user's experience, and a utilitarian design might not inspire or facilitate the most efficient workflow.
Design Functionalities
Manage Assignments
(Code File: Assignment.tsx) (Route: http://localhost:3000/assignments)
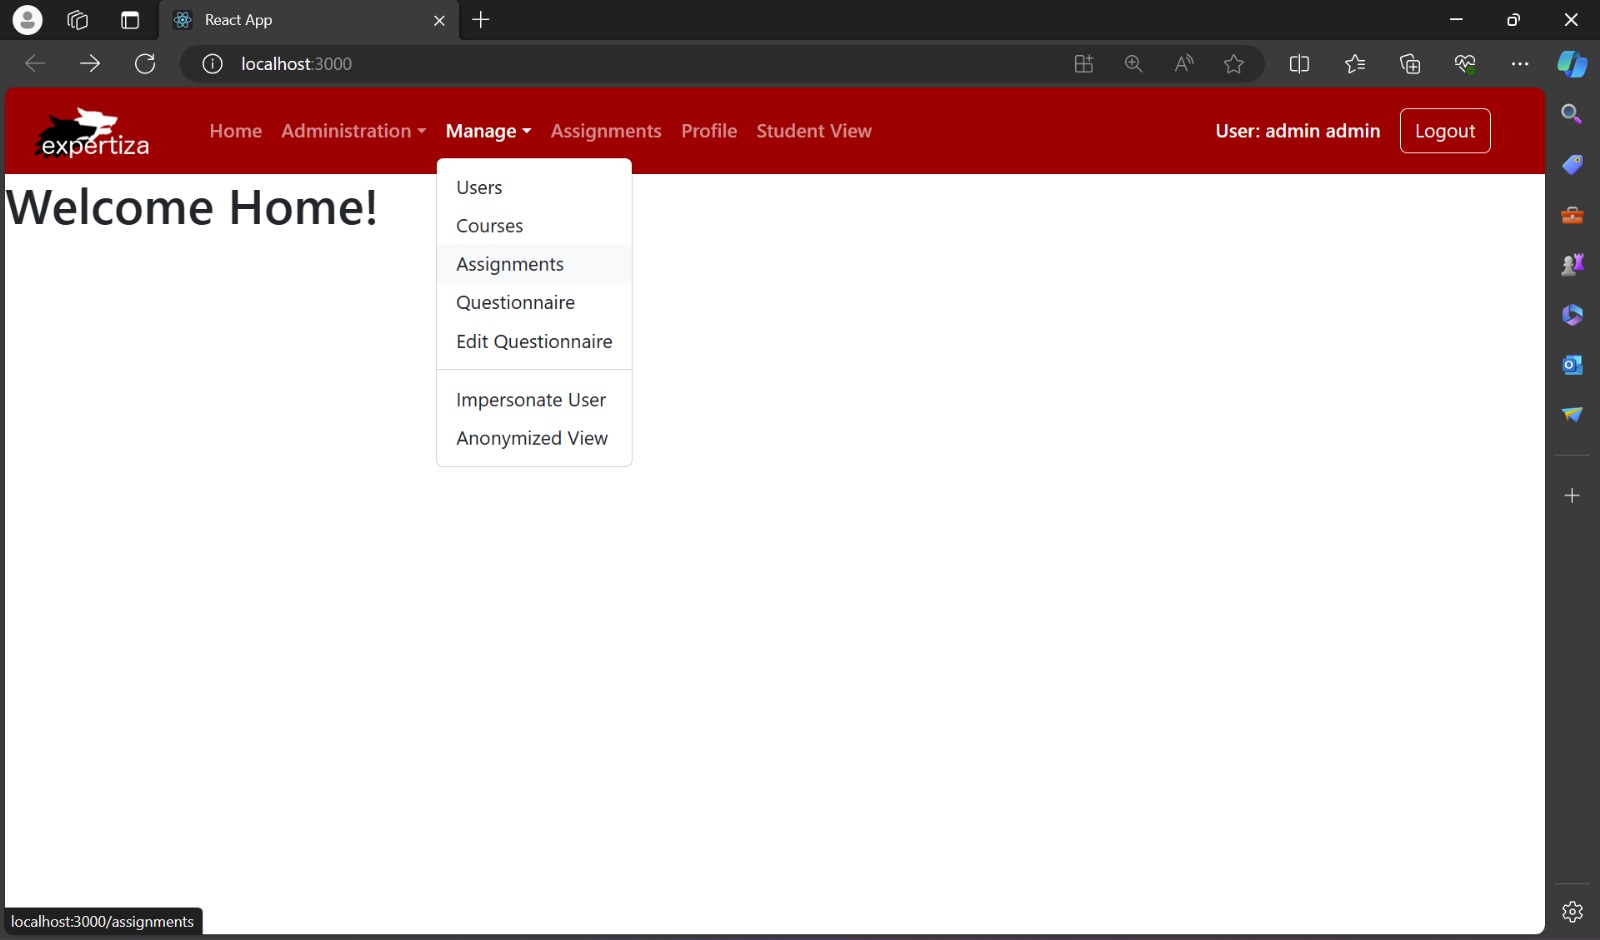
Path: Go to Manage -> Assignment
Upon navigating through the Expertiza interface, an administrator can streamline their management tasks using the comprehensive menu offered under the "Manage" tab. When any of the available options—such as Users, Courses, Assignments, Questionnaire, Edit Questionnaire, Impersonate User, or Anonymized View—are selected, the user is directed to the corresponding editor page. Here, detailed and interactive elements allow for the editing and customization of each element within the system.
For instance, clicking on "Assignments" will open the assignment editor page, where administrators can create new assignments, modify existing ones, or oversee the intricate details associated with each task. This systematized approach ensures that administrative functions are executed with precision and ease, contributing to an organized and efficient educational platform.
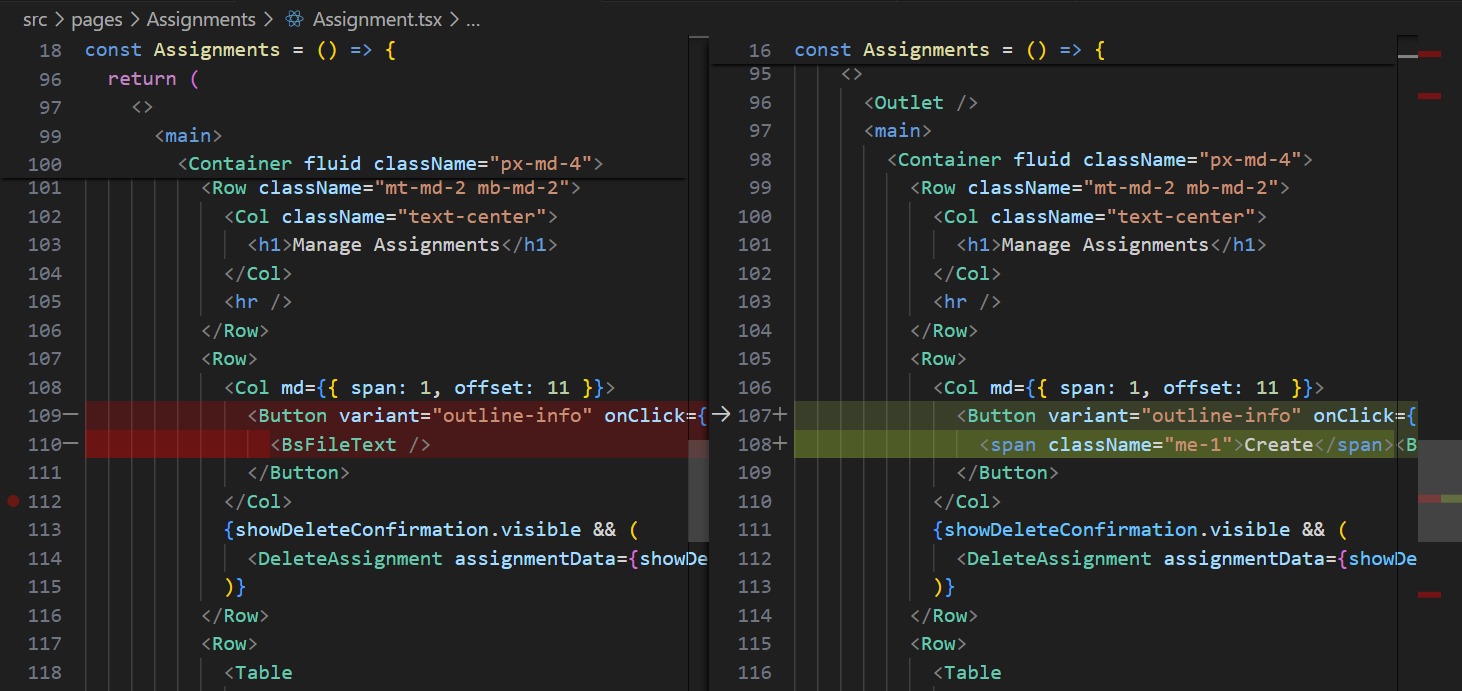
Enhanced Clarity for Create Assignment: By adding the word "Create" before the creation icon, users now have a textual clue alongside the iconographic one. This dual indication makes it significantly clearer that clicking this button or icon will initiate the process of creating a new assignment.
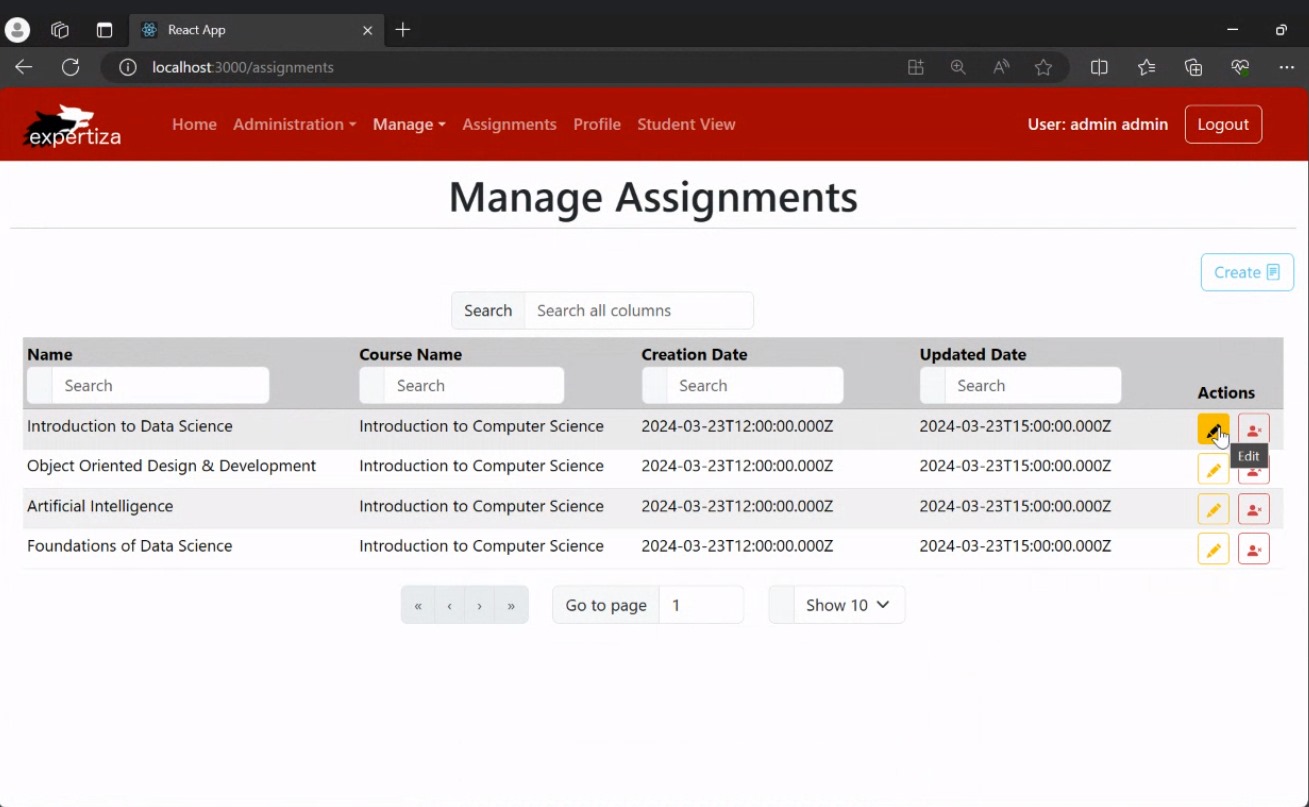
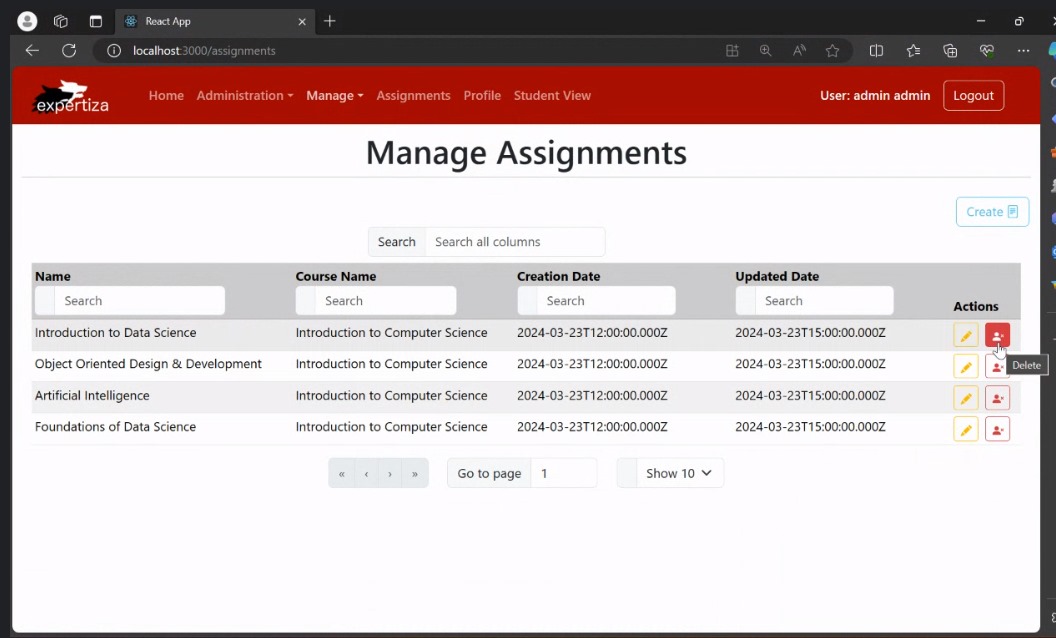
Descriptive Hover Effects: We have implemented hover text for both the edit and delete options. When a user moves their cursor over these icons, descriptive text appears, explaining the function of each button. This is particularly user-friendly, as it helps to prevent accidental clicks and makes the interface more intuitive.
Assignment Editor
(Code File: AssignmentEditor.tsx) (Route Example: http://localhost:3000/assignments/edit/8)
/assignments/edit/8: The application will route the user to a specific page designed for editing the assignment with an ID of 8.
Path: Go to Manage -> Assignment -> Select the desired assignment by clicking on the Edit (pencil icon)
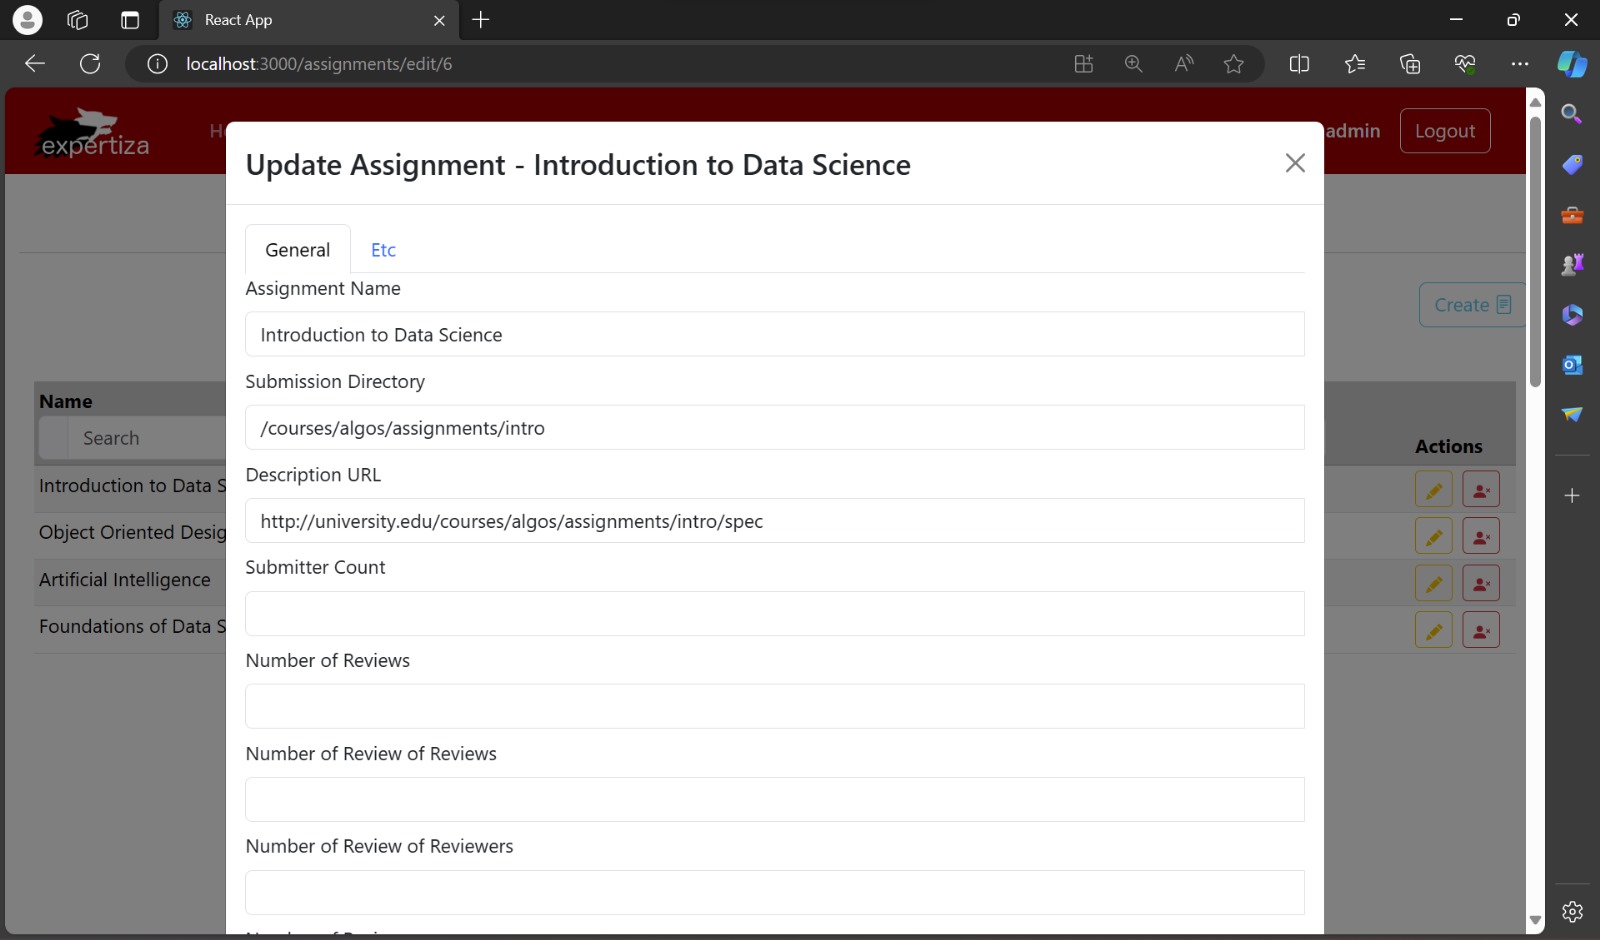
The "Edit Assignment" modal has been restructured for enhanced organization and functionality through the introduction of tabs. This method effectively categorizes settings and actions, facilitating a more streamlined user experience.
When any user with required privileges clicks on "Edit Assignment," the "Update Assignment" modal pops up with two distinct tabs: "General" and "Etc."
General Tab
Path: Go to Manage -> Assignment -> Select the desired assignment by clicking on the Edit (pencil icon) -> Click on General Tab
This is where the fundamental aspects of an assignment can be edited. The options here likely include editing the assignment name, description, submission deadlines, and other basic parameters that define the assignment.
ETC Tab
Path: Go to Manage -> Assignment -> Select the desired assignment by clicking on the Edit (pencil icon) -> Click on ETC Tab
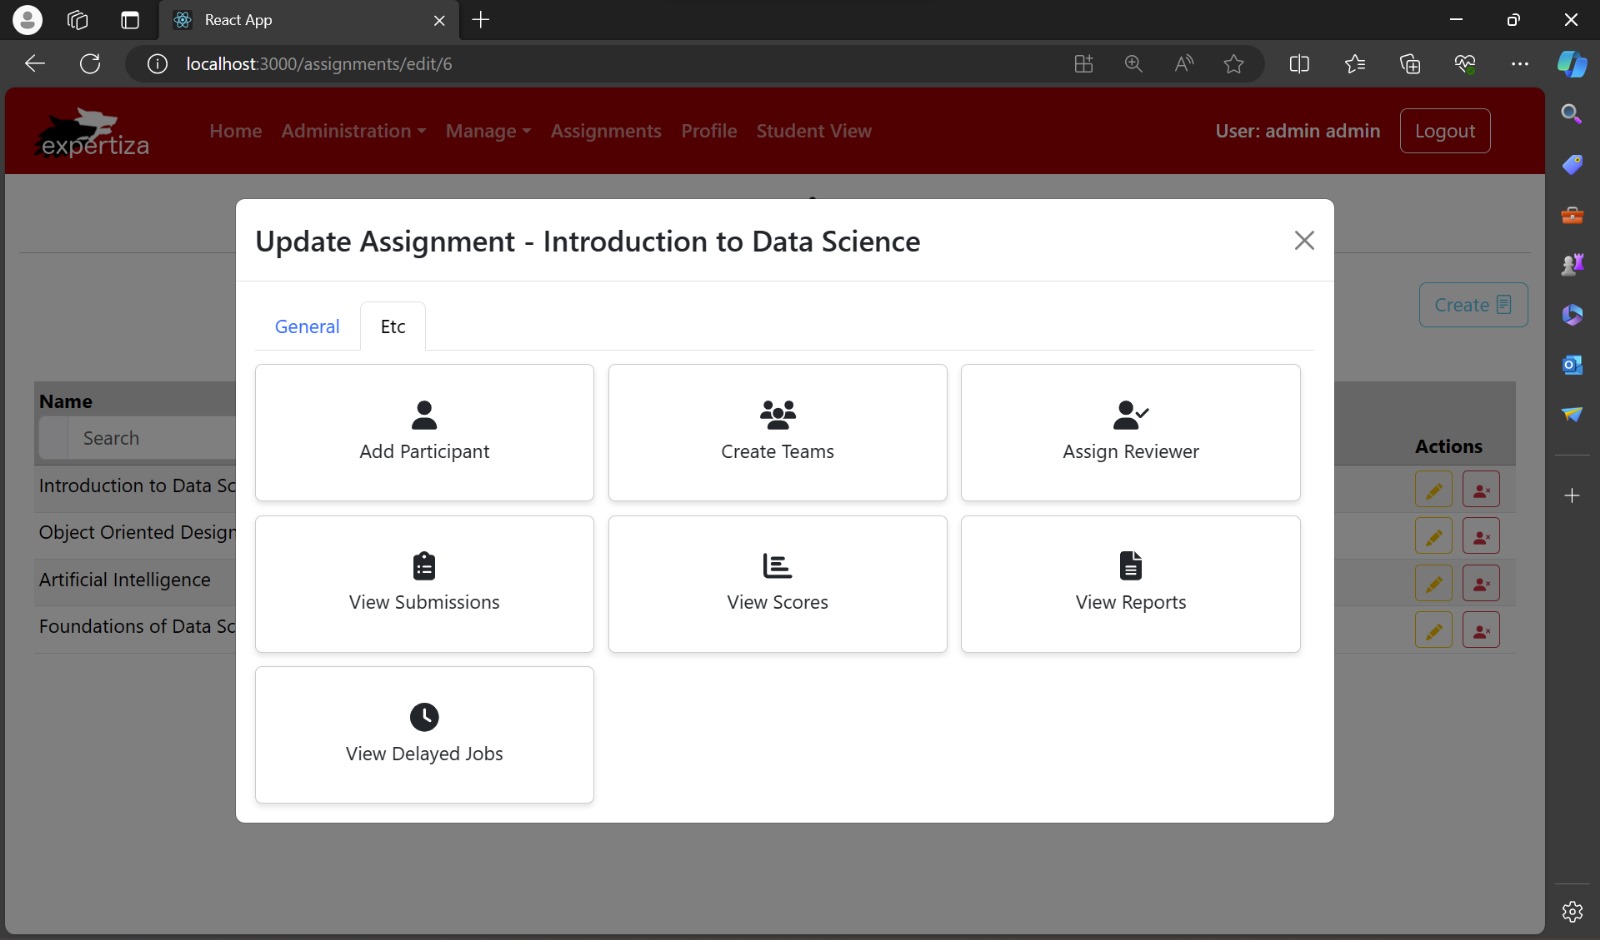
The "Etc" tab, as presented in the interface, serves as a centralized access point for additional management tasks associated with an assignment, in this case, "Introduction to Data Science". This tab is meticulously organized to provide quick access to a suite of functions.
The "Etc" tab includes the following options, each represented as an interactive tile to streamline the management of assignments:
Add Participant: For enrolling new participants into the assignment.
Create Teams: To assemble participants into teams for collaborative work.
Assign Reviewer: To allocate reviewers for assessing submissions.
View Submissions: Allows viewing of all assignment submissions.
View Scores: To inspect and analyze the scores given to submissions.
View Reports: To generate and review reports based on assignment data.
View Delayed Jobs: For monitoring scheduled tasks that are set to run later.
The above options are laid out as clickable tiles, allowing instructors or administrators to navigate directly to the relevant sections for further actions. The design is focused on enhancing user experience by grouping related management features in a visually coherent and interactive manner, facilitating the efficient administration of the course's workflow and tracking.
The design approach for the Etc page embraces both clarity and efficiency, ensuring that each section is distinct and accessible with minimal navigation.
Add (Manage) Participants
(Code File: Participants.tsx) (Route Example: http://localhost:3000/assignments/edit/8/participants)
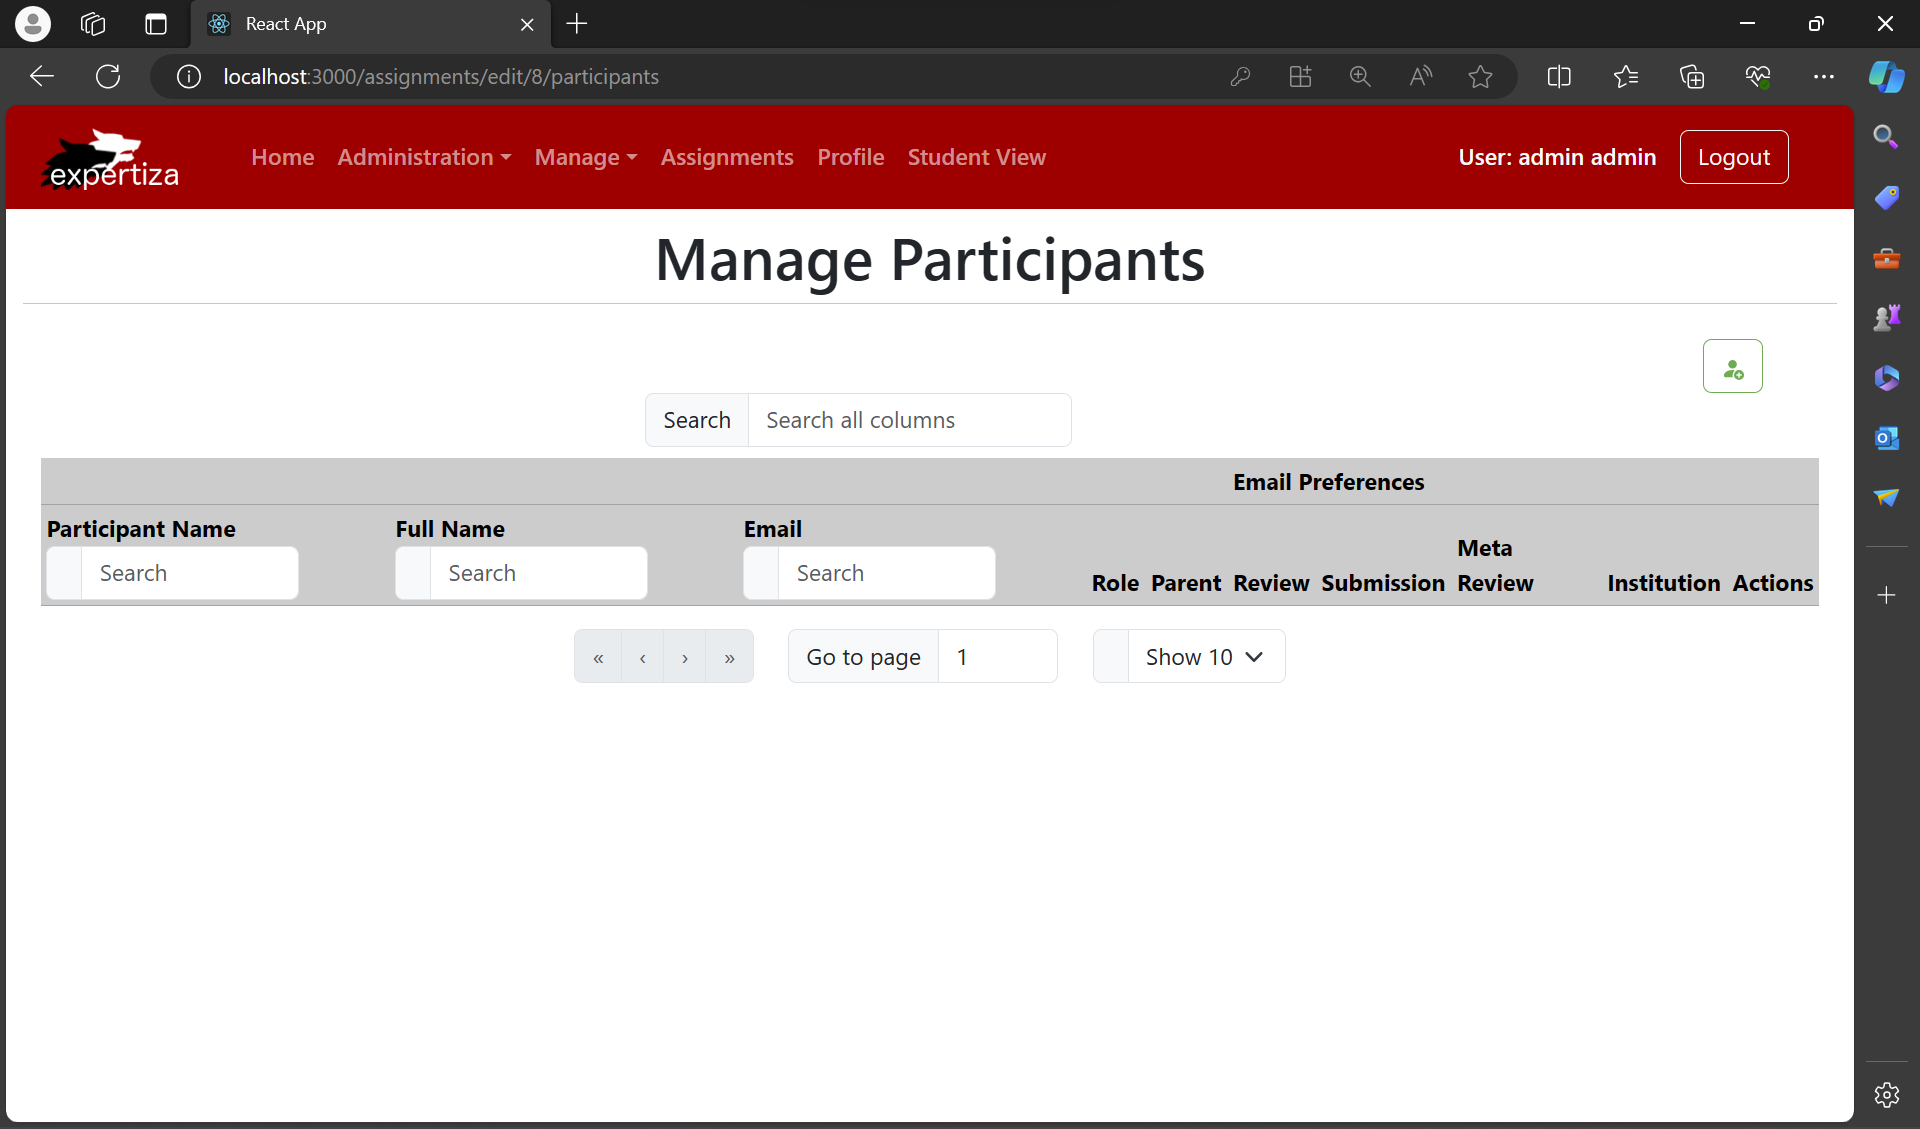
Path: Go to Manage -> Assignment -> Select the desired assignment by clicking on the Edit (pencil icon) -> Click on ETC Tab -> Click on Add Participant Tile
The "Add Participant" section is a direct entry point to include new members in the assignment process. It utilizes pre-existing components, offering a seamless transition from the Etc tab to the actual functionality of adding participants.
For the other sections, each is represented by a newly created JavaScript file.
Create Teams
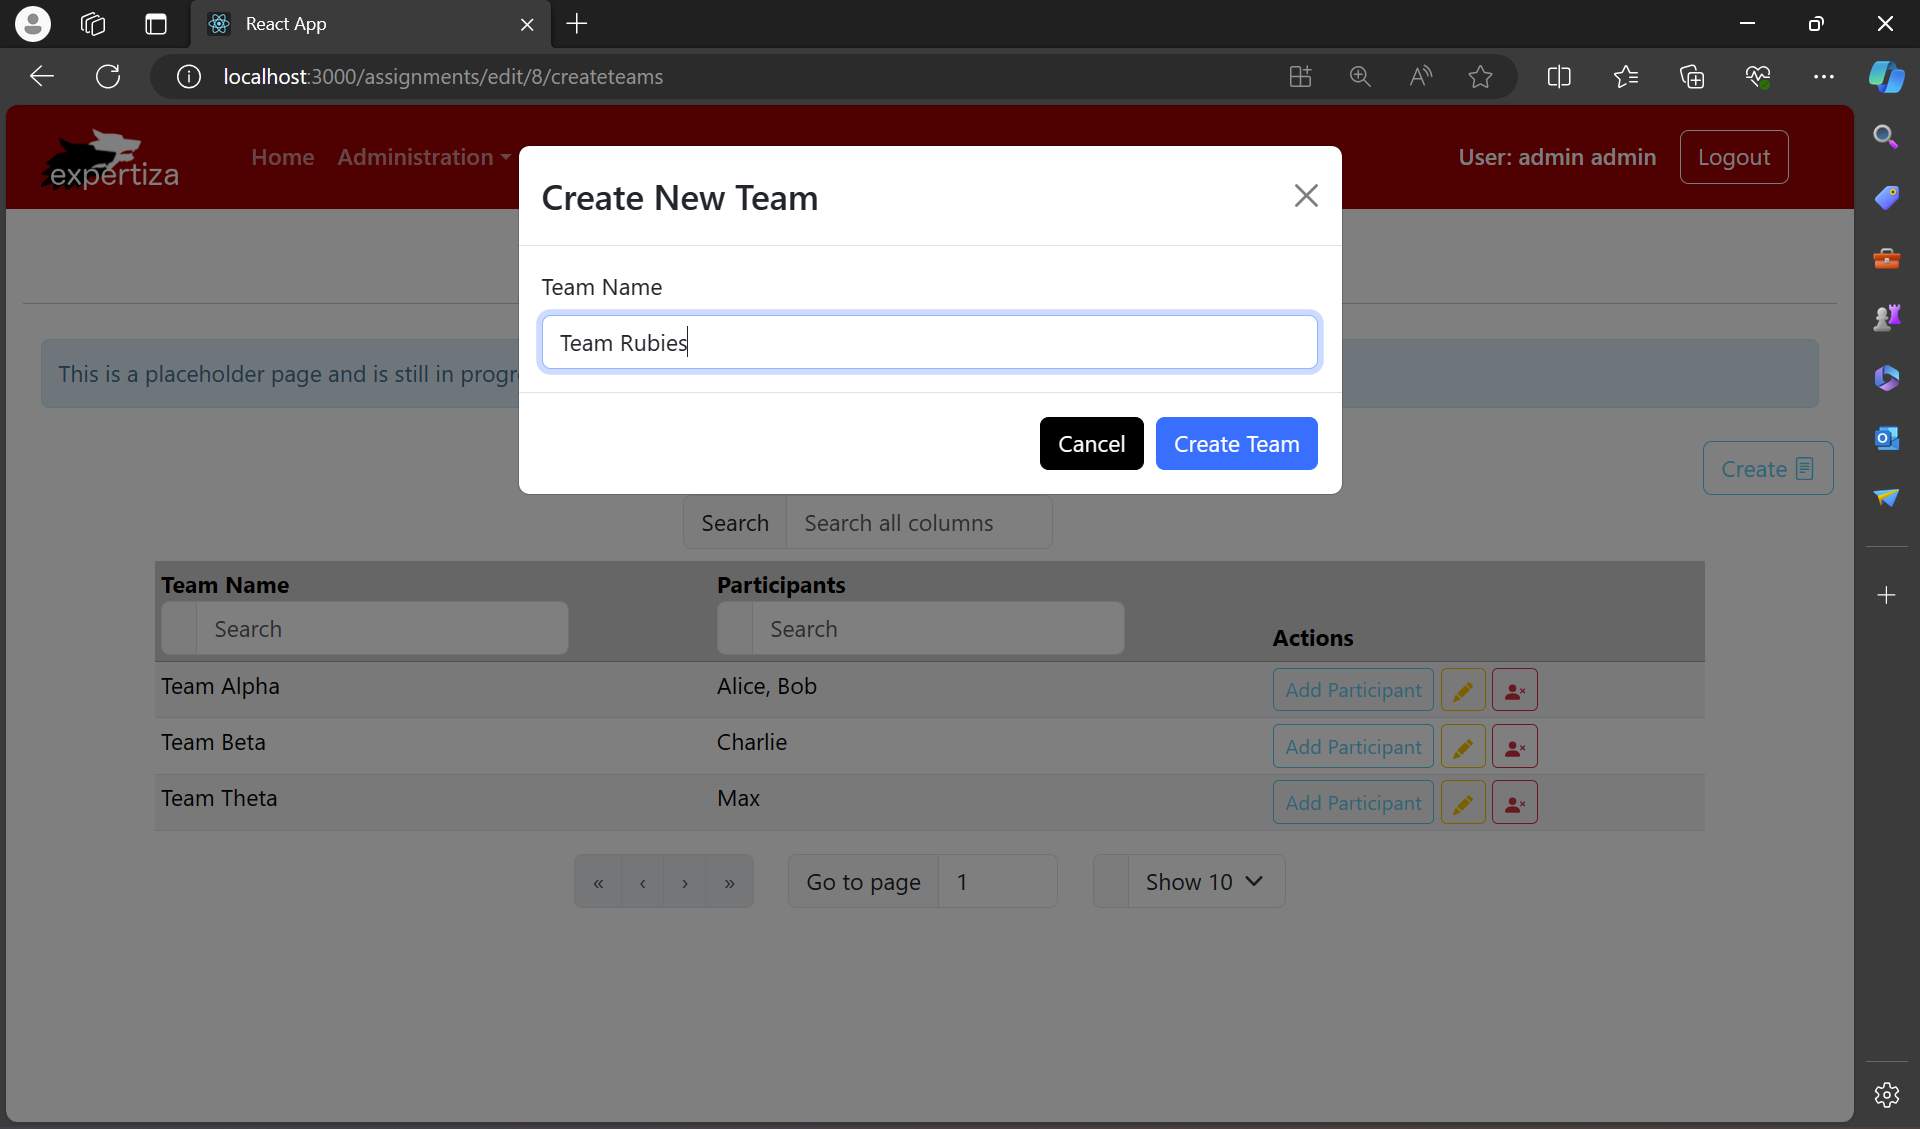
(Code File: CreateTeams.tsx) (Route Example: http://localhost:3000/assignments/edit/8/createteams)
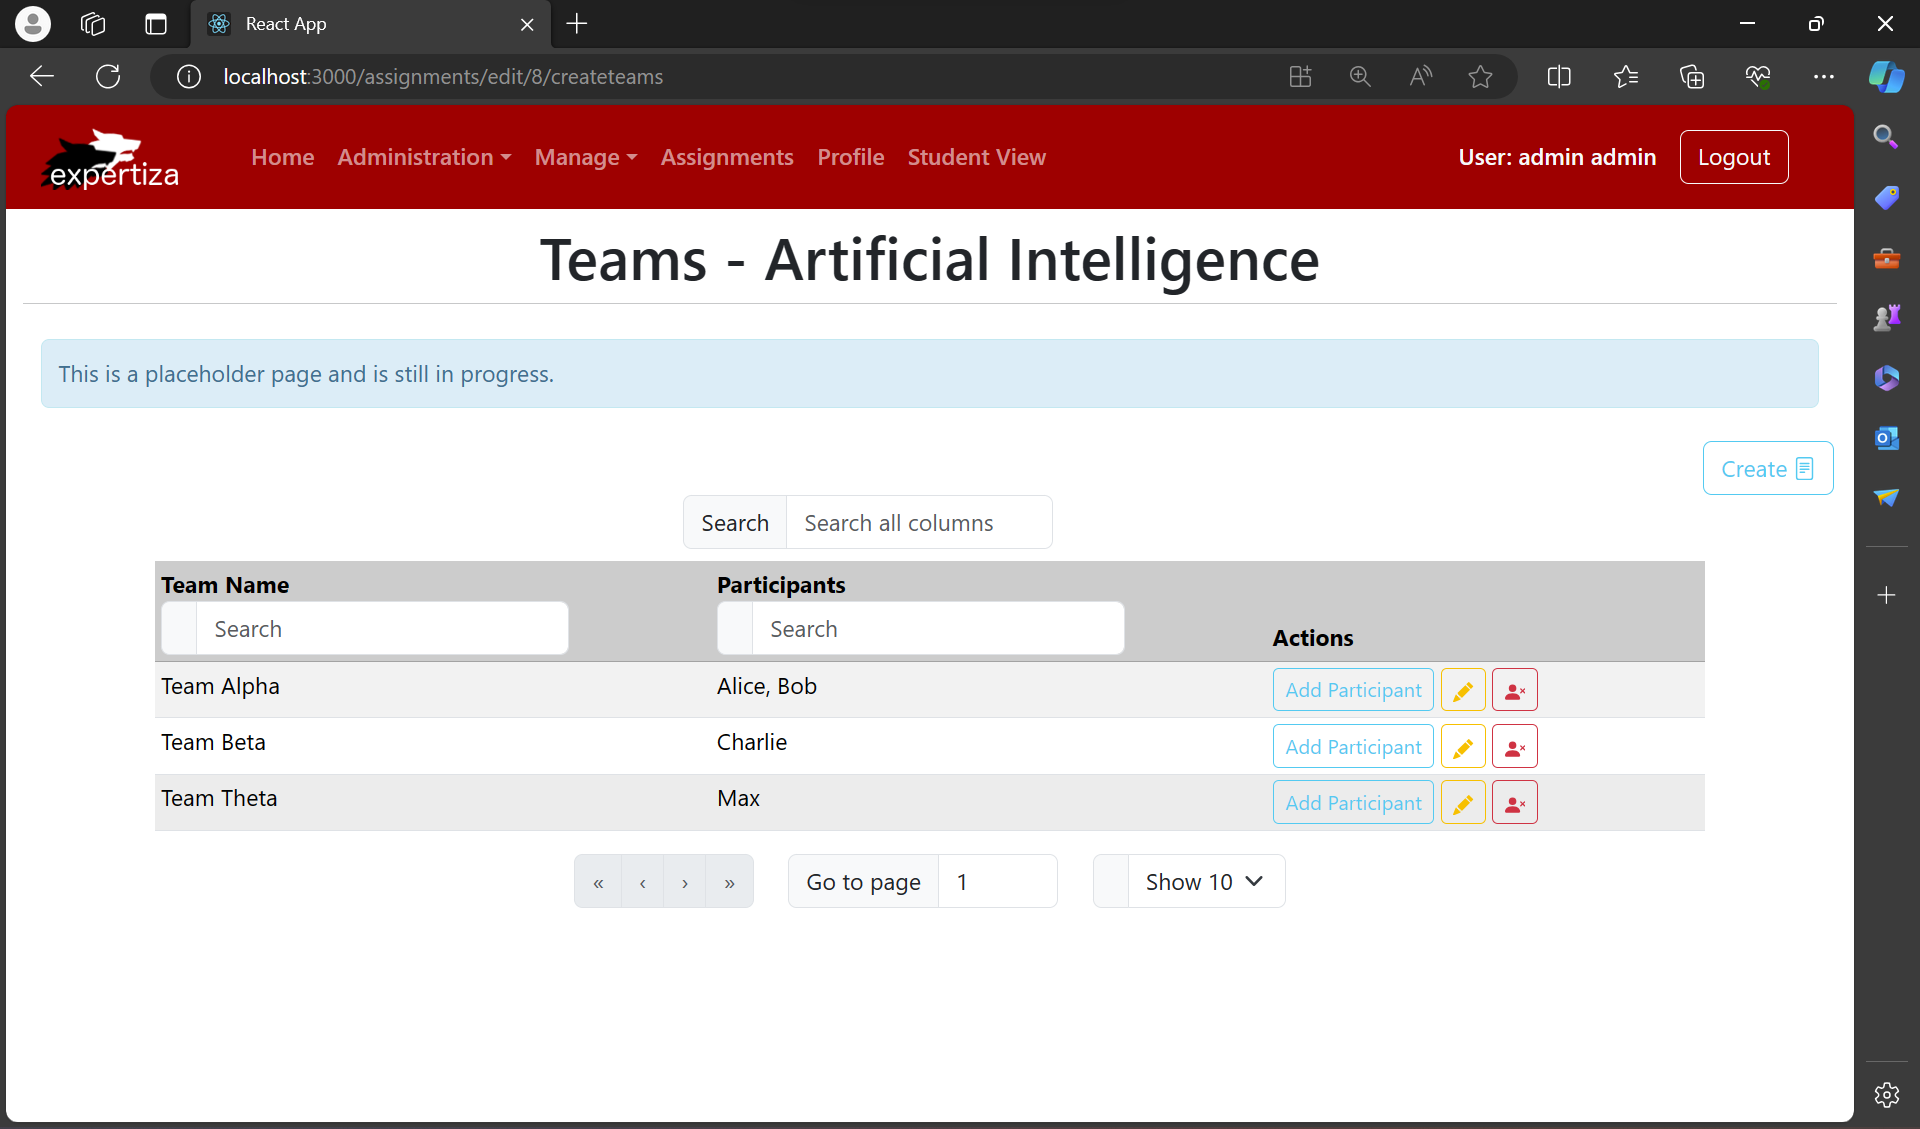
assignments/edit/8/createteams: The application will route the user to a specific page designed for managing team creation for the assignment with an ID of 8.
Path: Go to Manage -> Assignment -> Select the desired assignment by clicking on the Edit (pencil icon) -> Click on ETC Tab -> Click on Create Teams Tile
On the "Create Teams" page, instructors and administrators can form new student groups for collaborative projects and assignments such as Artificial Intelligence within a particular course. This part of the system is engineered to facilitate the organization of students into teams, making it easier to manage collaborative work. With user-friendly controls, the page is expected to offer options to add students to teams and fine-tune the team structure, with straightforward options for editing or deleting teams as needed. The search functionality integrated into the design allows for quick filtering through team names and participants, optimizing the user's ability to manage team configurations efficiently.
Path: Go to Manage -> Assignment -> Select the desired assignment by clicking on the Edit (pencil icon) -> Click on ETC Tab -> Click on Create Teams Tile -> Click on the Create button on the top right corner
When the 'Create' button is clicked, it directs to a modal window where users can create a new team by entering a desired team name. After inputting the name, such as "Team Rubies," the user can confirm the creation of the team by selecting the 'Create Team' button within the modal. This action will add the new team to the existing list of teams displayed on the main interface, thereby updating the team management system with the new addition. The simple and intuitive design of this functionality suggests its purpose is to enable quick and efficient team creation, facilitating smoother collaboration and organization within the assignment.
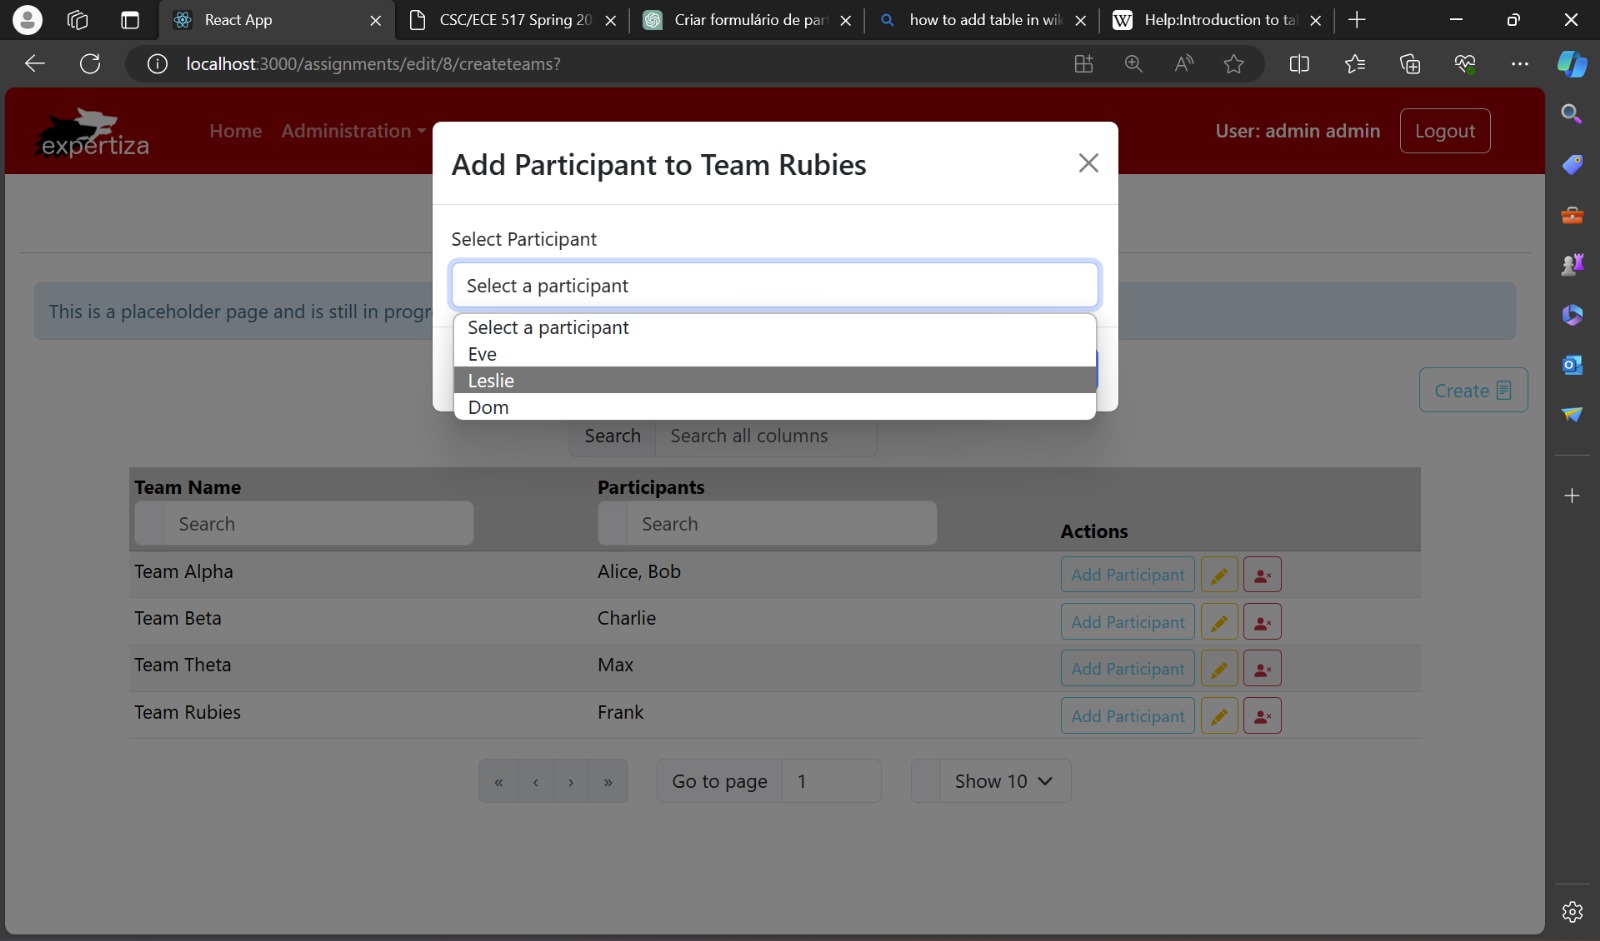
Path: Go to Manage -> Assignment -> Select the desired assignment by clicking on the Edit (pencil icon) -> Click on ETC Tab -> Click on Create Teams Tile -> Click on the Add Participant
When the 'Add Participant' button is clicked next to a team's name, a modal appears where you can add new members to that specific team. In the modal, you can select a participant from a list or through a search function, and then add them to the team by clicking 'Add to Team'. This process is designed to make team management straightforward and efficient, seamlessly integrating new members into existing teams without disrupting the flow of the interface.
Assign Reviewer
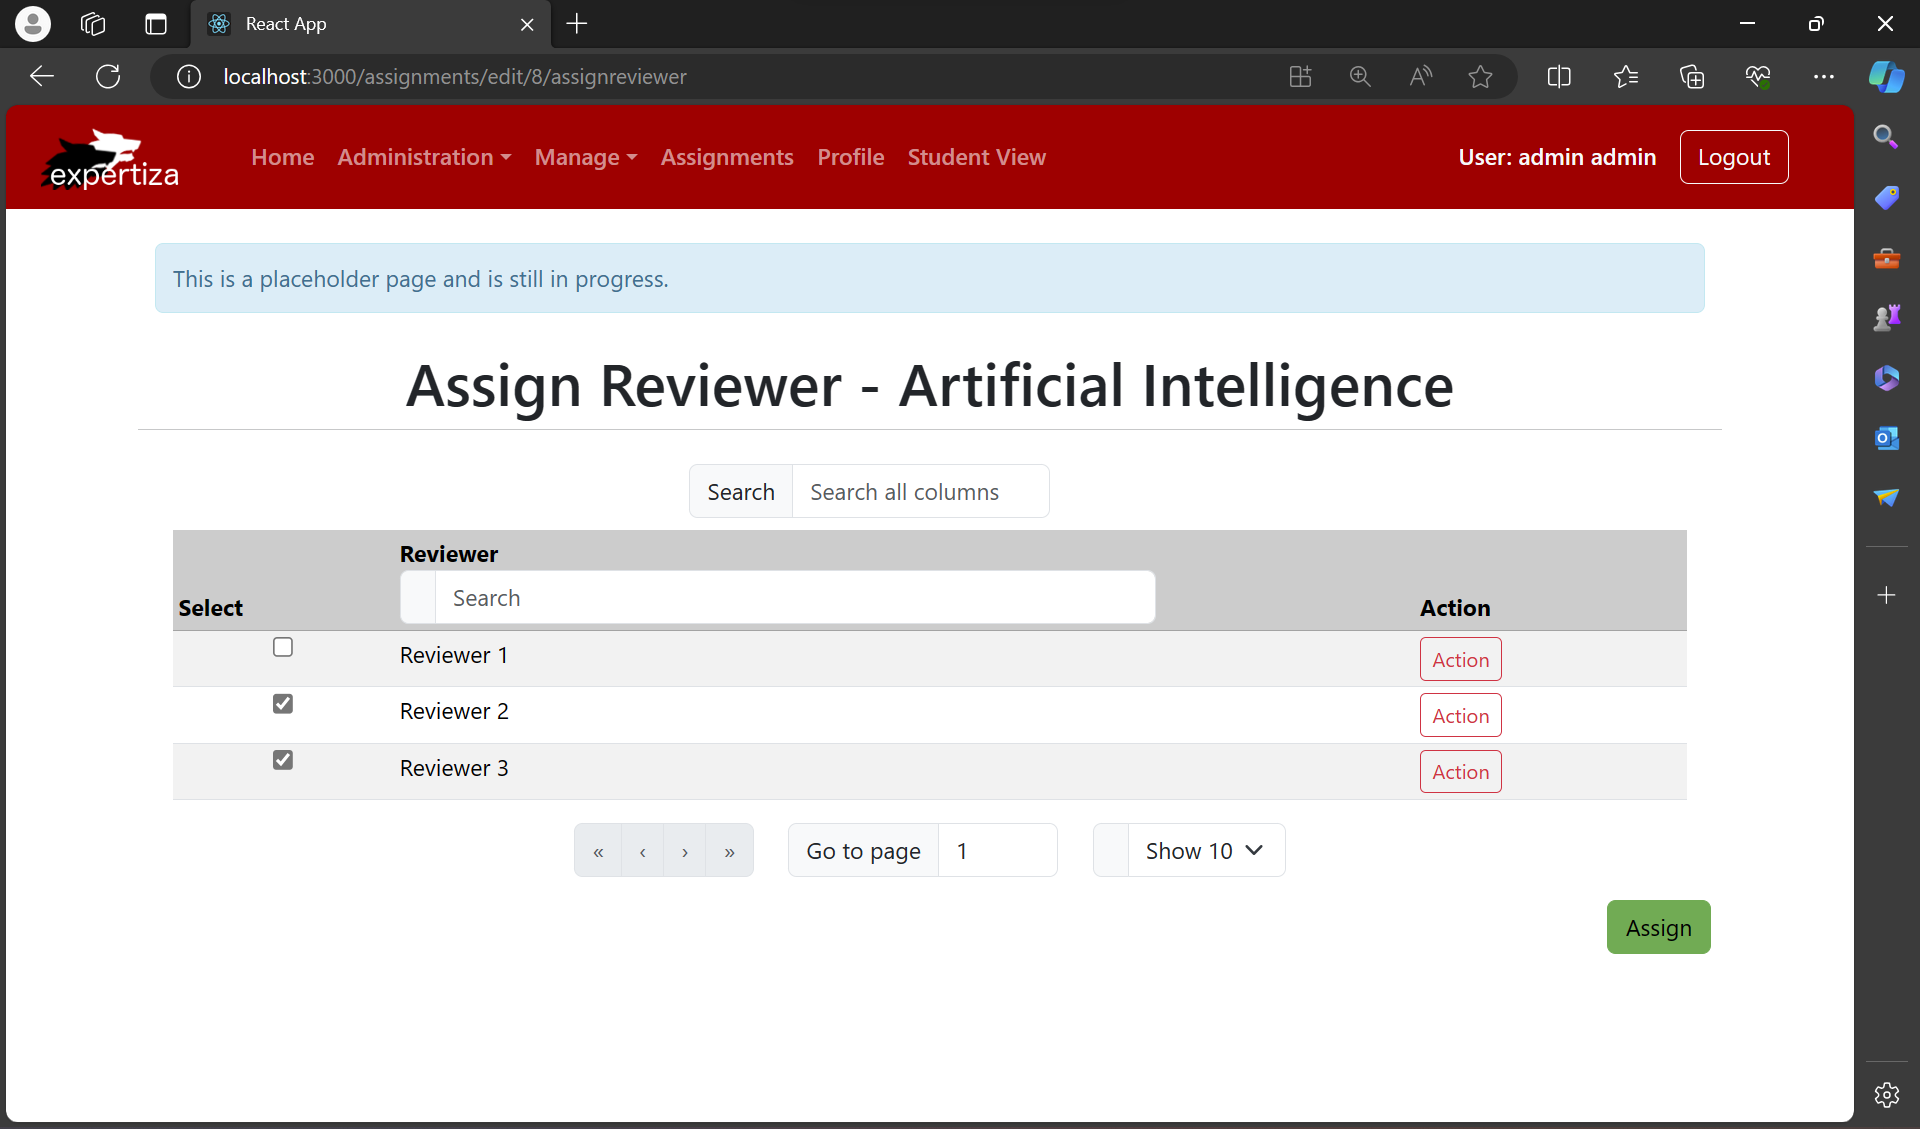
(Code File: AssignReviewer.tsx) (Route Example: http://localhost:3000/assignments/edit/8/assignreviewer)
assignments/edit/8/assignreviewer: The application will route the user to a specific page designed for assigning and managing reviewers for the assignment with an ID of 8.
Path: Go to Manage -> Assignment -> Select the desired assignment by clicking on the Edit (pencil icon) -> Click on ETC Tab -> Click on Assign Reviewer Tile
The "Assign Reviewer" page is designed for users with privileges to assign peer reviewers within the Artificial Intelligence assignment framework. This interface presents a streamlined process, displaying a searchable list of reviewers and providing actionable steps to assign them to evaluate submissions. An 'Action' button is likely tied to each reviewer, enabling the user to allocate reviewing responsibilities systematically. Navigational elements at the bottom suggest the ability to manage a large pool of reviewers across multiple pages, while the prominent 'Assign' button indicates the final step to confirm and apply the reviewer assignments. Even in its current placeholder state, the interface hints at a future where managing peer review assignments is both intuitive and efficient.
View Submissions
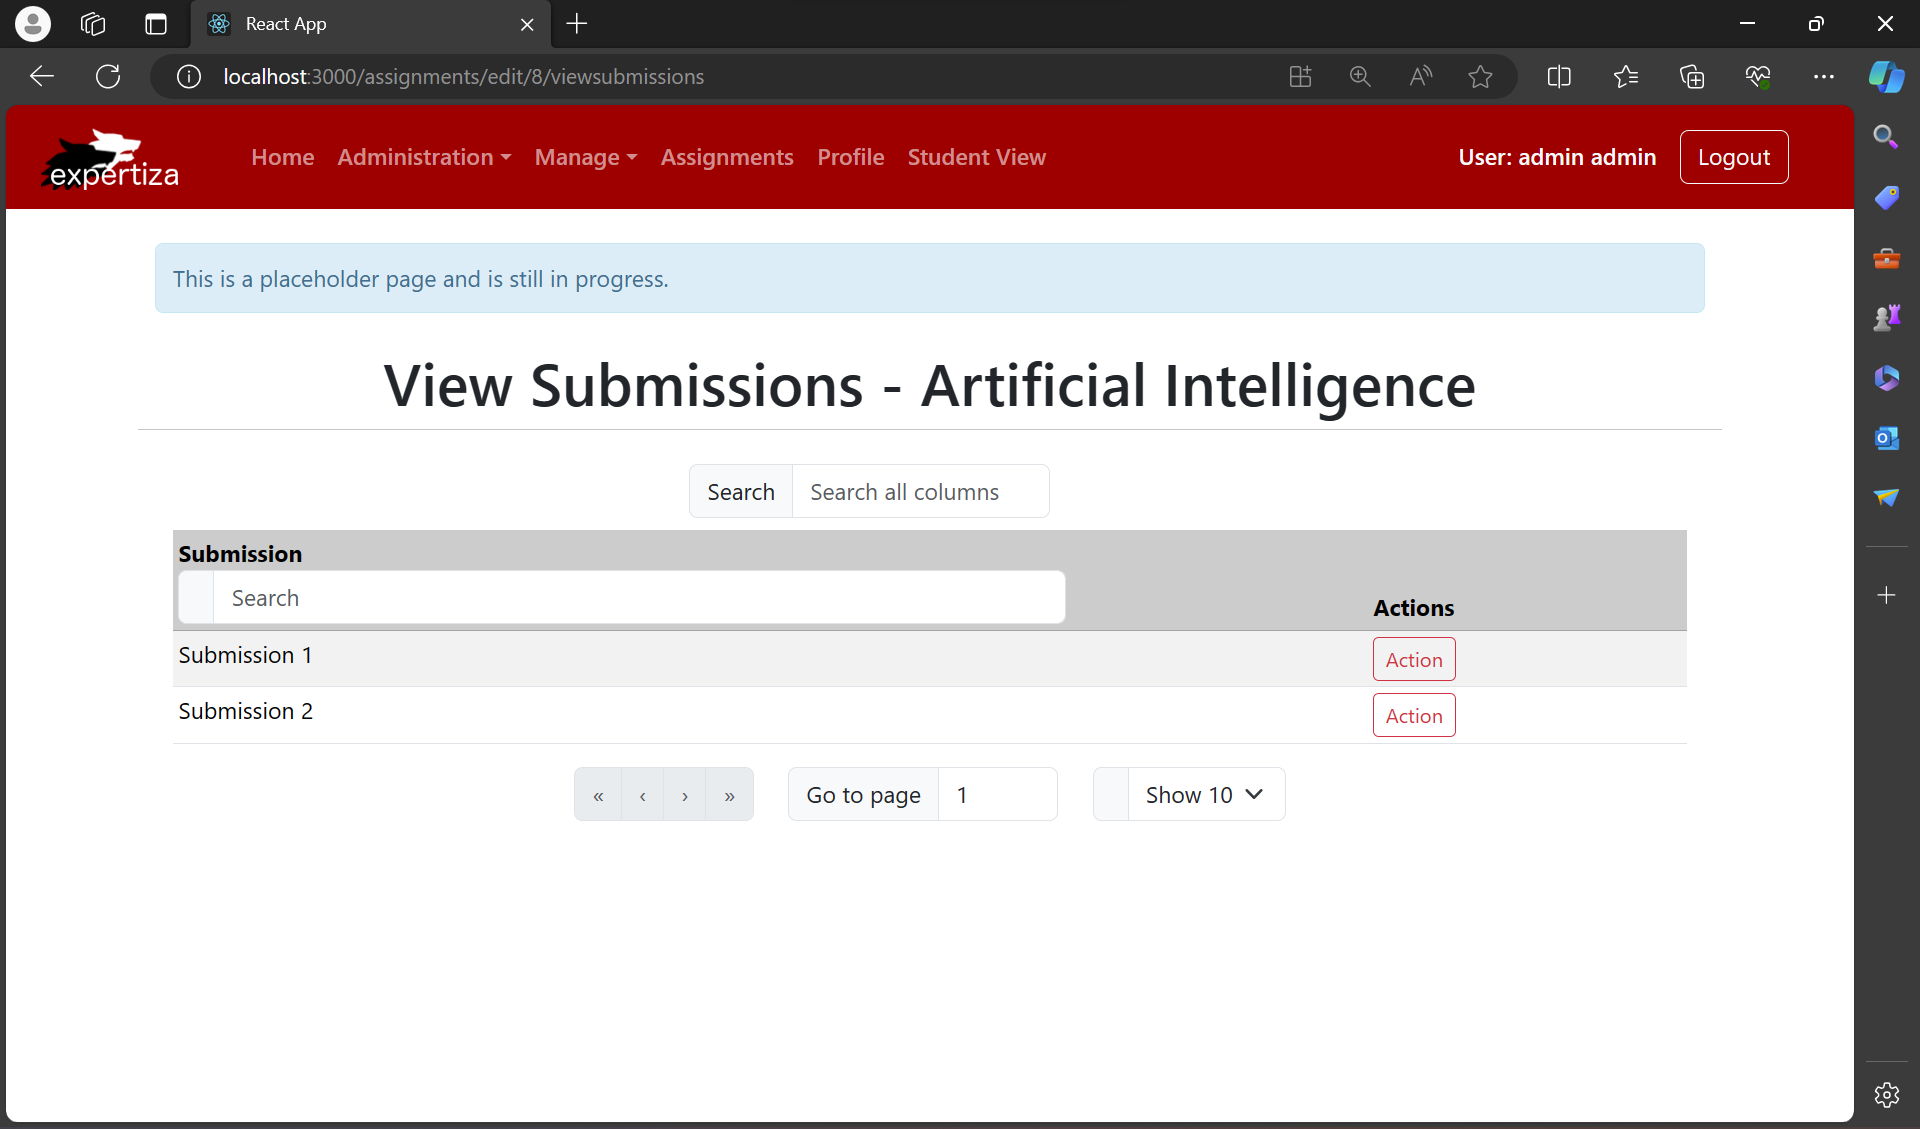
(Code File: ViewSubmissions.tsx) (Route Example: http://localhost:3000/assignments/edit/8/viewsubmissions)
assignments/edit/8/viewsubmissions: The application will route the user to a specific page designed for viewing and managing the submissions for the assignment with an ID of 8.
Path: Go to Manage -> Assignment -> Select the desired assignment by clicking on the Edit (pencil icon) -> Click on ETC Tab -> Click on View Submissions Tile
The "View Submissions" page is envisioned as a platform where submissions for assignments can be viewed and managed. The interface is designed to display a list of submissions, each associated with an 'Action' button, which is likely meant for users with the appropriate permissions to perform tasks such as reviewing or grading these submissions. A search bar is included to facilitate the quick finding of specific entries, enhancing the ease of navigation. While the interface indicates that it is a placeholder and the development is ongoing, the structured layout points toward a future functionality that will allow efficient handling of student submissions for the course.
View Scores
(Code File: ViewScores.tsx) (Route Example: http://localhost:3000/assignments/edit/8/viewscores)
assignments/edit/8/viewscores: The application will route the user to a specific page designed for viewing and managing scores for the assignment with an ID of 8.
Path: Go to Manage -> Assignment -> Select the desired assignment by clicking on the Edit (pencil icon) -> Click on ETC Tab -> Click on View Scores Tile
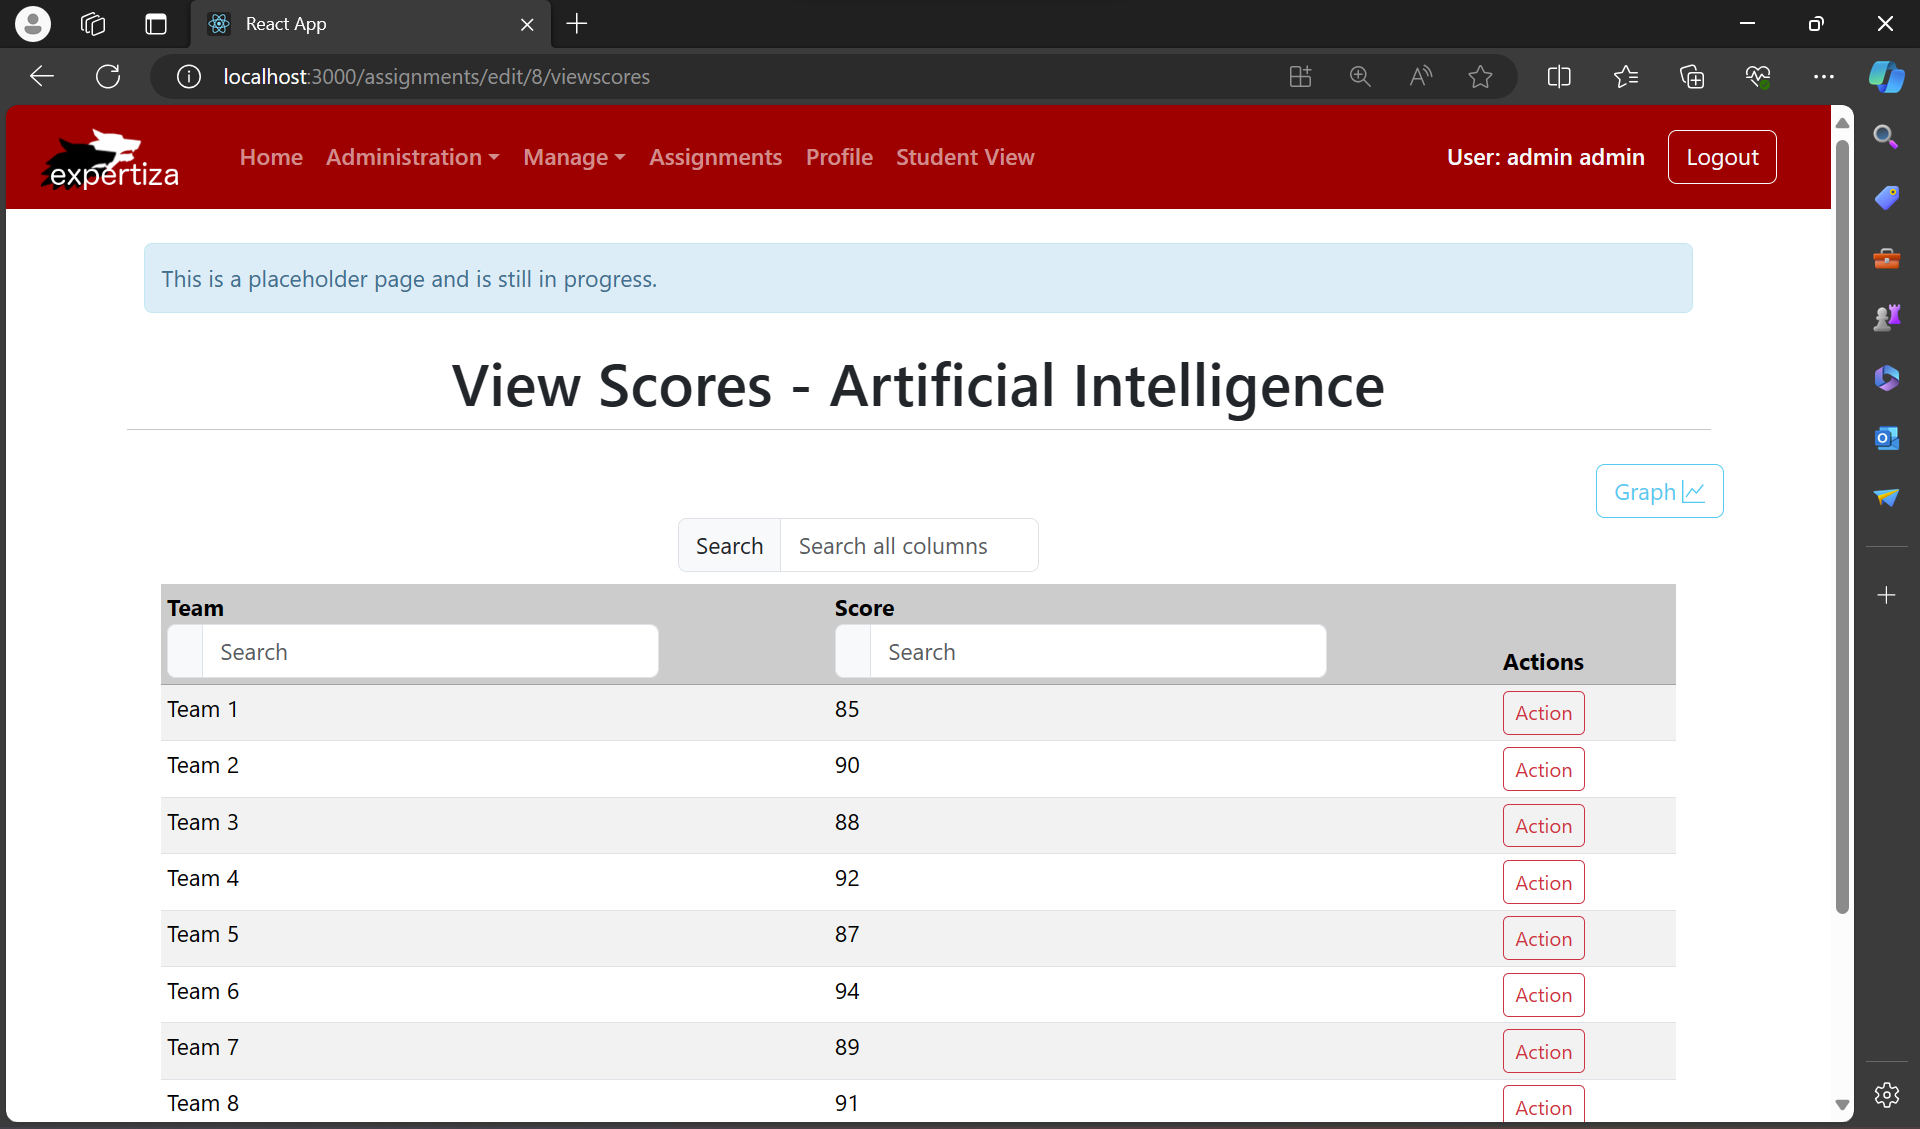
The "View Scores" page is designed to provide a clear and organized overview of the scores assigned to teams within a course. Users can observe the scored performance of each team, streamlined in a tabular format that includes both the team's identifier and its associated score. A search function is embedded to quickly locate specific teams or scores, enhancing the user's ability to efficiently sift through the data. Each row is equipped with an 'Action' button, implying future functionality for further interaction with the team's scores, such as detailed analysis or revisions. Additionally, the presence of a 'Graph' button indicates the intention to implement visual data representation, offering a more comprehensive view of performance metrics across the teams. The page's current status as a placeholder suggests ongoing development, aimed at optimizing the assessment and feedback process in the course.
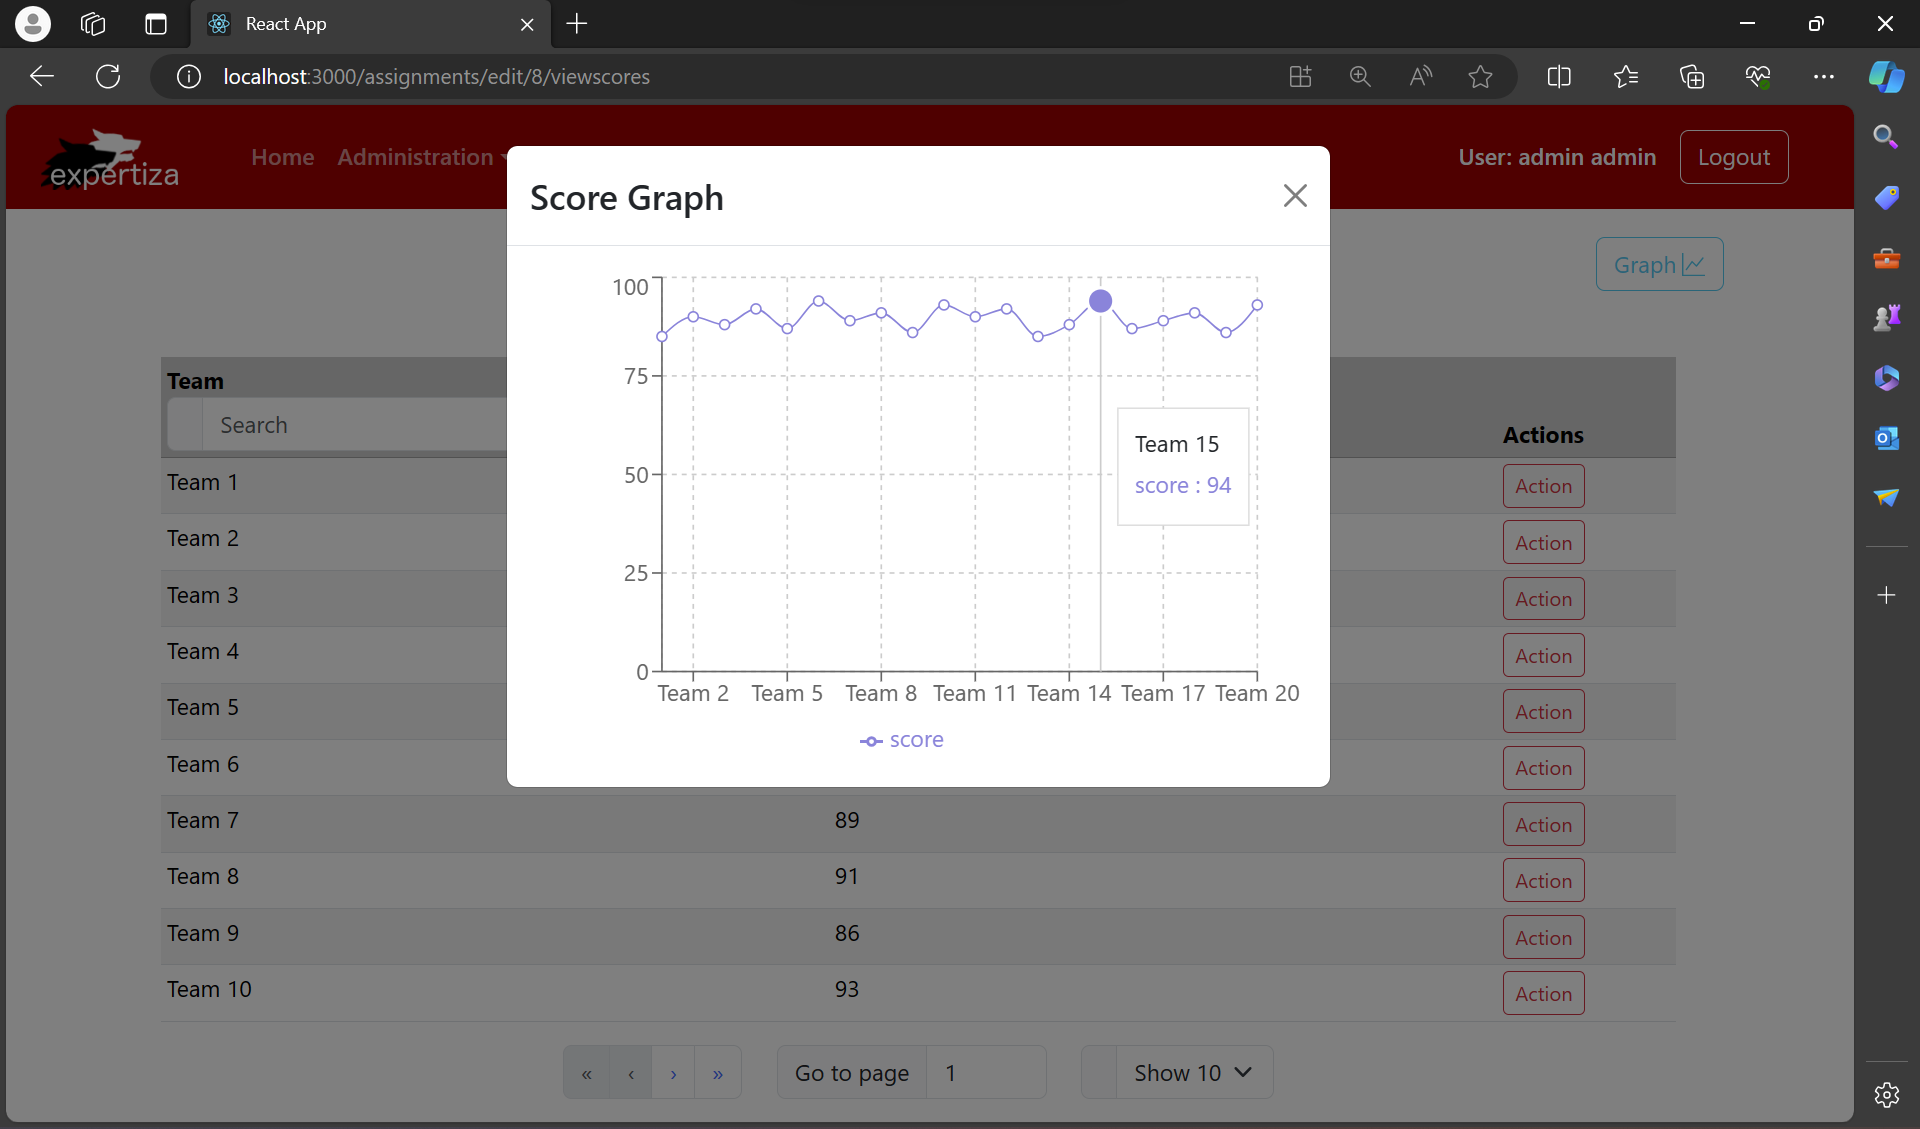
The actionable 'Graph' button likely toggles the display of this detailed score graph. The score graph provides a graphical visualization of scores, indicating a feature that allows for a visual analysis of team performance. The graph displays score trends across various teams, pinpointing individual scores for deeper insight. Such a visual tool is valuable for identifying patterns, outliers, and overall class performance at a glance, enhancing the understanding of how teams fare in their assignments. This integration of graphical data representation reflects a commitment to providing a multifaceted approach to assessment analysis.
View Reports
(Code File: ViewReports.tsx) (Route Example: http://localhost:3000/assignments/edit/8/viewreports)
assignments/edit/8/viewreports: The application will route the user to a specific page designed for viewing and managing reports for the assignment with an ID of 8.
Path: Go to Manage -> Assignment -> Select the desired assignment by clicking on the Edit (pencil icon) -> Click on ETC Tab -> Click on View Reports Tile
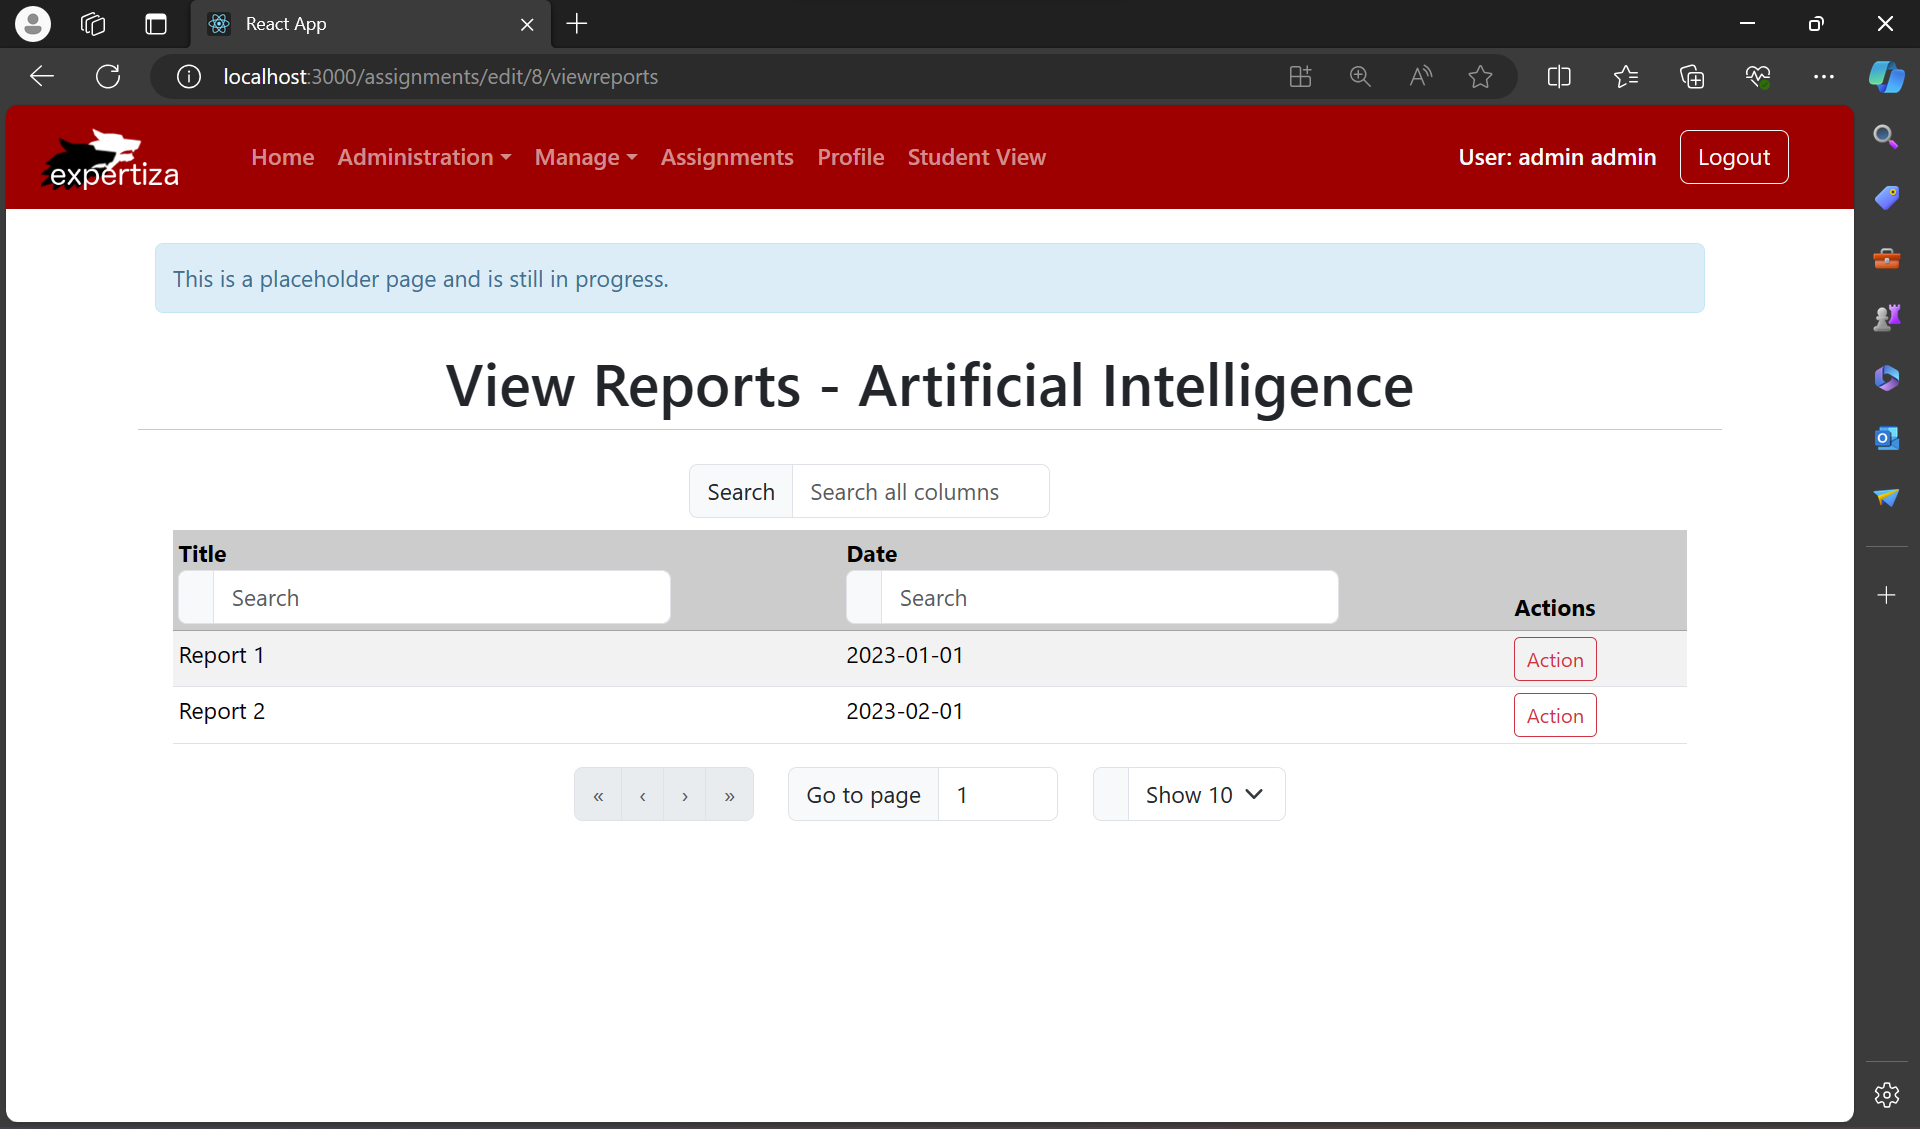
The "View Reports" page appears to be a designated area for users to access and manage reports related to a specific course or assignment. The interface organizes reports by title and date, with each report having an associated 'Action' button for further interaction, such as viewing detailed analytics or downloading the report. Search functionality is integrated to filter through reports quickly. The current placeholder notice indicates that the page is a work in progress, suggesting that additional features and functionalities which might include analytics on grades, submission rates, or review completion. maybe implemented to enhance the report management process.
View Delayed Jobs
(Code File: ViewDelayedJobs.tsx) (Route Example: http://localhost:3000/assignments/edit/8/viewdelayedjobs)
assignments/edit/8/viewdelayedjobs: The application will route the user to a specific page designed for viewing and managing delayed jobs for the assignment with an ID of 8.
Path: Go to Manage -> Assignment -> Select the desired assignment by clicking on the Edit (pencil icon) -> Click on ETC Tab -> Click on View Delayed Jobs Tile
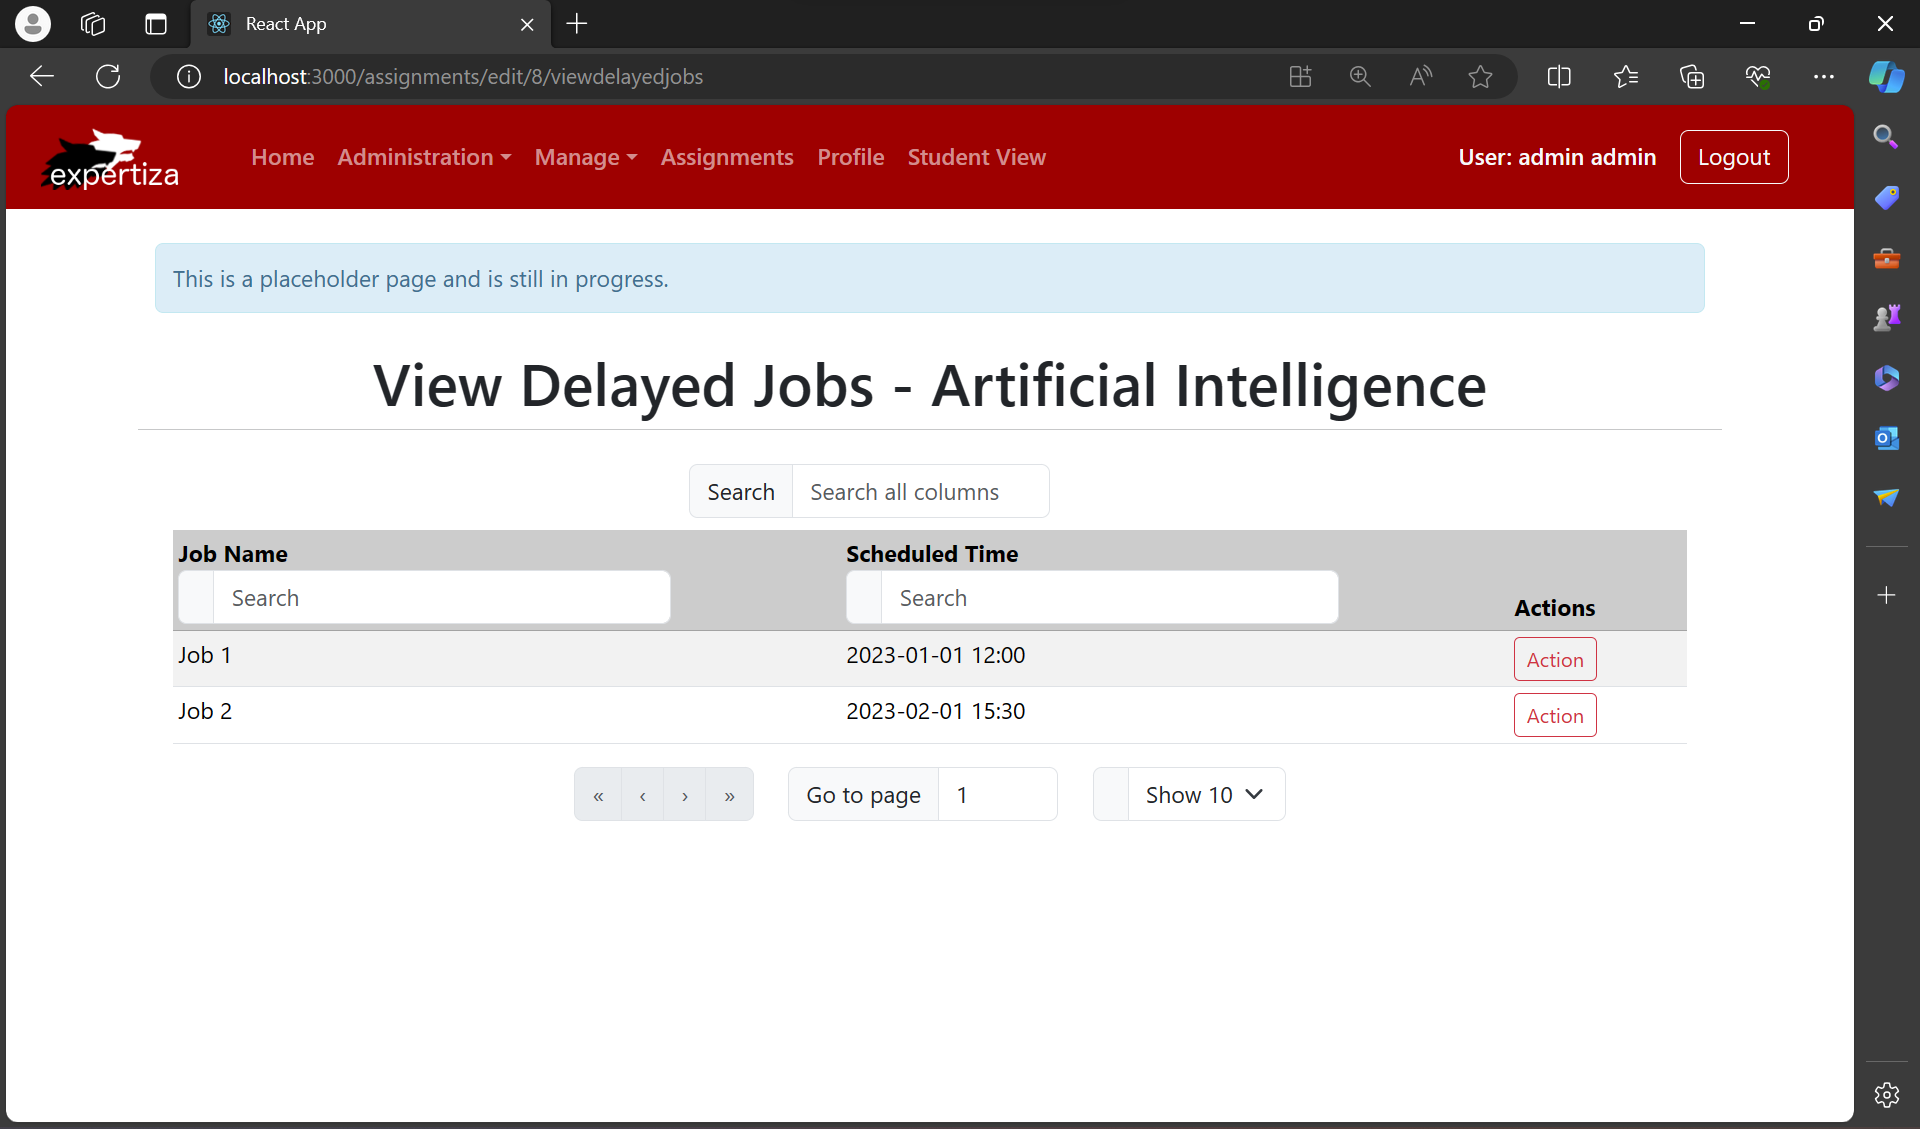
The "View Delayed Jobs" page is intended for viewing assignments or tasks that have not been submitted by the designated deadline. It presents a streamlined table listing each job by name alongside its originally scheduled time, indicating when it was due. This interface aids in identifying late submissions and providing essential information at a glance. Users can utilize the search function to swiftly locate specific delayed jobs, optimizing task management. The presence of 'Action' buttons suggests future functionality that may include options to send reminders, extend deadlines, or otherwise manage these overdue tasks. Although the page is labeled as a placeholder, indicating that development is still underway, its design indicates its purpose: to assist in tracking and handling assignments that have not been submitted on time.
Database
We have utilized the existing data from the MySQL Database. As there is no backend implementation for certain components such as Create Teams, View Scores, and a few others, we have used dummy JSON objects with mock data within these components. This approach allowed us to simulate the behavior of these components and develop their frontend functionality without depending on backend data. The dummy data is structured to mimic the expected format of real data, ensuring that the components can be seamlessly integrated with the backend once it is developed.
Files Modified
- src/App.tsx
- src/custom.scss
- src/pages/Assignments/Assignment.tsx
- src/pages/Assignments/AssignmentColumns.tsx
- src/pages/Assignments/AssignmentEditor.tsx
- src/pages/Participants/Participant.tsx
- src/pages/Assignments/CreateTeams.tsx
- src/pages/Assignments/ViewDelayedJobs.tsx
- src/pages/Assignments/ViewReports.tsx
- src/pages/Assignments/ViewScores.tsx
- src/pages/Assignments/ViewSubmissions.tsx
Components
App.tsx
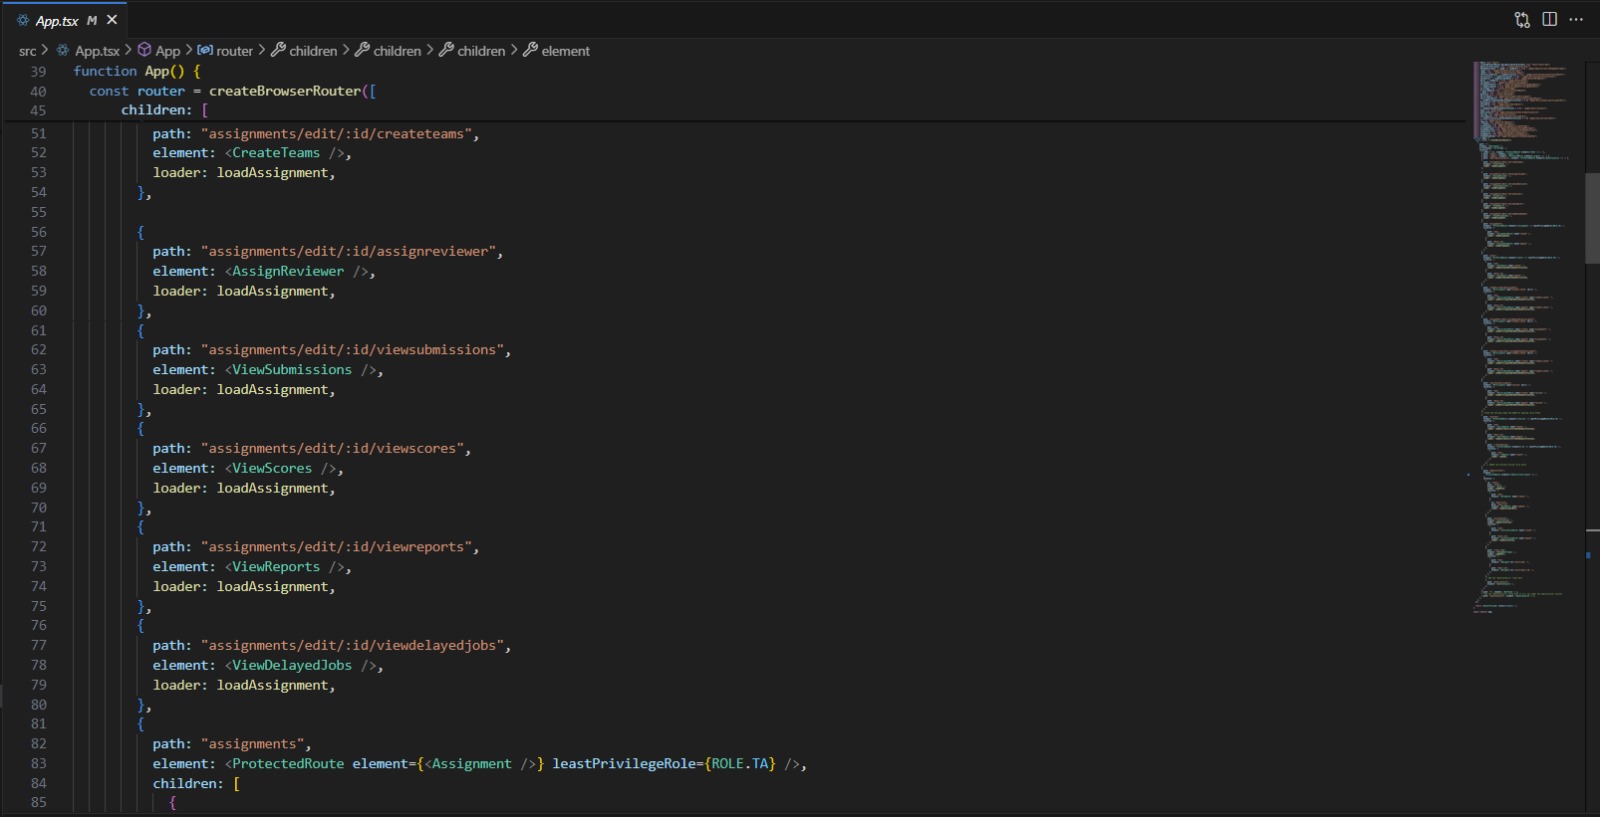
We have integrated routes for several new components to enhance the application's functionality. These components include:
CreateTeams: Accessible via the path /assignments/edit/:id/createteams, this route leads to the CreateTeams component, allowing users to form teams within assignments.
ViewScores: Located at /assignments/edit/:id/viewscores, this route connects to the ViewScores component, providing an interface to view and analyze scores associated with an assignment.
ViewReports, ViewSubmissions, and ViewDelayedJobs: These components are similarly routed under /assignments/edit/:id/, each serving distinct purposes related to assignment management, such as viewing submissions, reports, and managing delayed jobs.
Assignment.tsx
The code modification in Assignments.tsx introduces the label "Create" alongside the creation icon within a button, improving user clarity. This change enhances the button's intuitiveness by explicitly indicating its purpose, thereby aligning with UI best practices that advocate for the pairing of icons with descriptive text to facilitate user interaction and accessibility.
AssignmentEditor.tsx
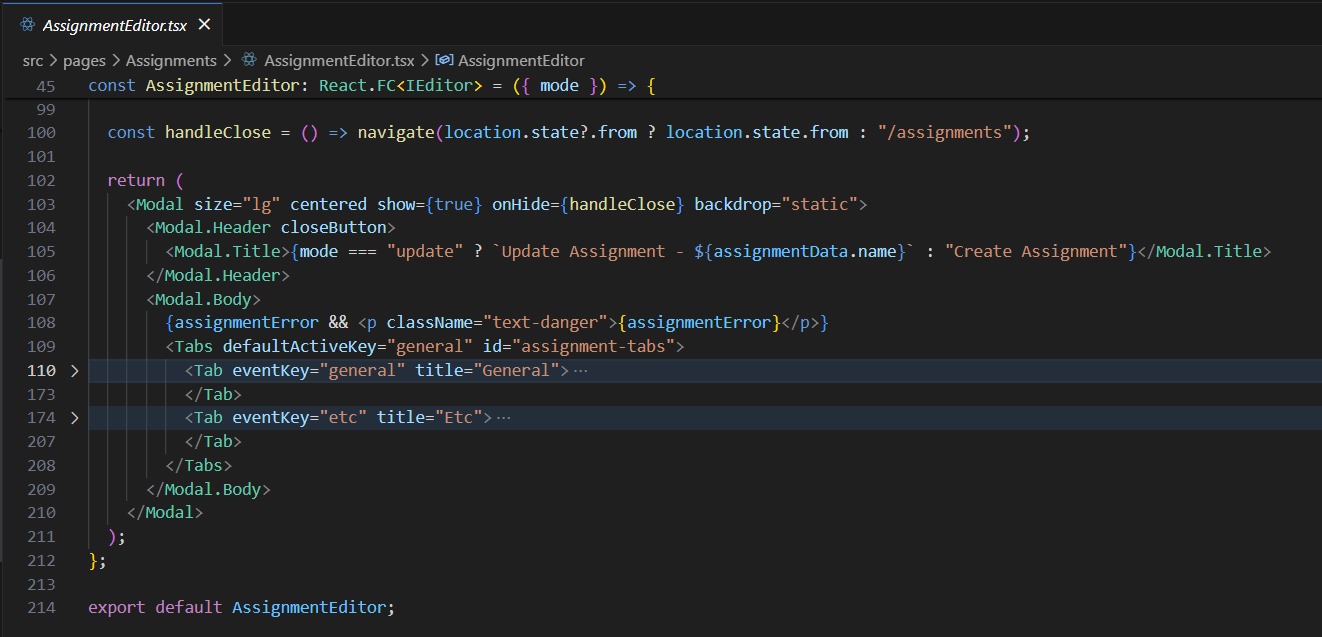
AssignmentEditor.tsx is a React component designed for creating and updating assignments within an application. Here's a summarization of its functionality:
State and Effects: It uses hooks like useDispatch, useSelector, useNavigate, and useLocation for Redux state management, navigation, and side effects.
Form Handling: Incorporates Formik for form state management and Yup for validation, ensuring the form inputs for assignment details are managed correctly and validated.
Modal UI: Uses a React Bootstrap Modal to present the form, providing a user-friendly way to create or update assignments.
Tabs for Organization: The component features Tabs to separate assignment details into "General" and "Etc" categories, with the latter including options like "Add Participant," "Create Teams," and "Assign Reviewer."
Dynamic Form Fields: Renders various form inputs and checkboxes for assignment attributes, dynamically populated for updates or initialized for creation.
Iconography: Utilizes FontAwesome icons for a visually intuitive experience, indicating different actions within the "Etc" tab.
API Integration: Sends requests to the server on form submission, with the ability to handle different HTTP methods based on the context (create or update). Feedback and Navigation: Provides feedback to users on successful updates or errors using alert actions and navigates back to the assignments page upon completion or closure of the modal.
CreateTeams.tsx
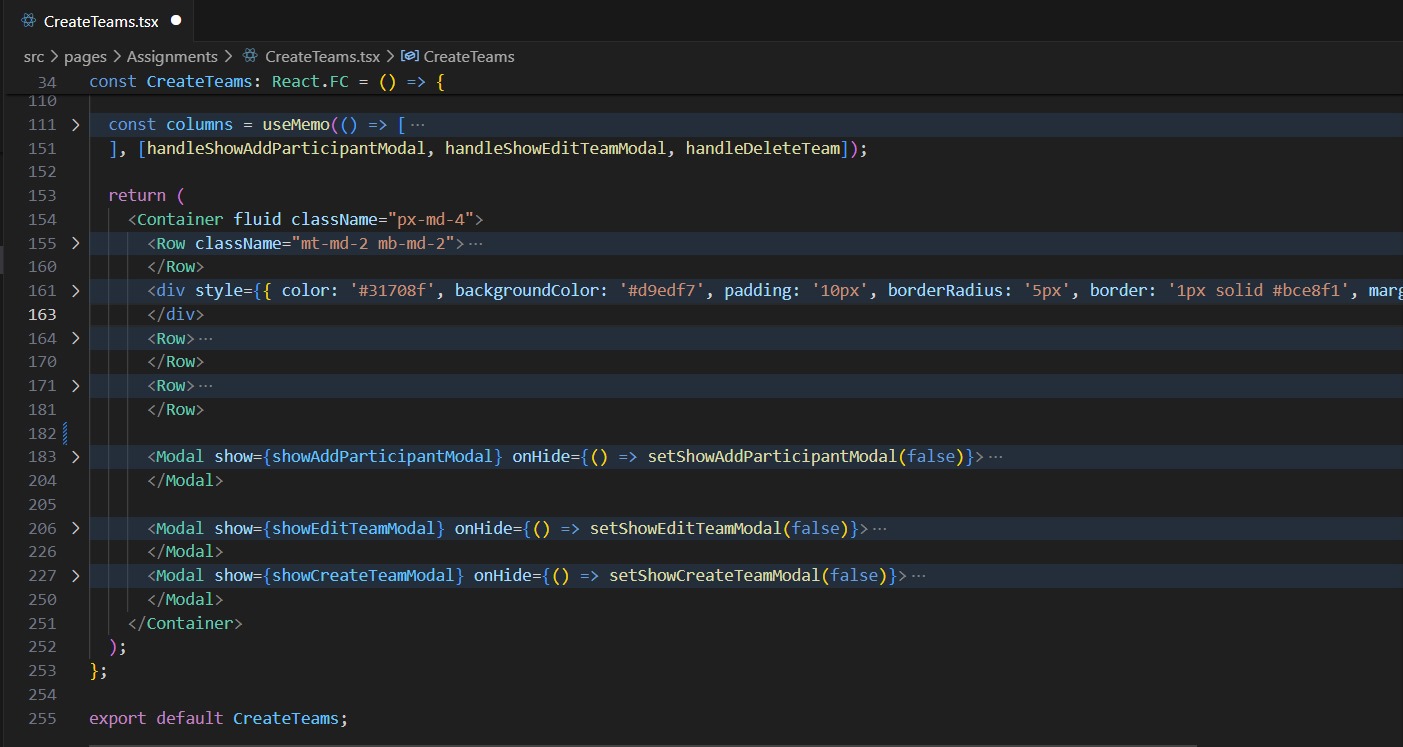
It showcases a UI where users can create new teams, add participants to existing teams, edit team names, and delete teams.
Key aspects of this component include:
State Hooks: It uses useState for local state management of teams, participants, selected items, and modal visibility flags.
Callbacks: The useCallback hook ensures that functions for adding participants, editing, and deleting teams are memorized to prevent unnecessary re-renders.
Modal Components: Several Modal components from react-bootstrap are utilized to present forms for adding participants to teams, editing team names, and creating new teams.
Table Display: A Table component (likely custom) displays teams and their members. It's configured with columns defined using @tanstack/react-table, providing a structured and interactive data presentation.
Data Management: Teams and participants data are initially set with predefined arrays, with the ability to manipulate these arrays based on user interactions, like adding or removing participants, creating new teams, or editing existing ones.
Icons and Buttons: Icons from react-icons enhance the UI, making it visually clear what actions can be performed. Buttons trigger modals and actions, providing the interactive elements necessary for user operations.
Loader Data: It uses useLoaderData from react-router-dom to load assignment data, indicating that this component may be part of a larger routed application where assignments are managed.
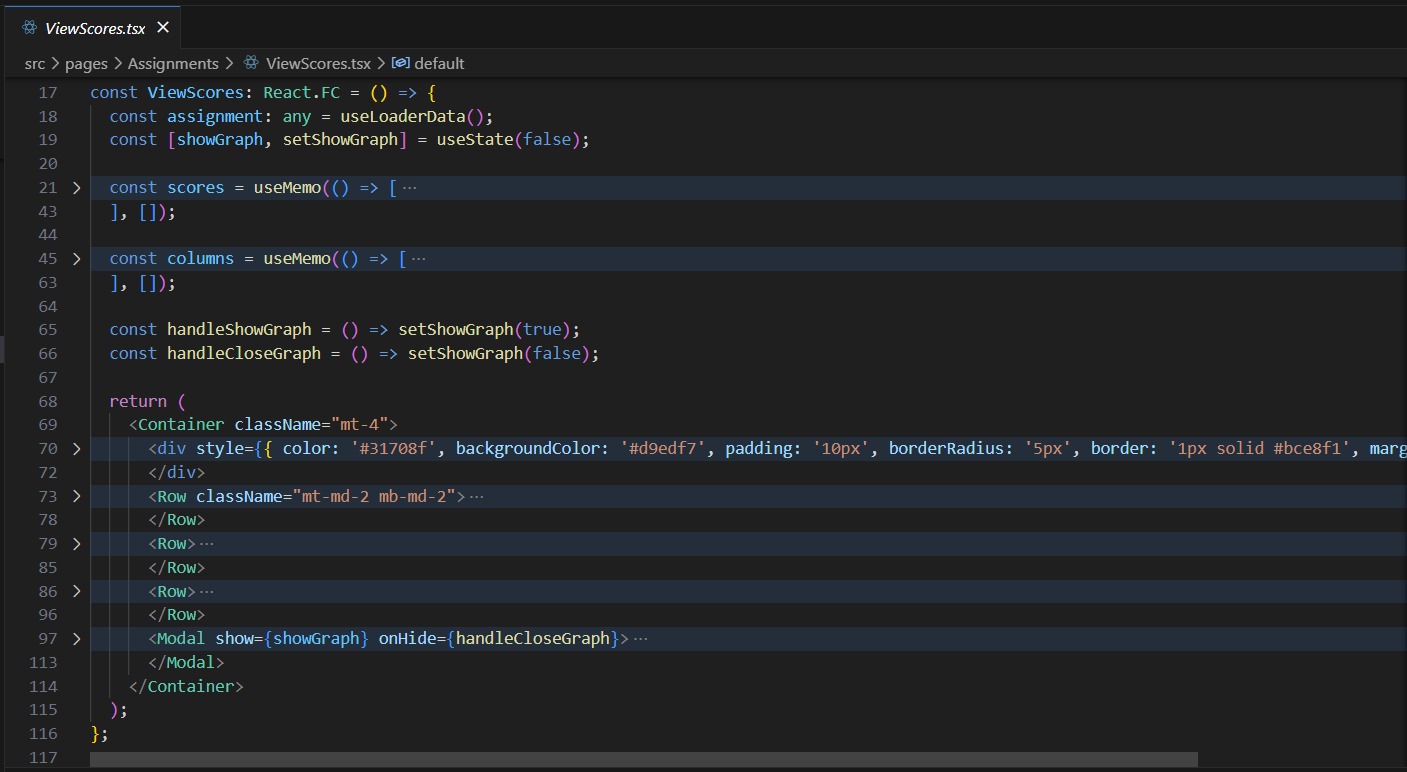
ViewScores.tsx
This component relies on react-bootstrap for layout and styling, and integrates with @tanstack/react-table for tabular data presentation, providing a structured overview of score data. This component also includes data visualization capabilities by leveraging recharts for rendering a line graph of the scores. Key functionalities of ViewScores include:
Data Loading: It uses the useLoaderData hook from react-router-dom to load relevant assignment data, which suggests that it operates within a larger context where assignment details are significant.
State Management: A local state is maintained using useState for controlling the visibility of a graphical representation of scores.
Data Memorization: The component memoizes the scores data and table columns setup using useMemo to optimize performance and prevent unnecessary recalculations.
Table Configuration: A table is configured with columns for team names and their corresponding scores, along with action buttons for potential operations like editing or deleting scores.
Graphical Analysis: A modal contains a responsive line chart from recharts that visually represents scores, offering an alternative analytical view for users to comprehend the data more intuitively.
Interaction: Interaction handlers are set up to show and hide the graph modal, along with a placeholder for future action handlers, indicated by a console log in the action button's onClick event.
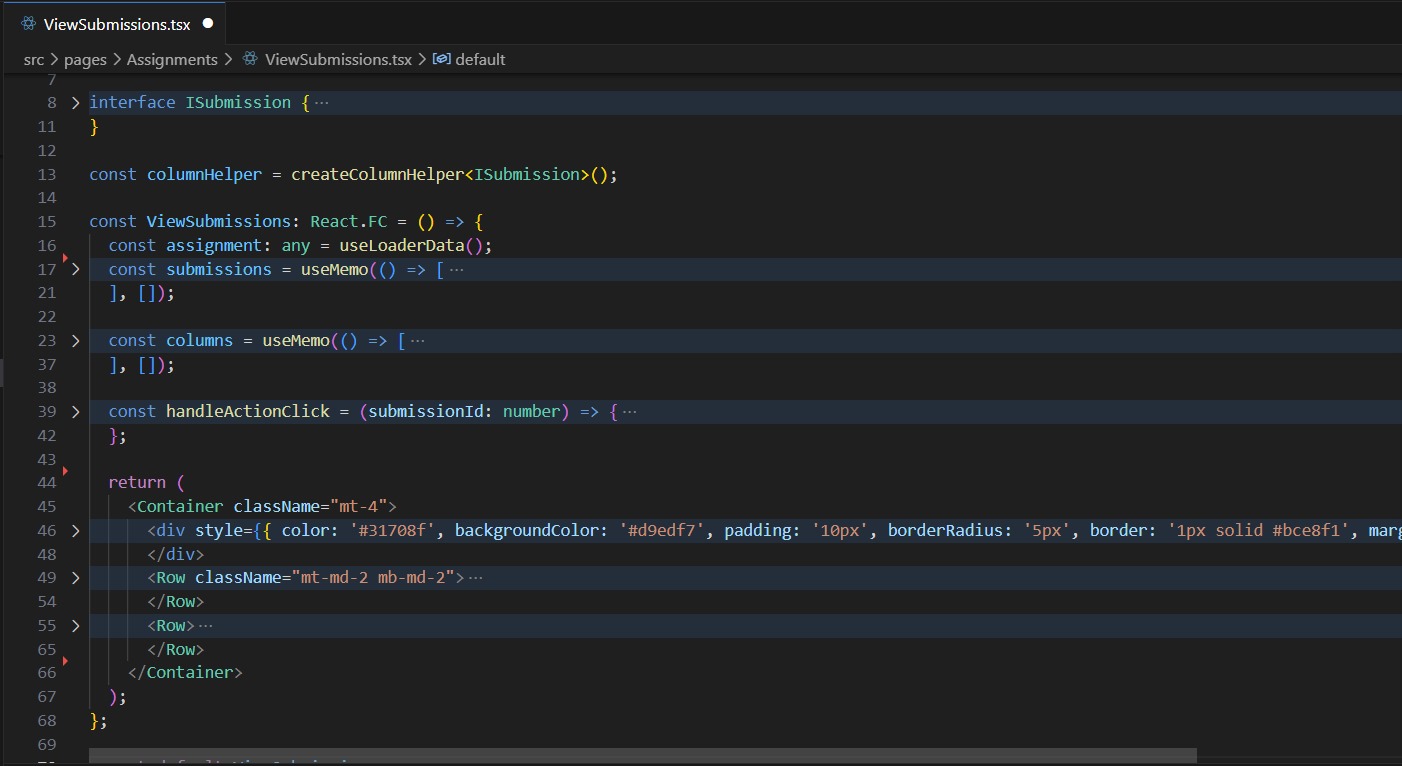
ViewSubmission.tsx
Component utilizes the useLoaderData hook to fetch data about a particular assignment, indicating that this component is part of a routed application where the assignment context is passed along.
Key functionalities and structure include:
Table Generation: It leverages @tanstack/react-table for creating a dynamic and responsive table, which lists submissions by name and provides an action button for each submission.
Data Management: Submission data is memoized using useMemo to optimize performance, ensuring that the data isn't recalculated on every render.
Column Configuration: The table uses a createColumnHelper to define columns for submission names and associated actions. The action column features a button to handle submission-specific operations like reviewing or downloading.
Action Handling: Each action button is linked to a handleActionClick function that, for now, logs the action to the console. This serves as a placeholder for future implementation where clicking the action button would perform a meaningful operation related to the submission ID.
Styling and Layout: react-bootstrap is used to style and arrange UI components like Container, Row, and Col, making the layout responsive and accessible. A notification bar at the top indicates that the page is still under development.
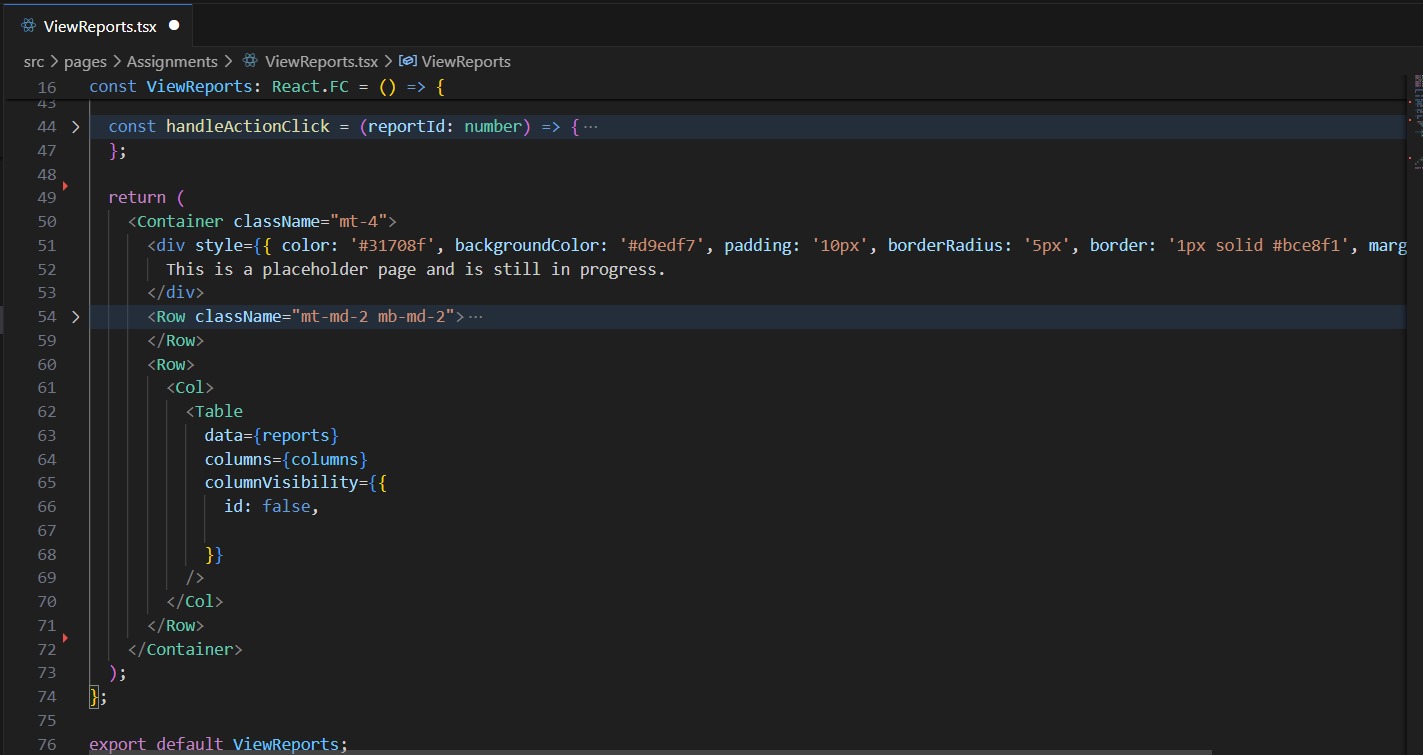
ViewReports.tsx
The component makes use of hooks like useLoaderData to retrieve assignment data, suggesting it's part of a larger application with routing where assignment-specific data is passed for display.
The component's structure and functionality are outlined below:
Table for Displaying Reports: It employs @tanstack/react-table for generating a table view of the reports. The table lists reports by title and date and offers an action button for further interaction with each report entry.
Memoization of Data: The list of reports is memoized using useMemo, which optimizes rendering performance by preventing unnecessary recalculations of the reports list on each render.
Column Configuration: With createColumnHelper, columns are defined for the report title, date, and actions. This setup simplifies the process of configuring and rendering table columns.
Action Handling: An handleActionClick function is linked to the action button in each row, ready to be implemented with specific logic for report interactions such as viewing details or downloading.
Styling and Layout: Using react-bootstrap components like Container, Row, and Col, the page is styled responsively. Additionally, there's a notification area styled to indicate that the page is in development.
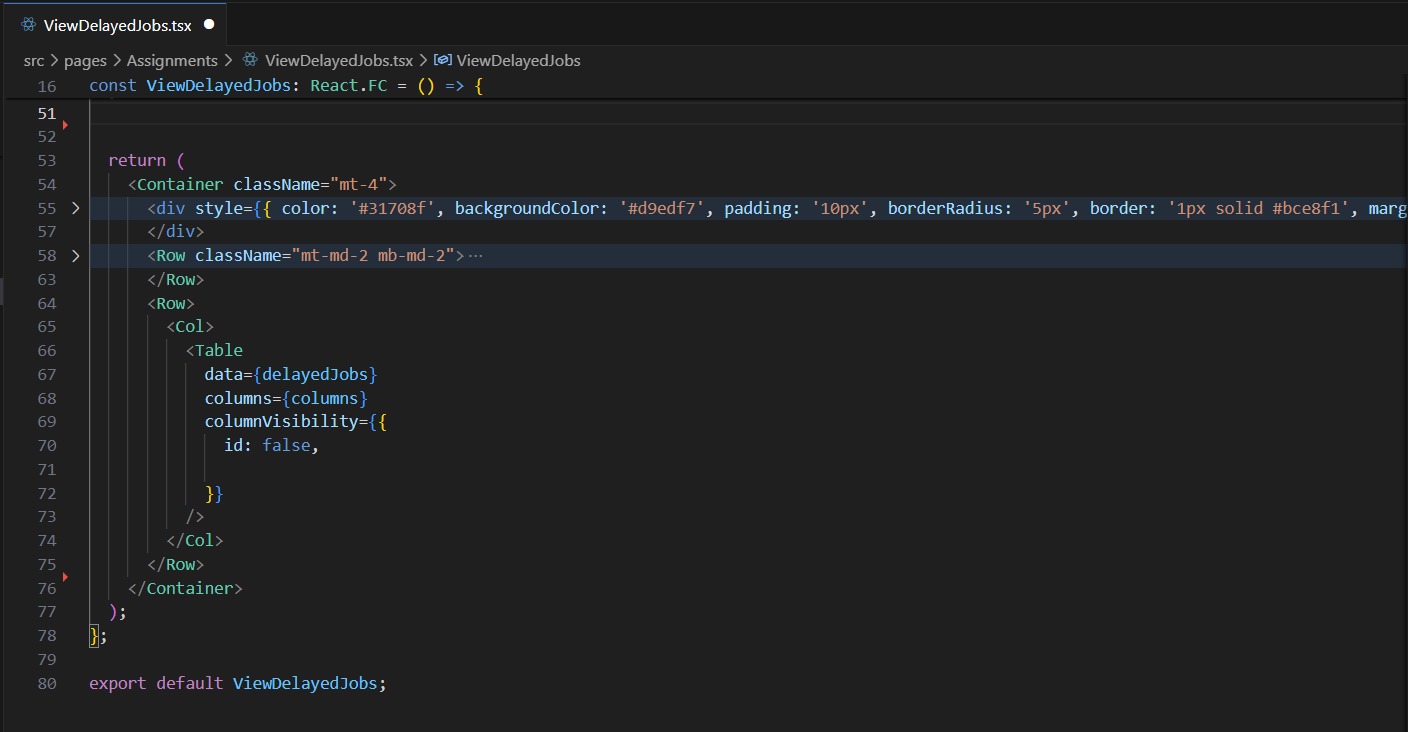
ViewDelayedJobs.tsx
In this component useLoaderData hook is used to fetch context-specific data, likely to display delayed jobs related to a particular assignment or module.
Overview of the component's functionality and structure:
Table Presentation: The component uses @tanstack/react-table to render a table of delayed jobs, allowing users to view essential information about each job, such as its name and when it's scheduled to run.
Data Optimization: Delayed job data is optimized using useMemo to ensure that the job list is only recalculated when necessary, enhancing performance.
Column Setup: The createColumnHelper is utilized to define columns for the delayed job's name and scheduled time, providing a clear and organized display of information.
Interactive Actions: Action buttons are provided for each job, wired up to a handleActionClick function that currently logs to the console but is intended for future implementation of job-related actions like editing schedules or canceling jobs.
Styling with React-Bootstrap: The page layout and elements are styled using react-bootstrap components, offering a consistent and responsive design.
Progress Indicator: A styled div at the top of the page indicates that the component is a work in progress, setting the expectation for users that more functionality may be forthcoming.
Extended Scope
The project’s future development includes the creation of backend functionalities essential for empowering the ETC tab's components with a broader range of actions. This will involve writing server-side logic to process requests such as adding or editing team members, assigning review duties, and updating submission statuses. With the backend in place, actions initiated from the ETC tab—like assigning reviewers or managing delayed jobs—will have the necessary support to perform operations that are both data-driven and responsive. The aim is to provide users with a dynamic and responsive interface where changes made in the ETC tab are immediately reflected and stored in the database, ensuring the system is always in sync and up to date. This backend advancement is crucial for the ETC tab to fully realize its potential as a central command center for assignment-related management tasks.
Test Cases
| Test Case ID | Objective | Steps | Result |
|---|---|---|---|
| TC1 | Verify that the ETC tab is accessible from Manage -> Participants -> Edit. | Log in, navigate to Manage -> Participants -> Edit, and click on the ETC tab. | The ETC tab is accessible and displays the available features. |
| TC2 | Verify that the Participants page is accessible from the ETC tab. | Click on the 'Participants' option in the ETC tab. | The Participants page loads successfully. |
| TC3 | Verify that the Create Teams feature is accessible from the ETC tab for the particular assignment. | Click on the 'Create Teams' option in the ETC tab. | The Create Teams page for the specific assignment loads successfully. |
| TC4 | Verify that a new team can be created successfully. | Access the Create Teams page and create a new team. | The new team is created successfully. |
| TC5 | Verify that an existing team can be edited successfully. | Access the Create Teams page and edit an existing team. | The team is edited successfully. |
| TC6 | Verify that multiple participants can be added to a team. | Access the Create Teams page and add multiple participants to a team. | Multiple participants are added to the team successfully. |
| TC7 | Verify that a team can be deleted successfully. | Access the Create Teams page and delete a team. | The team is deleted successfully. |
| TC8 | Verify that the Assign Reviewers page is accessible for the particular assignment. | Click on the 'Assign Reviewers' option in the ETC tab. | The Assign Reviewers page for the specific assignment loads successfully. |
| TC9 | Verify that the View Submissions page is accessible for the particular assignment. | Click on the 'View Submissions' option in the ETC tab. | The View Submissions page for the specific assignment loads successfully. |
| TC10 | Verify that the View Scores page is accessible for the particular assignment. | Click on the 'View Scores' option in the ETC tab. | The View Scores page for the specific assignment loads successfully. |
| TC11 | Verify that the score graph displays accurate data for all scores. | Access the View Scores page and view the score graph. | The graph accurately displays all scores. |
| TC12 | Verify that the View Reports page is accessible for the particular assignment. | Click on the 'View Reports' option in the ETC tab. | The View Reports page for the specific assignment loads successfully. |
| TC13 | Verify that the View Delayed Jobs page is accessible for the particular assignment. | Click on the 'View Delayed Jobs' option in the ETC tab. | The View Delayed Jobs page for the specific assignment loads successfully. |
| TC14 | Verify that pagination works correctly for all the pages. | Access each page in the ETC tab and navigate through multiple pages using pagination controls. | Pagination allows navigation through different pages, displaying the correct data on each page. |
| TC15 | Verify that the assignment ID is correctly carried in the route for pages accessed from the ETC tab. | Access each page in the ETC tab and check the URL for the correct assignment ID. | The URL for each page contains the correct assignment ID. |
Important links
Team
Mentor
- Kalyan Karnati <kkarnat@ncsu.edu>
Members
- Sreenitya Mandava <smandav@ncsu.edu>
- Sree Tulasi Shevva <sshevva@ncsu.edu>
- Yogitha Seela <yseela@ncsu.edu>


