CSC/ECE 517 Spring 2020 - M2000. Implement ImageBitMap web API
A new browser technology that is being implemented with the new rust language to take advantage of the concurrency features of the language is the servo. [1]. It is an innovation that will be using compiling in a very synchronous style as well as support things like web assembly code. It was an implementation that was a result of the effort of Mozilla research with aid from Samsung to help port it to android and arm processors. The servo does not yet have any support for the ImageBitmap which eventually makes it difficult to write it to the canvas in real-time without any undue latency in the process. This could lead to servo being slow and having very little graphical support, hence it will be requiring to implement support for ImageBitmap to make sure the process is smooth and efficient for graphical canvas support.
Pull Request
The pull request for this implementation has been merged.[2]
It passes all the test cases and also the build is passing.[3]
It contains only one commit as the servo DOM peer had asked us to squash all the commits into one for easier integration into the master servo implementation.
The whole list of commits can be found in the log details of that commit.
Comments for the code
We will not be having detailed comments for each function of the code, because the servo community does not encourage comments which are not required.
The comments that are more than what is required will fail the servo build checks.
To make up for that, we try to explain wherever possible the code that we have written in this documentation.
Introduction
Servo
Servo [4] which is born as an intention from Mozilla to produce an open-source web engine that will work on the rust language implementation[5]. It works on a parallel setup where the various rendering activities take place in a highly parallel nature.
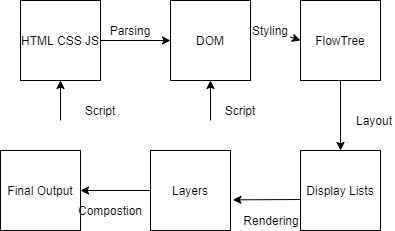
The entire nature of flow for the servo is shown in the below diagram:
Here we can see that the servo parses the contents of html and css using dom, which runs on the rust scripts and produces a flow tree using the styling elements. It then renders them as layers which are produced as output using composition.[6]
Rust
Rust [7] Rust again is born out of an intention from Mozilla to implement a programming language that is highly efficient for parallel processing that will make sure the threads are safe in execution and implementation. It is being used in the servo browser.
DOM
DOM stands for Document Object Model. It is a method that is being used by web-browsers to effectively arrange web pages and use them in a structured manner. Servo also uses the concept of dom to efficiently access the structure of how the web pages are stored and used effectively.
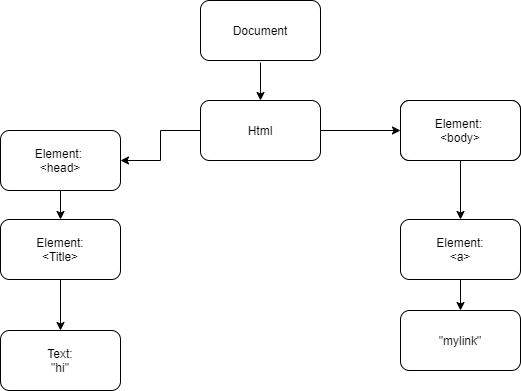
the general dom structure is shown below that has all head and body elements with a hyperlink :
Scope
Several browsers that we know have the ability to create images of bitmaps that can be reproduced for graphical purposes on canvas elements. The new servo browser from Mozilla is something that has canvas, thus the aim would be to implement code to support imagebitmap() for canvas in the servo.
Image Bitmap
Interface for imagebitmap[8] is something that represents an image which is a bitmap that can be drawn to a <canvas> [9] without undue latency. the createimagebitmap() factory method is used to produce these images for implementation.
The general flow of an imagebitmap method would be :
Here we see that the browser holds the main thread which will request the worker thread to obtain the URL that is being passed and uses it to create the image bitmap, Once the image has been created we will be transferring it back to the main thread where the canvas would be drawing the image created.[10]
Implementation Steps
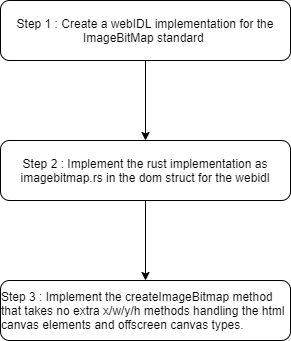
The following steps have been implemented:
Step 1- add a ImageBitmap WebIDL interface to components/script/dom/webidls
Step 2- Implement its Rust code in components/script/dom/imagebitmap.rs that is backed by a Vec<u8> buffer
Design Pattern
Our project will not require any design patterns as it will only require the implementation of the methods. Please see below for the steps required in the implementation.
Implementation
The following are the steps that are present it the implementation project description [11].
Step 1: add a ImageBitmap WebIDL interface [12] to components/script/dom/webidls
The webidl information is from the official standard webidl[13].
Please note that we have removed the "Serializable" and "Transferable" components from the webidl as they are not required for this implementation.
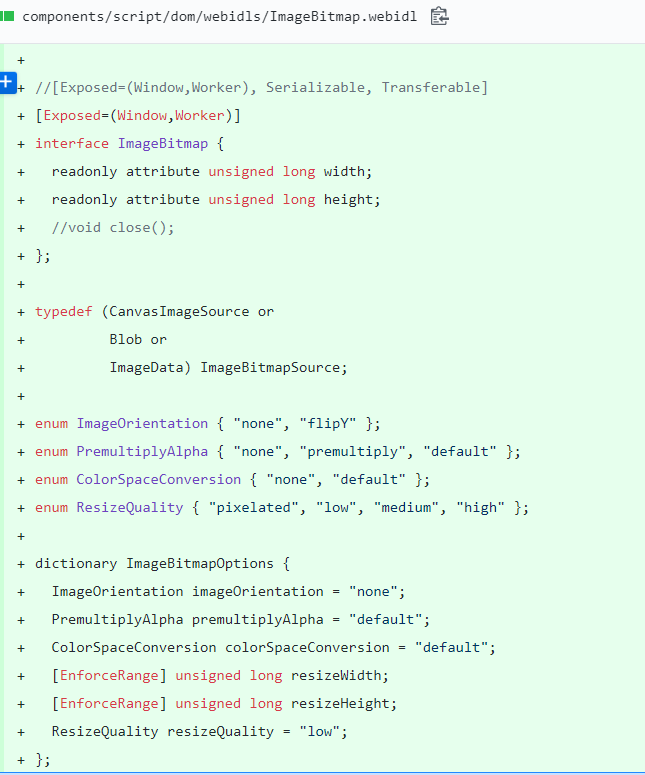
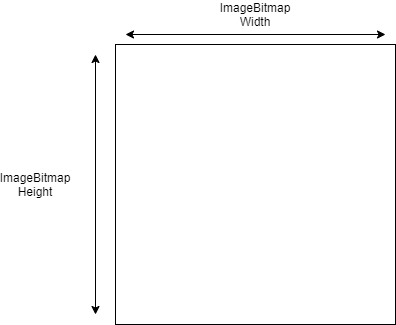
From the implemented the imagebitmap webidl for the dom struct that will be taking the height and width as its attributes.
The webidl specifies that it will hold an interface of the imagebitmap which will have attributes of height and width as unsigned long integers represent as the below diagram.
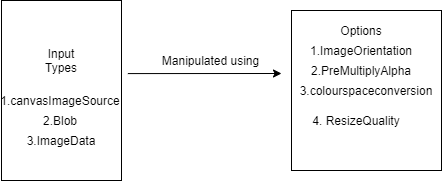
enum specifies the various options that are available to the input image type that could be CanvasImageSouce or Blob or ImageData. The options will be used to manipulated these input types specifically - ImageOrientation, preMulitplyAlpha,ColourSpaceCoversion,ResizeQuality
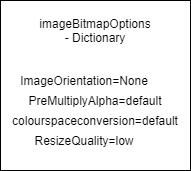
The imagebitmap options dictionary will be creating key-value pairs for these with initial default values as seen in the image below :
Step 2: Create a imagebitmap.rs code implementation [14] for the webidl
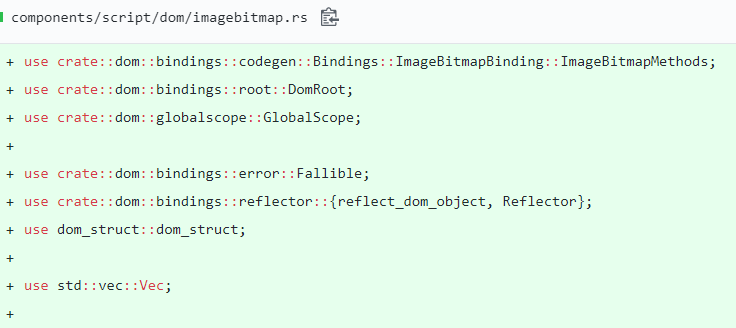
Below we have implemented the image bitmap rust code that uses all the crates[15]. Crates are the packages for rust implementation that can be imported.
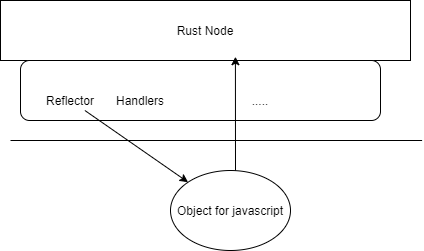
The code here creates the crates for the rust implementation. The bitmap options are bound followed by binding to dom root and global scope. Fallible is used to check errors, Reflector is used to link the js side to the rust code. We also use vector of u8 charset to store the bitmap implementation
In the below image we can see the way the reflector object in the above code is used to access and link the javascript objects using rust. The rust node contains the reflector which is using to bind the javascript object every time a thing is manipulated on the rust side.
Reflector design in dom
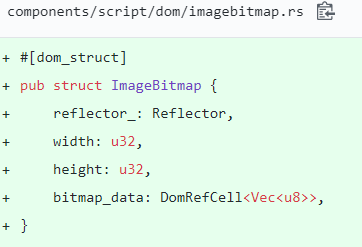
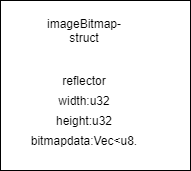
The dom_struct is the DOM structure that the ImageBitMap data has from the javascript object. It consists of the following-
1. Reflector - a reflector has the pointer to the required JavaScript object.
2. width and height - the width and the height part of the ImageBitMap's data as mentioned in the webidl file. The required datatype[16] is 32-bit unsigned integers, denoted by u32.
3. As the imagebitmap needs to be implemented backed b a <Vec8> buffer, as mentioned in the problem statement, the DomRefCell<Vec<u8>> has been used. Where, u8 stands for 8-bit unsigned integer, which is used to hold the data of colour model[17] and DOMRefCell is the RefCell[18] equivalent for the DOM implementation. RefCell is a wrapper used to make the data mutable, which is a required property here as the colour data might be altering.
The image below shows how this struct is organised
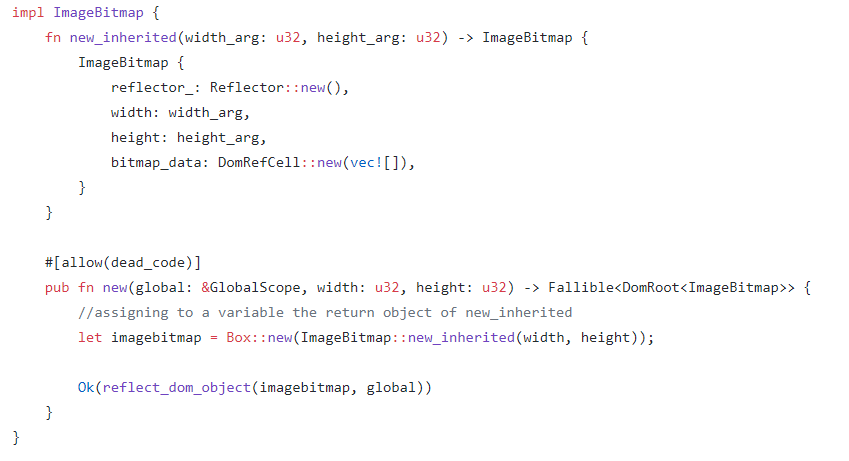
Here we implement the code that reads in the various attributes and the javascript objects required (shown below). We use the words impl ImageBitmap[19] which means the implementation of the ImageBitmap type. It will be using the newinherited and the new methods to obtain the required javascript objects and resolve the intended promises.
new_inheritence method is where the new instance of the ImageBitmap is created. new method is where the javascript object is connected to the ImageBitmap object[20].
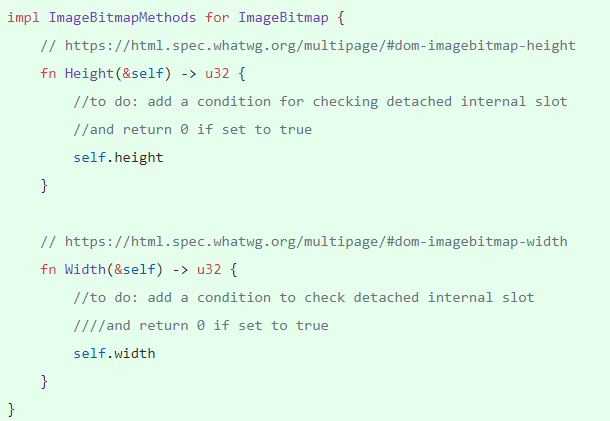
Here we implement the code for the getter methods for height and width attributes for an ImageBitmap object. We use impl ImageBitmapMethods for ImageBitmap here which includes only the methods that are required as part of the implementation of the ImageBitmap.
The height and width attributes are as shown below :
The detailed description of the algorithm that has been implemented can be seen in the HTML Standard [21].
Note: Please note that the implementation does not have detailed comments as we were asked to remove them since they are against the servo implementation guidelines.
How to Set up and Run
The following are the steps to build the servo.
1. git clone the servo repository
2. setup all the pre-requisites[22]
3. switch into the "servo" directory - cd servo
4. build the project using:
4.1. For Windows
    mach.bat build -dev

    run the project using:
mach run -d -- https://github.com
4.2. For Linux / Mac-OS
./mach build --dev
run the project using:
./mach run --release tests/html/about-mozilla.html
Test_Plan and Testing
Upon successful completion of the setup and building the whole browser engine. You should get an output that is something similar to the image below.
Servo Building Test
-> This completes the first step of testing as you will able to successfully run the software.
Note: Please be aware that your system may hang up during the process as it involves compiling the whole code from source and this involves usage of the whole processing power of the local system. Don't fret yet, the system will come back to its normal state after the build is completed.
Note: Time to compile depends on the CPU clock speed, and varies widely.
Servo Tidiness test
-> The next part of the testing involves checking for file tidiness, i.e. checking if all standards of the servo have been met.
Running the below command will test for the same.
[FOR LINUX / MAC-OS]
    ./mach test-tidy
    ./mach fmt
[FOR WINDOWS]
    mach.bat test-tidy
    mach.bat fmt
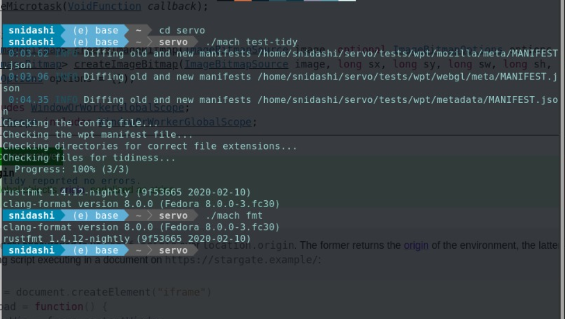
The output should be similar to the below picture which shows that the tests that were passed.
Servo automated Unit-Testing
-> The next part of testing is the unit-tests
Running the below command will run all unit-tests
[FOR LINUX / MAC-OS]
./mach test-unit
[FOR WINDOWS]
mach.bat test-unit
Note: The output is too large to include everything here as images, and this LOG FILE has the full details of all the unit-tests passed.
Servo Automated WPT Tests
-> Then the next steps involve running the servo-provided automated WPT [Web Platform Tests] that are relevant for our implementation.
I am providing the commands to run the WPT tests WPT Tests on linux.
./mach test-wpt tests/wpt/web-platform-tests/html/dom/idlharness.https.html
To save the log results to a file, for example wpt.log
./mach test-wpt tests/wpt/web-platform-tests/html/dom/idlharness.https.html --log-raw wpt_dom.log
Once the test results are saved to the log, we need to update the test expectations.
./mach update-wpt wpt_dom.log
Now to test another relevant feature for the above implementation and save it to a log file named wpt_interface-objects.log
./mach test-wpt tests/wpt/web-platform-tests/workers/semantics/interface-objects/001.worker.js --log-raw wpt_interface-objects.log
./mach update-wpt wpt_interface-objects.log [ UPDATING TEST EXPECTATIONS ]
Note: The output can also be viewed in this LOG_FILE link.
Manifest Update
Now to cap it all off, we need to update the WPT manifest so that all the changes have been registered and reflected appropriately.
It can be done by the command below.
./mach update-manifest
This finishes the testing for the code and you can see that the test coverage has increased.
References
[3] Rust Language Official Website
[4] servo working architecture
[7] Canvas Element
[8] Bitmap flow
[9] Implement ImageBitmap problem statement
[12] ImageBitmap WebIDL Standard
[14] Crates and Packages for Rust
[14] Data Types in Rust
[16] RefCell in Rust
[17] impl Keyword in Rust
[18] Implement a new DOM tutorial
[20] ImageBitmap Implementation pull request
