CSC/ECE 517 Fall 2023 - NTX-1 Adding Snapshot Controller/API and CRDs
Adding Snapshot Controller/API and CRDs
Background
Kubernetes
Kubernetes, also known as K8s, is an open-source system for automating deployment, scaling, and management of containerized applications.You can automate daily tasks using Kubernetes since it comes with built-in commands that take care of a lot of the intensive parts of application administration. You can ensure that your apps always function as you planned. Once installed, Kubernetes takes care of networking, computation, and storage for your workloads. This frees developers from having to worry about the underlying environment and lets them concentrate on apps. Kubernetes performs ongoing health checks on your services, restarting containers that have failed or stopped and only granting users access to services once it has verified they are operational.
Nutanix Database Service
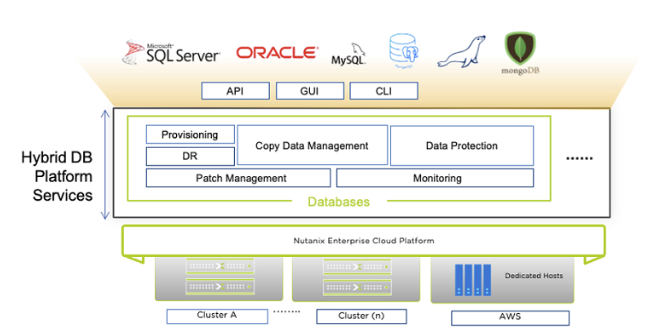
Nutanix Database Service is a database-as-a-service that simplifies and automates database lifecycle management across on-premises, colocation facilities, and public clouds for Microsoft SQL Server, Oracle Database, PostgreSQL, MySQL, and MongoDB databases. NDB helps you deliver database as a service (DBaaS) and gives your developers an easy-to-use, self-service database experience for new and existing databases on-premises and in the public cloud.
Some features of NDB: Secure, consistent database operations Automate database administration tasks to ensure operational and security best practices are applied consistently across your entire database fleet. Accelerate software development Enable developers to deploy databases with just a few clicks or commands directly from development environments to support agile software development. Free up DBAs to focus on higher value activities With automation handling day-to-day administration tasks, DBAs can spend more time on higher value activities like optimizing database performance and delivering new features to developers. Retain control and maintain database standards Choose the right operating systems, database versions and database extensions to meet application and compliance requirements.
NDB Operator
The MySQL NDB Operator for Kubernetes is a Kubernetes Operator to run and manage MySQL NDB Cluster on Kubernetes. The NDB Kubernetes Operator provides automated deployment, scaling, backup, recovery, and monitoring of databases, making it easier to manage databases in Kubernetes terrain. It also integrates with popular DevOps tools like Ansible, Jenkins, and Terraform to automate the deployment and operation of databases. It also provides features for data protection, compliance, and security, including data encryption, part- grounded access control, and inspection logging. It allows druggies to work the benefits of Kubernetes, including automatic scaling, rolling updates, tone- mending, service discovery, and cargo balancing. With the NDB Kubernetes Operator, inventors and DevOps brigades can concentrate on the high- position aspects of their operations rather than the low- position details of managing databases, making operation deployment and operation more scalable and dependable. Existing Architecture and Problem Statement
Problem Statement
A controller should take snapshots of the database and report the status. Users will get a feature to look at the snapshots of the provision database using this operator. They can also create a query for the Kubernetes to filter the snapshots.A snapshot should have details of the database and metadata like time, name,etc.
NDB Architecture
The Nutanix Database Service armature is a distributed system that's designed to give high availability, scalability, and performance for numerous types of databases, including Microsoft SQL Server, Oracle Database, PostgreSQL, MySQL, and MongoDB. The NDB architecture is built on top of Nutanix's infrastructure, which provides a scalable and flexible platform for running enterprise workloads. The architecture consists of several layers which has the Nutanix hyperconverged infrastructure at the bottom providing storehouse, cipher, and networking resources for running the databases. Above this layer is the Nutanix Acropolis operating system, which provides the core virtualization and operation capabilities. Above the Nutanix Acropolis layer is the Nutanix Era layer, which provides the database lifecycle operation capabilities for the Nutanix Database Service. This layer includes the Nutanix Era Manager, which is a centralized operation console that provides a single pane of glass for managing the databases across multiple data centers. The Nutanix Era subcaste also includes the Nutanix Era Orchestrator, which is responsible for automating the provisioning, scaling, doctoring, and backup of the databases. The Orchestrator is designed to work with numerous databases and provides a declarative model for defining the state of the databases. At the top most layer is the Nutanix Era Application, which is a web-based interface that allows developers and DBAs to provision and manage the databases. The Era application provides a self-service interface for provisioning databases, as well as a suite of tools for monitoring and troubleshooting database performance.
Design and Workflow
Nutanix Database has a pre-existing provision to take snapshots of the database. This can be done through making an api call. The details of the existing api for creating the snapshots of the database are as follows:
 Path: https://<IP>/era/v0.9/tms/<TimeMachineID>/snapshots
 Method: POST
 Request Payload:
 {
   "name": "Name of the snapshot"
 }
 Authorization: Basic Auth (username-password based)
Currently only the name of the snapshot is taken as an input, but in order to be able to provide the filter functionality to the user, we have to have few more metadata associated with the snapshot.
Currently, when this api call is called, the snapshot is being stored in NDB. For the new design also the same flow will be used along with the additional metadata being stored and displayed through k8s.
For the new design, a new api will be created and exposed which in turn calls the existing api available for creating a snapshot. The new api will have additional request parameters which can be used for the metadata of the snapshot which will help in implementing the filtering of snapshots for the users.
Proposed new API:
 Path: https://<IP>/era/v0.9/tms/<TimeMachineID>/snapshotsv2
 Method: POST
 Request Payload:
 {
   "name": "Name of the snapshot",
   “Ip” : “IP address”,
   “TimeMachineID” : “Time Machine ID”,
   “Username” : “Username”,
   “Password” : “Password”
 }
 Authorization: Basic Auth (username-password based)
4 new files will be created to add the logic required to make the calls to the existing snapshot api:
snapshot.go snapshot_request_types.go snapshot_response_types.go snapshot_helpers.go
We will use scaffolding to generate the above files through Go. The representation of the snapshot (the metadata of the snapshot) will be stored and displayed through the k8s. A new file will be created for this purpose snapshot_type.go
The snapshot_types.go file will hold the Spec and Status for the snapshots. We will add these details in two sections Spec and Status. The Status section will have two fields:
(i) OperationID
(ii) Status: (Can be a string “OK” or “Failed” based on the 200/non-200 responses of the API.
The snapshot_types.go file will have two sections:
i) Spec
ii)Status
The spec will consist of all the metadata that the user would have provided during the api request time.
The Status will further consist of two parts:
i) OperationID
ii) Status
Where, the OperationID is the unique ID which represents the snapshot. The ID from the response of the existing snapshot api will be retrieved to store in the status. The second part of the status is to represent if the operation has been performed successfully or not. Based on the response code of the API, the status can be determined. For example, we can store the status as Successful or Passed for apis returning 200 status code whereas for non-200 code, we can store it as Failed.
To get the input from the user, a new file snapshot.yaml will be created. This file shall have all the necessary information for fetching the request parameters from the user to create the snapshot. This file can also be created through the scaffold command.
Implementation Details
This section gives details about how the Custom Snapshot was implemented with all the additional metadata:
1) The structures required for the Metadata of the snapshot created and the structure required to return the status of the created snapshot were created in the file snapshot_types.go [commit]
The metadata structure includes IP, TimeMachineID, Name, ExpiryDateTimezone and ExpireInDays.
The status structure includes OperationId, Status and Id.
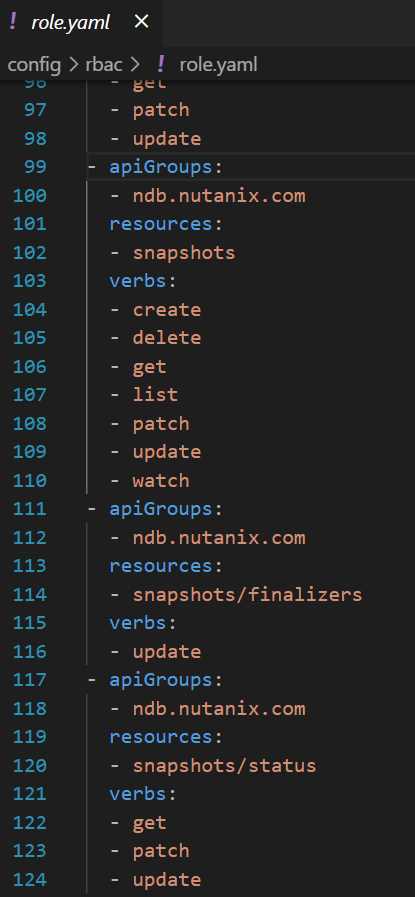
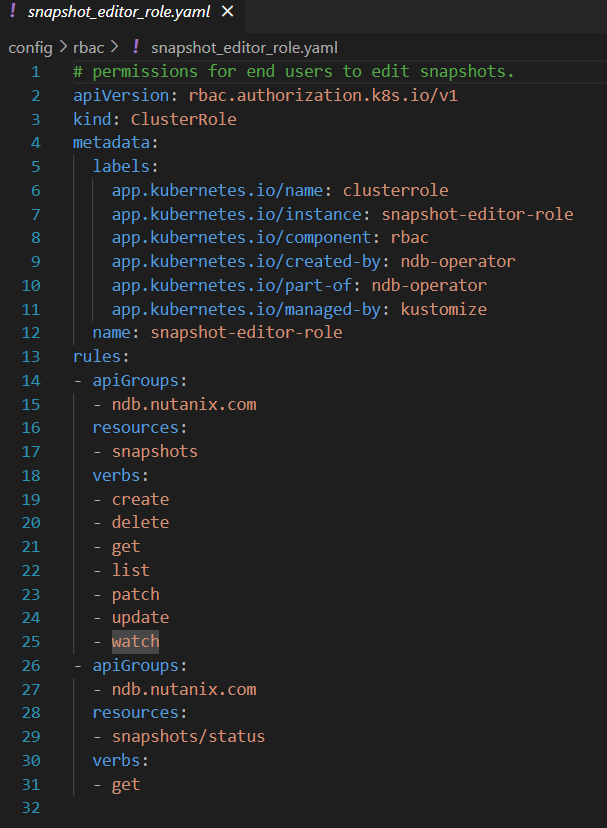
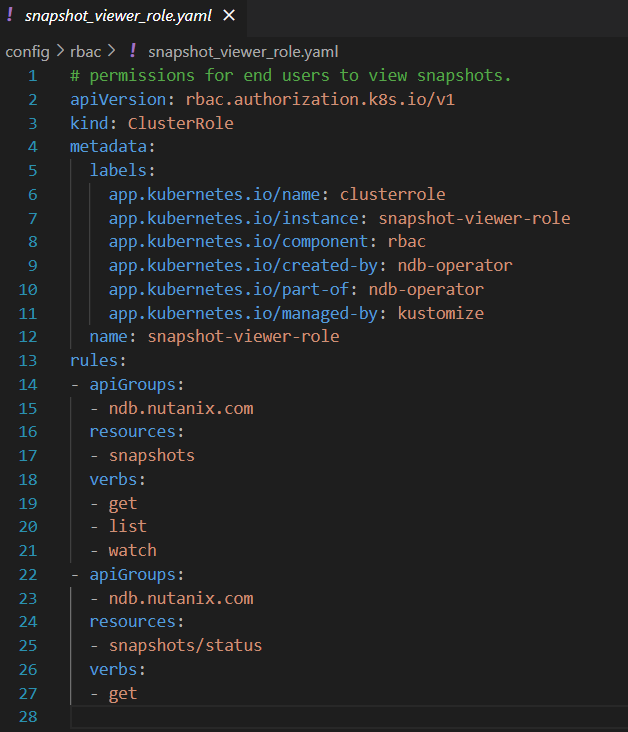
2) Inorder to make sure that the new operations being developed are controlled and available only based on roles defined a few files were modified and few were added. These are called the RBAC ( Role Based Access Control). For example, a user with the editor access will be able to perform many more actions when compared to that of a viewer. [commit]
A new section was added to roles.yaml to include the new apis being added and what are the available functions available for them.
The various available functions which can be executed when the user is an editor or given editor access is handled by the snapshot_editor_role.yaml
The various available functions which can be executed when the user is a viewer or given viewer access is handled by the snapshot_viewer_role.yaml
3) The snapshot controller additions and their helper functions are the major changes done for achieving the results.
The changes include the addition of file
i) snapshot_controller.go [File]
ii) snapshot_controller_helper.go [File]
iii) snapshot.go [File]
As in any API implementation, we start of with logging the enter statement and in the end another log statement for the exit. We have added null checks for the parameters being called with. The timeMachineId is the important parameter required for taking the snapshot, we create a post request with the timeMachineId to the /snapshots endpoint and make the call. The handling of the different status codes is handled in the function.
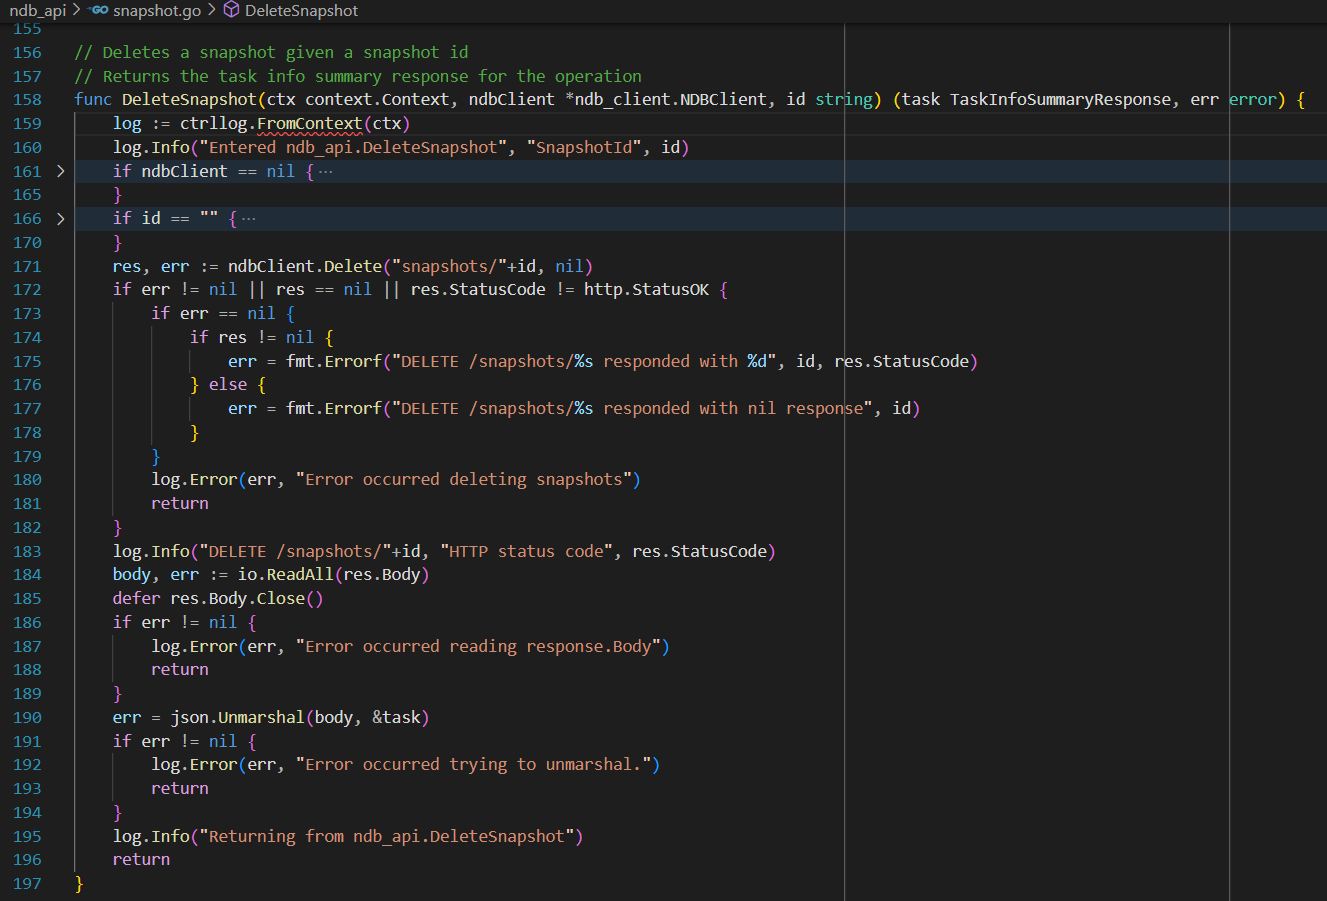
As in any API implementation, we start of with logging the enter statement and in the end another log statement for the exit. We have added null checks for the parameters being called with. The Id of the snapshot to be deleted is the most important parameter for this function. The Delete call is made to the /snapshot endpoint and different status codes are handled in the function.
Flow Walkthrough
In this section, we will go over the flow of the creation of snapshot
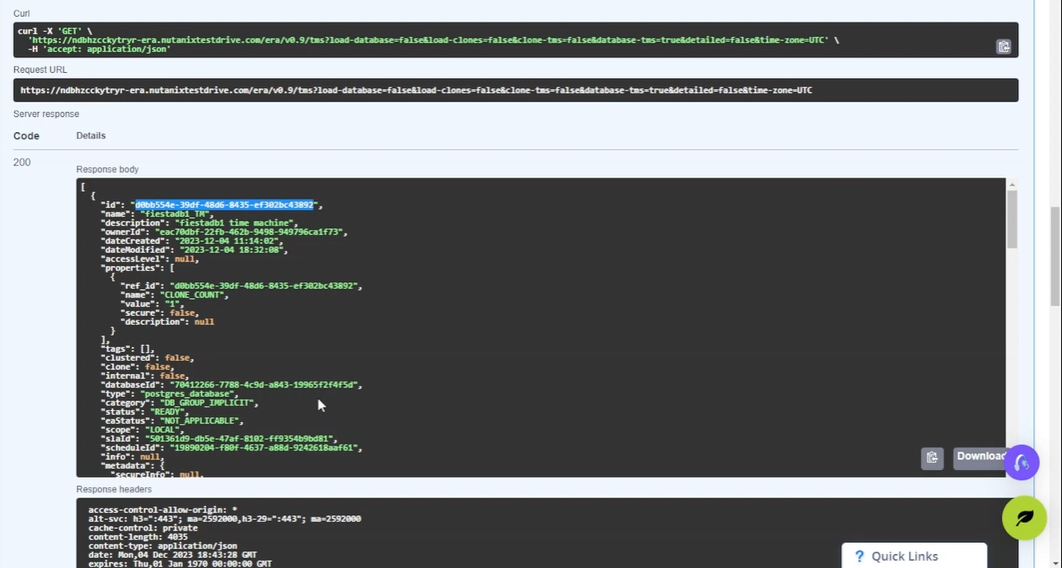
1) Firstly we check what are the currently created snapshots for the database. This can be also called as the available snapshots for the timeMachine.
2) Fetching the timeMachineId to be able to run the snapshot api. This is a mandatory parameter for the API to be called.
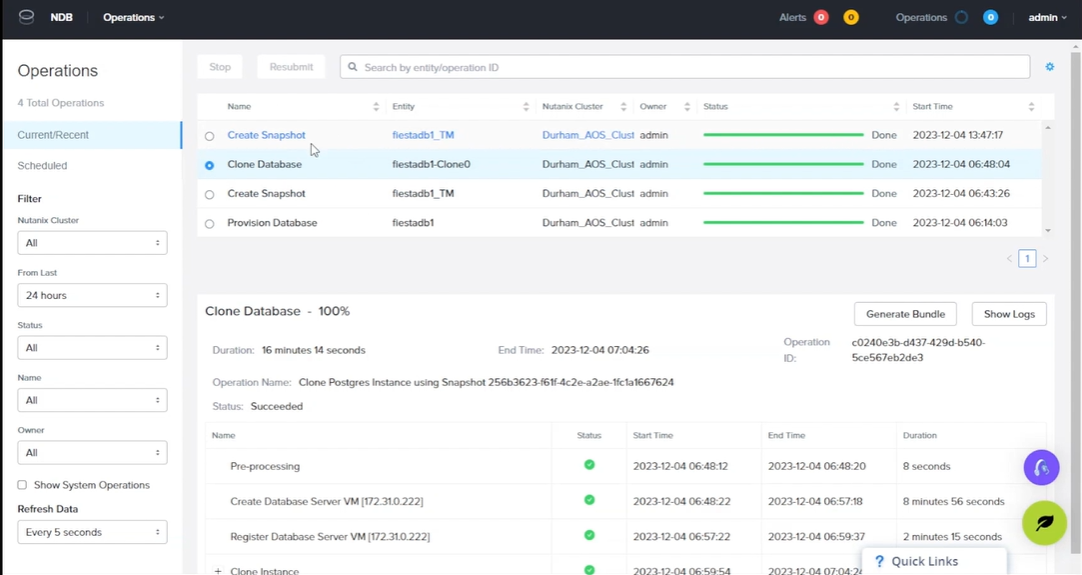
3) Once the api is called, the process for creating a custom snapshot begins, which takes a couple of minutes to complete successfully.
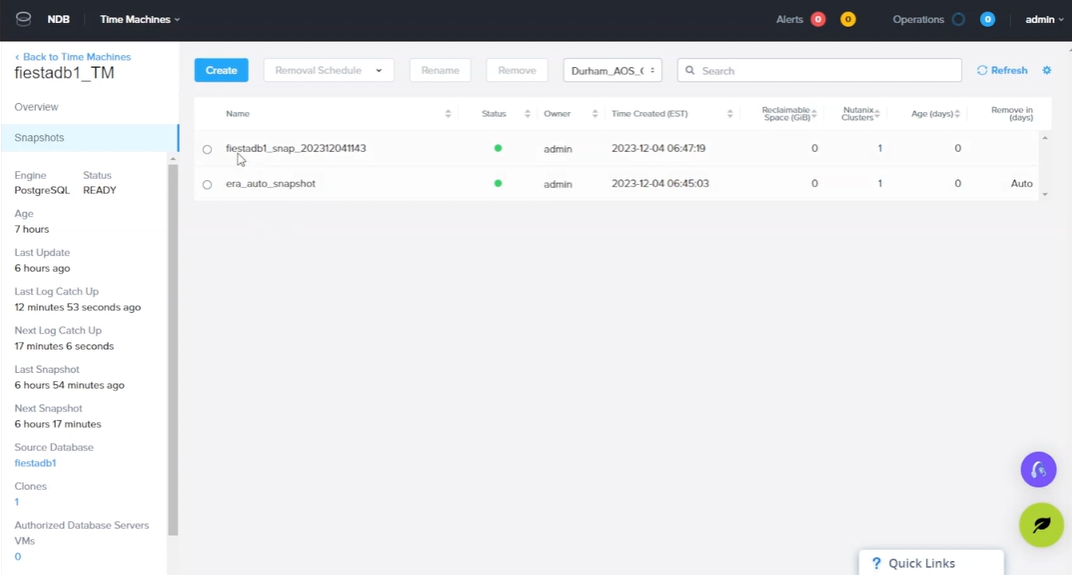
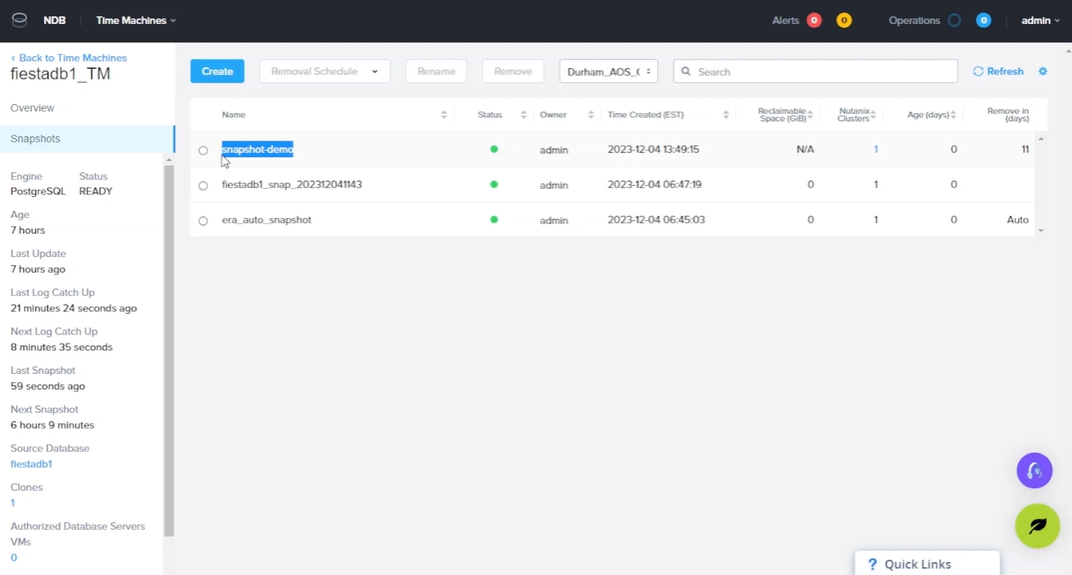
4) Once the operation is run successfully, we can see the newly created snapshot in the UI.
Test Plan
Snapshot creation: The major testing of this feature would be to test the functionalities of the newly created API for the custom snapshot to be saved with all the additional metadata in the database.
| Test | Test Description |
|---|---|
| New POST API available | This test will ensure that the new API exposed for the custom snapshots in a POST api. |
| Authentication of new API | This test is to make sure that only users with the required permissions should be able to create the snapshots. |
| Verify Snapshot creation | Once the api is called with all the required parameters, the snapshot should be successfully created. |
| Verify Snapshot creation Negative Case | Once the api is called with all the required parameters, the snapshot should be successfully created and if create is unsuccessfully the right message is deleted. |
| Verify the metadata of snapshot | The custom api should also be storing the metadata which can be further used to filter them. |
| Verify the Filter functionality | This test will ensure that the snapshots created can be filtered based on the metadata available. |
| Verify the Delete functionality | This test will ensure that the snapshots created can be deleted based on the metadata available. |
| Verify the Delete functionality Negative case | This test will ensure that the snapshots created can be deleted based on the metadata available and if delete is unsuccessfully the right message is deleted. |
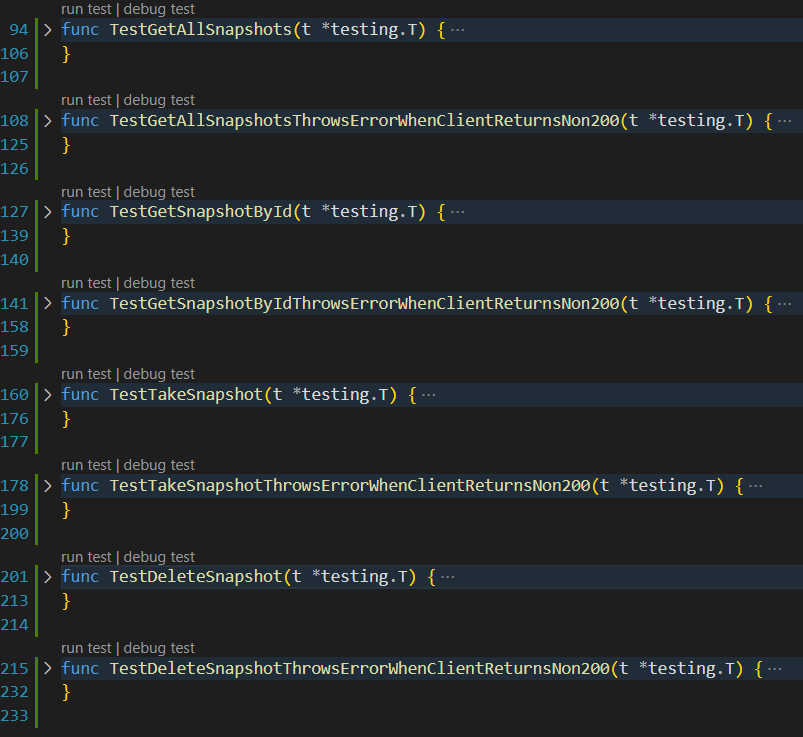
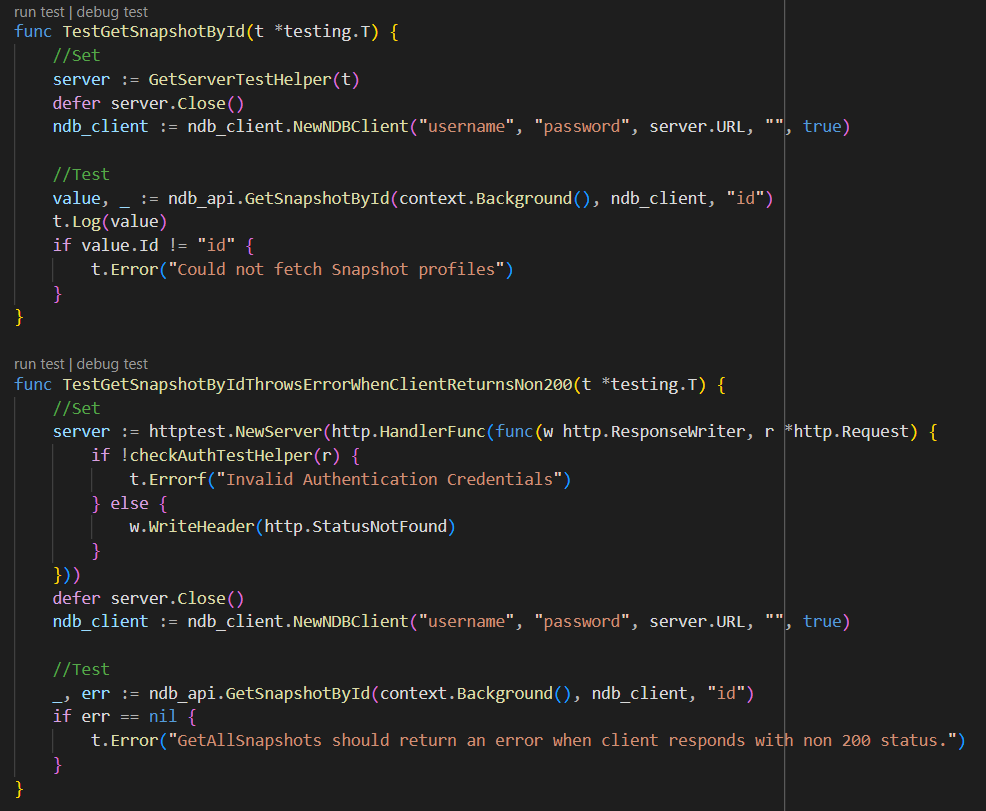
As part of the new test, 8 new tests were added to test the creation of snapshots, getting all snapshot details, getting snapshot details by Id and deletion of snapshots. 4 positive test cases to get the happy path and 4 negative test cases to test the error conditions and exception handling.
Given above is an example for the testing of getting snapshot by Id after the successful creation of it.
References
Relevant Links
Team
Mentor
Student Team
Prathima Putreddy Niranjana
Rohan Vitthal Dhamale
Sachin Kanth
