CSC/ECE 517 Fall 2024 - E2466. UI for Impersonate User
Expertiza
Expertiza is an open-source web application developed using Ruby on Rails. The Expertiza platform was supported by the National Science Foundation, and it is used by instructors and students from selected courses. It enables students and instructors to manage, submit, and evaluate assignments efficiently. This application makes it possible for student collaboration and learning, allowing students to form teams, submit projects, and do peer assessments.
Expertiza [1] is a Ruby on Rails [2] based open source project.
Problem Statement
The current Expertiza platform, implemented in Ruby on Rails, requires a re-implementation using TypeScript and ReactJS to modernize the user impersonation feature for administrators. This project focuses on developing an advanced impersonation interface, allowing authenticated users to assume identities of accounts they have authority over, either directly or through a defined creation hierarchy. Core elements include a responsive UI with optimized autocomplete and debounce, secure JWT token management, and APIs to facilitate controlled user access for enhanced system support and administration.
Terminology Explanation
- TypeScript - Built on JavaScript, TypeScript enhances the language by adding static typing. It helps catch type errors during development, allowing programmers to write more robust and maintainable code.
- ReactJS - A JavaScript library for building user interfaces. It allows developers to create reusable UI components and manage states in web applications.
- JWT (JSON Web Token) - A compact and secure token used to transmit information between different parts of a system as a JSON object. It is used for authentication.
Component Details
- package.json - This file was changed to include the lodash library and its debounce function. This addition was done to help TypeScript understand the structure of the debounce function, allowing features such as type checks and autocompletion.
- App.tsx - The file was changed to set up a route /impersonate in the Expertiza Application. When a user accesses this route, it will check if the user has the correct permission. If the user passes the check, then it will render the ImpersonateUser component.
- masquerade-mask.png - Image added to show a user is using the Impersonate feature.
- Header.tsx - This file was changed to include an impersonation banner indicating that a user is being impersonated and the impersonation session is active. The banner also has a cancel button that, when pressed, will reset the authentication state to the original user's credentials and clear the impersonation data.
- ImpersonateUser.css - A CSS file used by ImpersonateUser.tsx to display a spinning circle while the user is typing in the search field.
- ImpersonateUser.tsx - Allows the currently authenticated user to impersonate the identity of another user with roles lower than the current user. This is done by searching for their username and selecting them from a dynamically filtered dropdown list. The search field uses debouncing to decrease the number of API calls to the backend while the user types. Once a user is selected, the component sends an impersonation request with a JWT (JSON Web Token) to securely switch the active user session and displays a customized banner in the header to clearly indicate which user is currently being impersonated. The original user credentials are stored in LocalStorage, and it will be used when the user stops impersonating and wants to return to their default session.
Files Modified
- package.json [3]
- App.tsx [4]
- masquerade-mask.png [5]
- Header.tsx [6]
- ImpersonateUser.css [7]
- ImpersonateUser.tsx [8];
Design Patterns
Command Pattern
The Command Pattern encapsulates a request (or an action) into a separate object. This allows the user to pass the command as a parameter so the user can save it or execute it later. The design pattern separates what needs to be done (in this case, the command) from the requester.
The Command Pattern can be seen within the code, functions such as fetchUsers, selectedUser, and impersonateUser each encapsulate the logic for a specific action. These actions include fetching a list of users, retrieving a selected user, or initiating an impersonation of a selected user. These functions receive parameters as an input and execute their tasks.
handleImpersonate function is the invoker, which calls the {BASE_URL}/api/v1/impersonate POST API. The code below shows this pattern:
  const handleImpersonate = () => {
    // Store only the initial User's JWT token and information
    if (!localStorage.getItem("originalUserToken")) {
      localStorage.setItem("originalUserToken", auth.authToken);
    }
    const impersonateMessage =
      "Impersonating a " +
      fetchSelectedUser?.data.userList[0].role.name +
      " with name " +
      fetchSelectedUser?.data.userList[0].name;
    localStorage.setItem("impersonateBannerMessage", impersonateMessage);
    impersonateUser({
      method: "post",
      url: `/impersonate`,
      data: {
        impersonate_id: fetchSelectedUser?.data.userList[0]?.id,
      },
    });
  };
Facade Pattern
The Facade Pattern provides a simple interface to a set of classes. It hides the inner workings of a complex system by providing a simple interface, making it easier to work with without knowing the inner details.
A clear example of a Facade Design pattern within our code is the use of the useAPI hook. The API handles all the complexity involved in making HTTP requests. The rest of the code can interact with useAPI, focusing only on what data needs to be fetched or updated without needing to know the details of how it is done. The code below shows this pattern:
const { data: userResponse, sendRequest: fetchUsers } = useAPI();
In the code snippet, userResponse is used to store the data returned by the useAPI hook after an API request, while fetchUsers is a function provided by useAPI for making the actual API call.
  useEffect(() => {
    fetchUsers({
      method: "get",
      url: `/users/${auth.user.id}/managed`,
    });
  }, [fetchUsers, auth.user.id]);
The useEffect triggers an API call to fetch a list of users whose roles can be impersonated by the currently authenticated user when the component mounts.
Tasks Completed
1. Impersonation User Interface
- A ImpersonateUser.tsx webpage was created within the Expertiza front-end to allow authorized users, such as administrators and higher roles, to access the impersonation feature.
- Upon a successful impersonation, the user will be redirected to the homepage, and the authentication session will be switched to the impersonated user (using their JWT token). This will prompt a banner to appear at the top of the screen, indicating the active impersonation session. This banner includes details about the impersonated user's role and name, and it will also have the option to end the impersonation session.
2. Efficient User Search
- A debounce function was integrated into the search field on the Impersonate User page to display filtered users in a dropdown that matches the entered query. The purpose of this debounce function is to ensure API calls are only triggered when the user is typing.
- An autocomplete entry feature was implemented in the dropdown. Now, the user can click on the autocomplete entries, and the search field will autofill with the selected user username.
- The "Impersonate" button will stay disabled until a valid username is entered into the search bar.
- A spinner icon was integrated into this debounce. It will spin when a user is typing in the search field. This indicates that results are being fetched actively. The spinner stops when the user is no longer typing.
3. API Integration
- Made API calls to the user impersonation backend.
- GET a selected user's information. The response will be a userList object with details about the user, such as their ID, full name, role, etc.
- POST to retrieve a selected user's JWT token. This is used to facilitate the impersonation.
4. Secure Management and Handling of JWT Tokens
- Implemented effective handling of JWT tokens for the original user and the impersonated user.
- The original user's token is stored using LocalStorage before impersonation, while the impersonated user's token is used only once to switch to the authentication token. This allows for successive impersonations (if the user's role allows). This method of storage allows the user to revert back to their default session once the impersonation session is canceled.
Impersonation UI Walkthrough
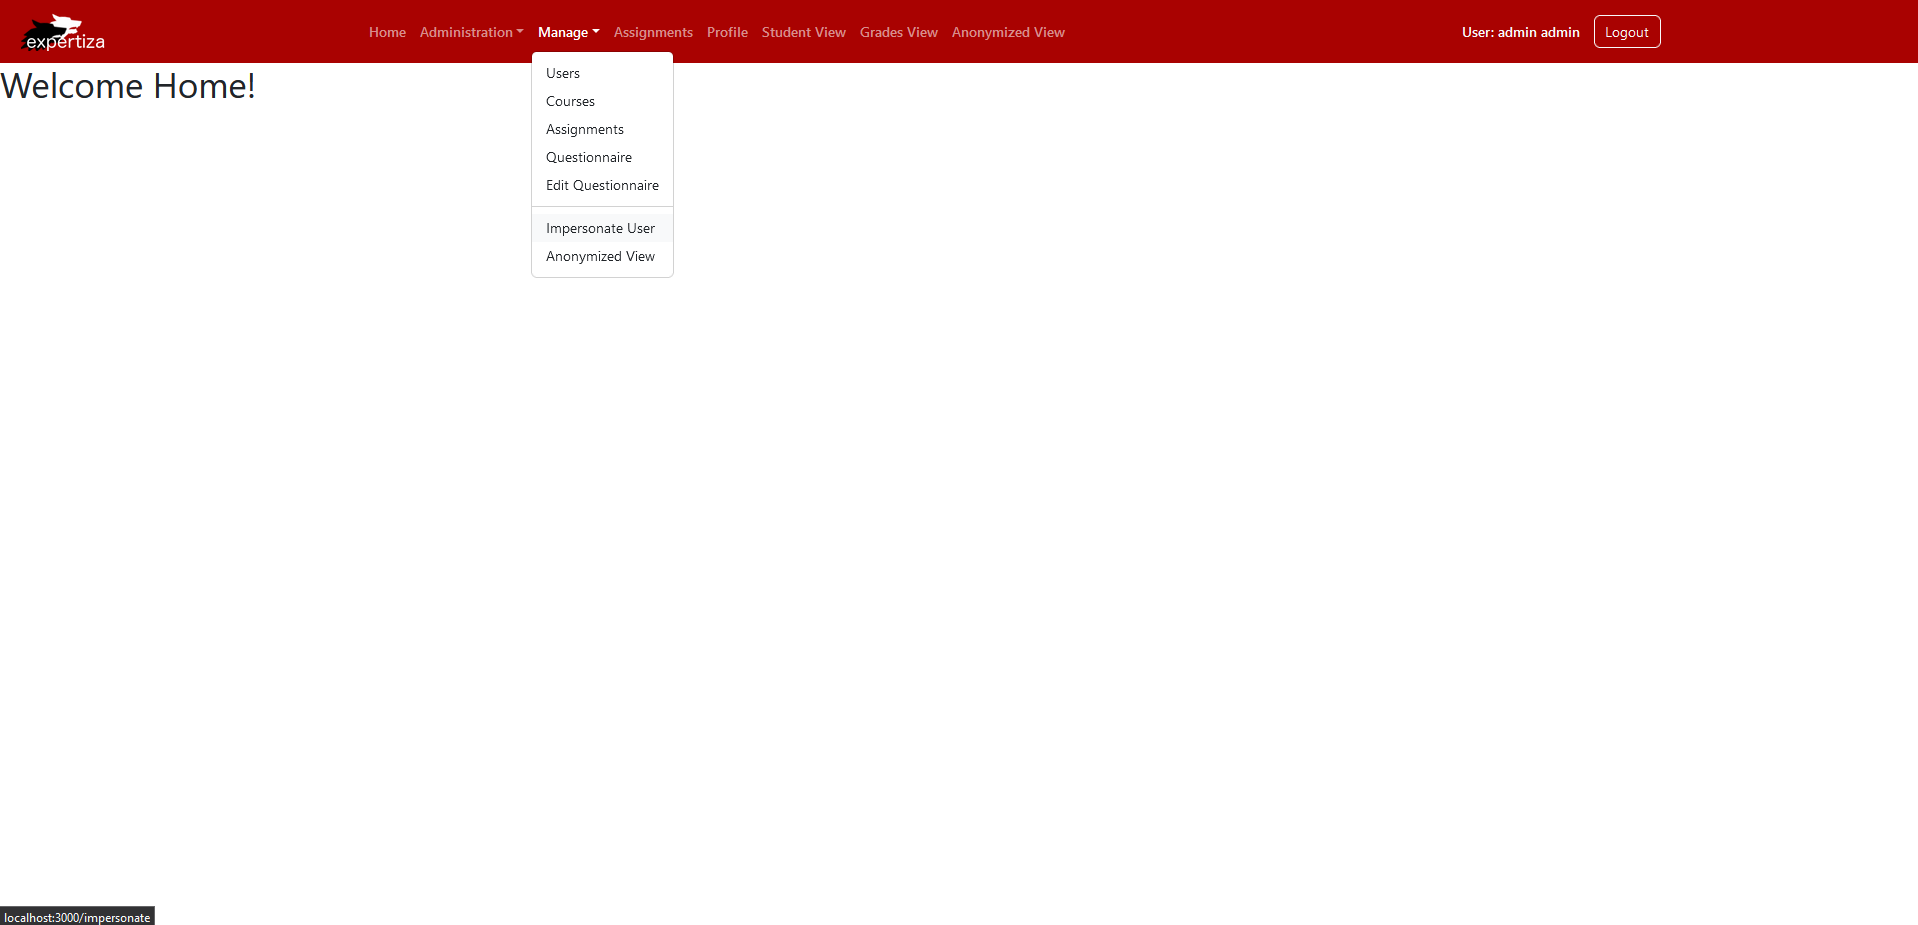
It will bring you to this homepage.
It will display this dropdown.
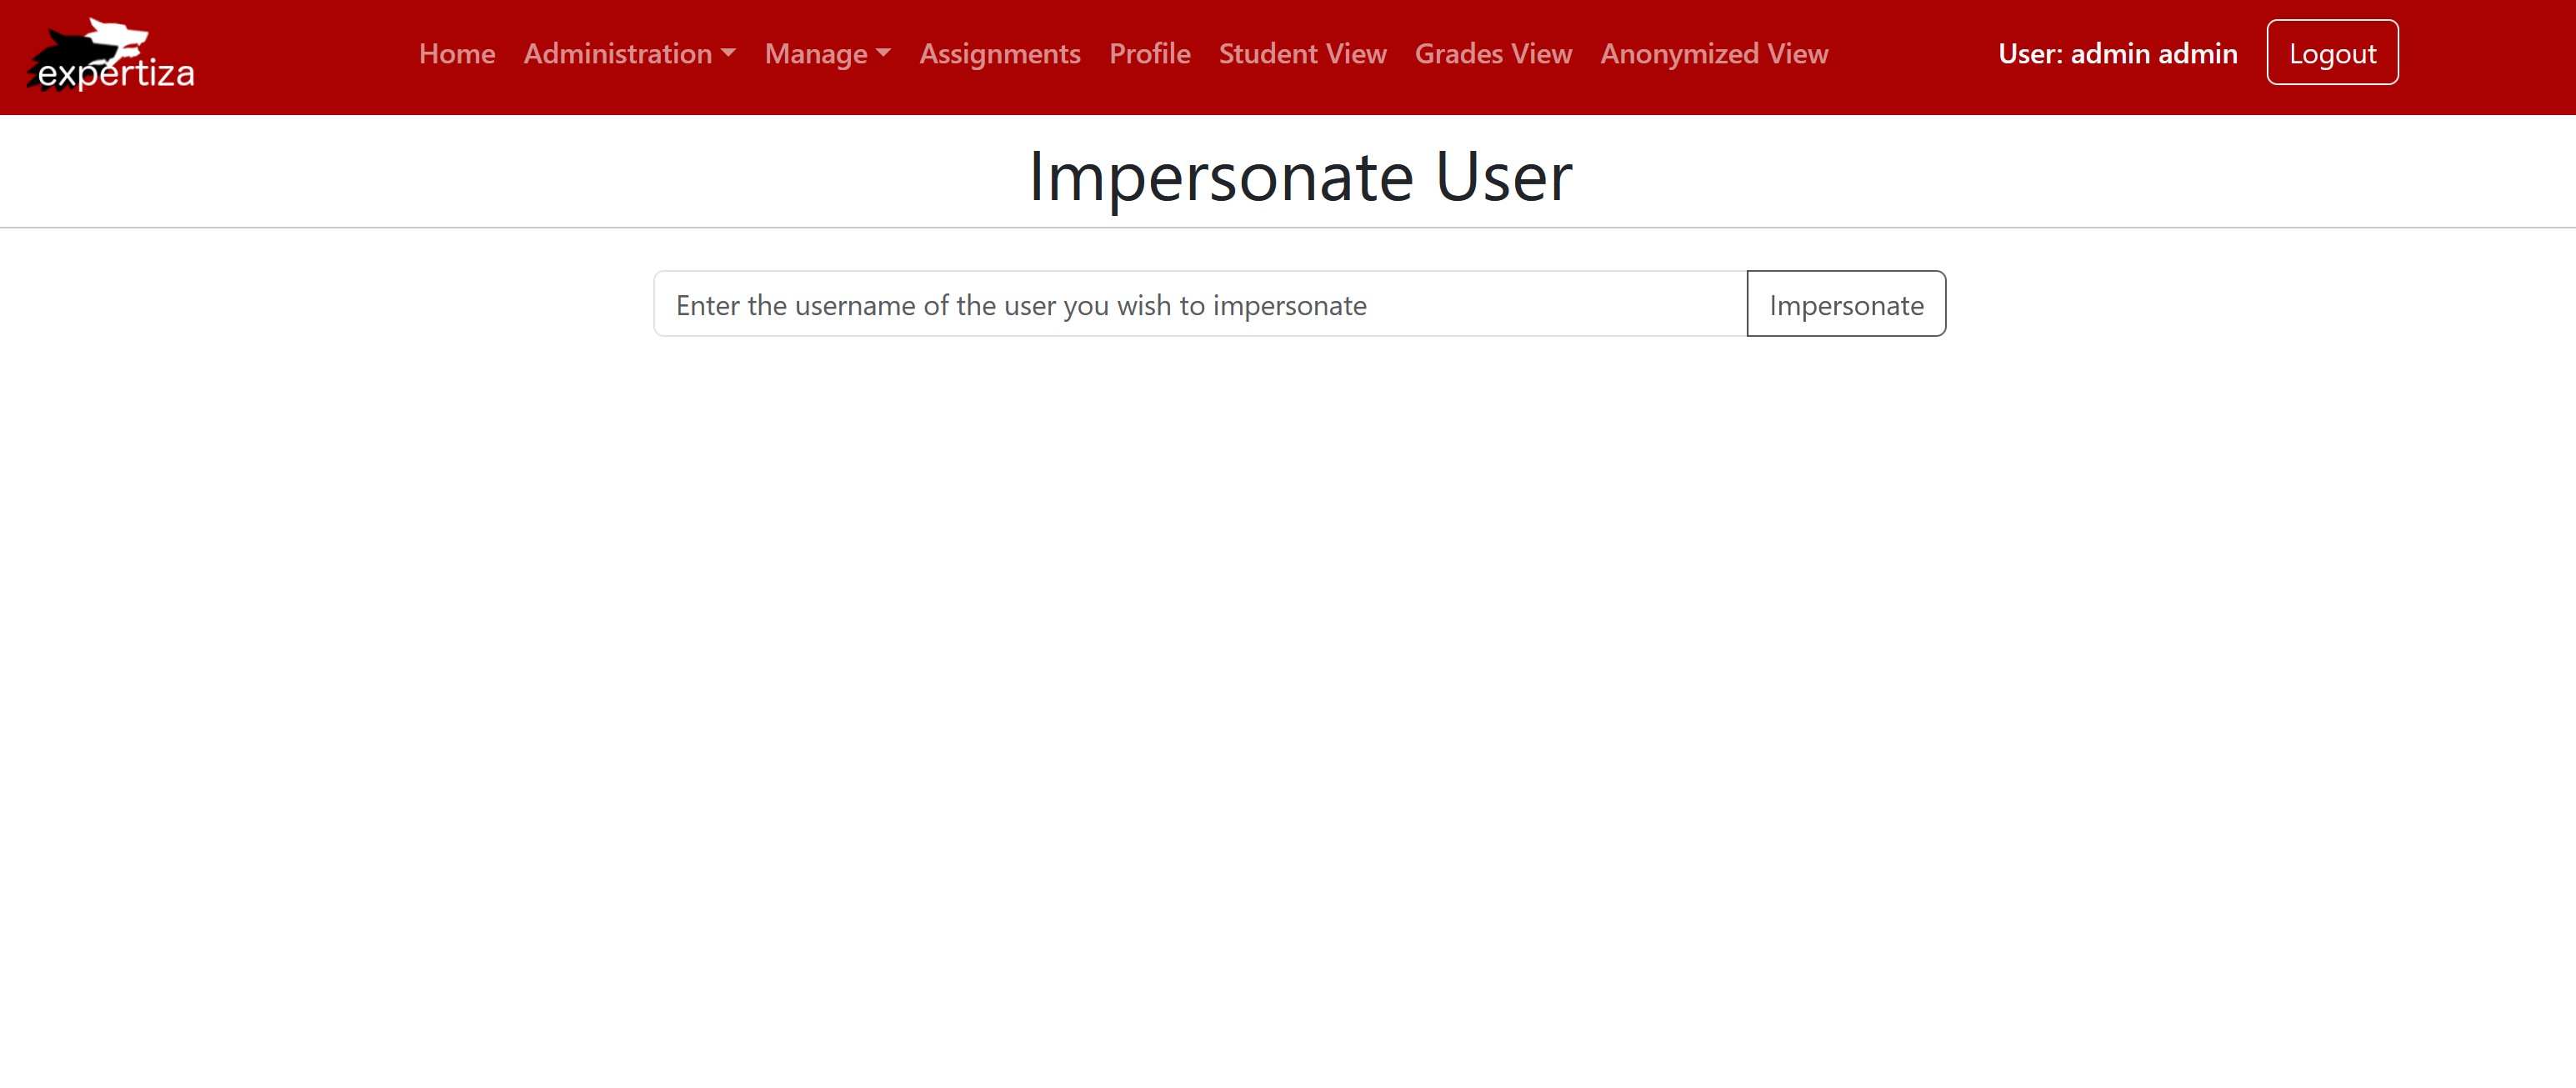
It will bring you to this Impersonate User page.
You will see that a list of matching users will appear in a dropdown. You can select the one you want to impersonate or finish typing out their username.
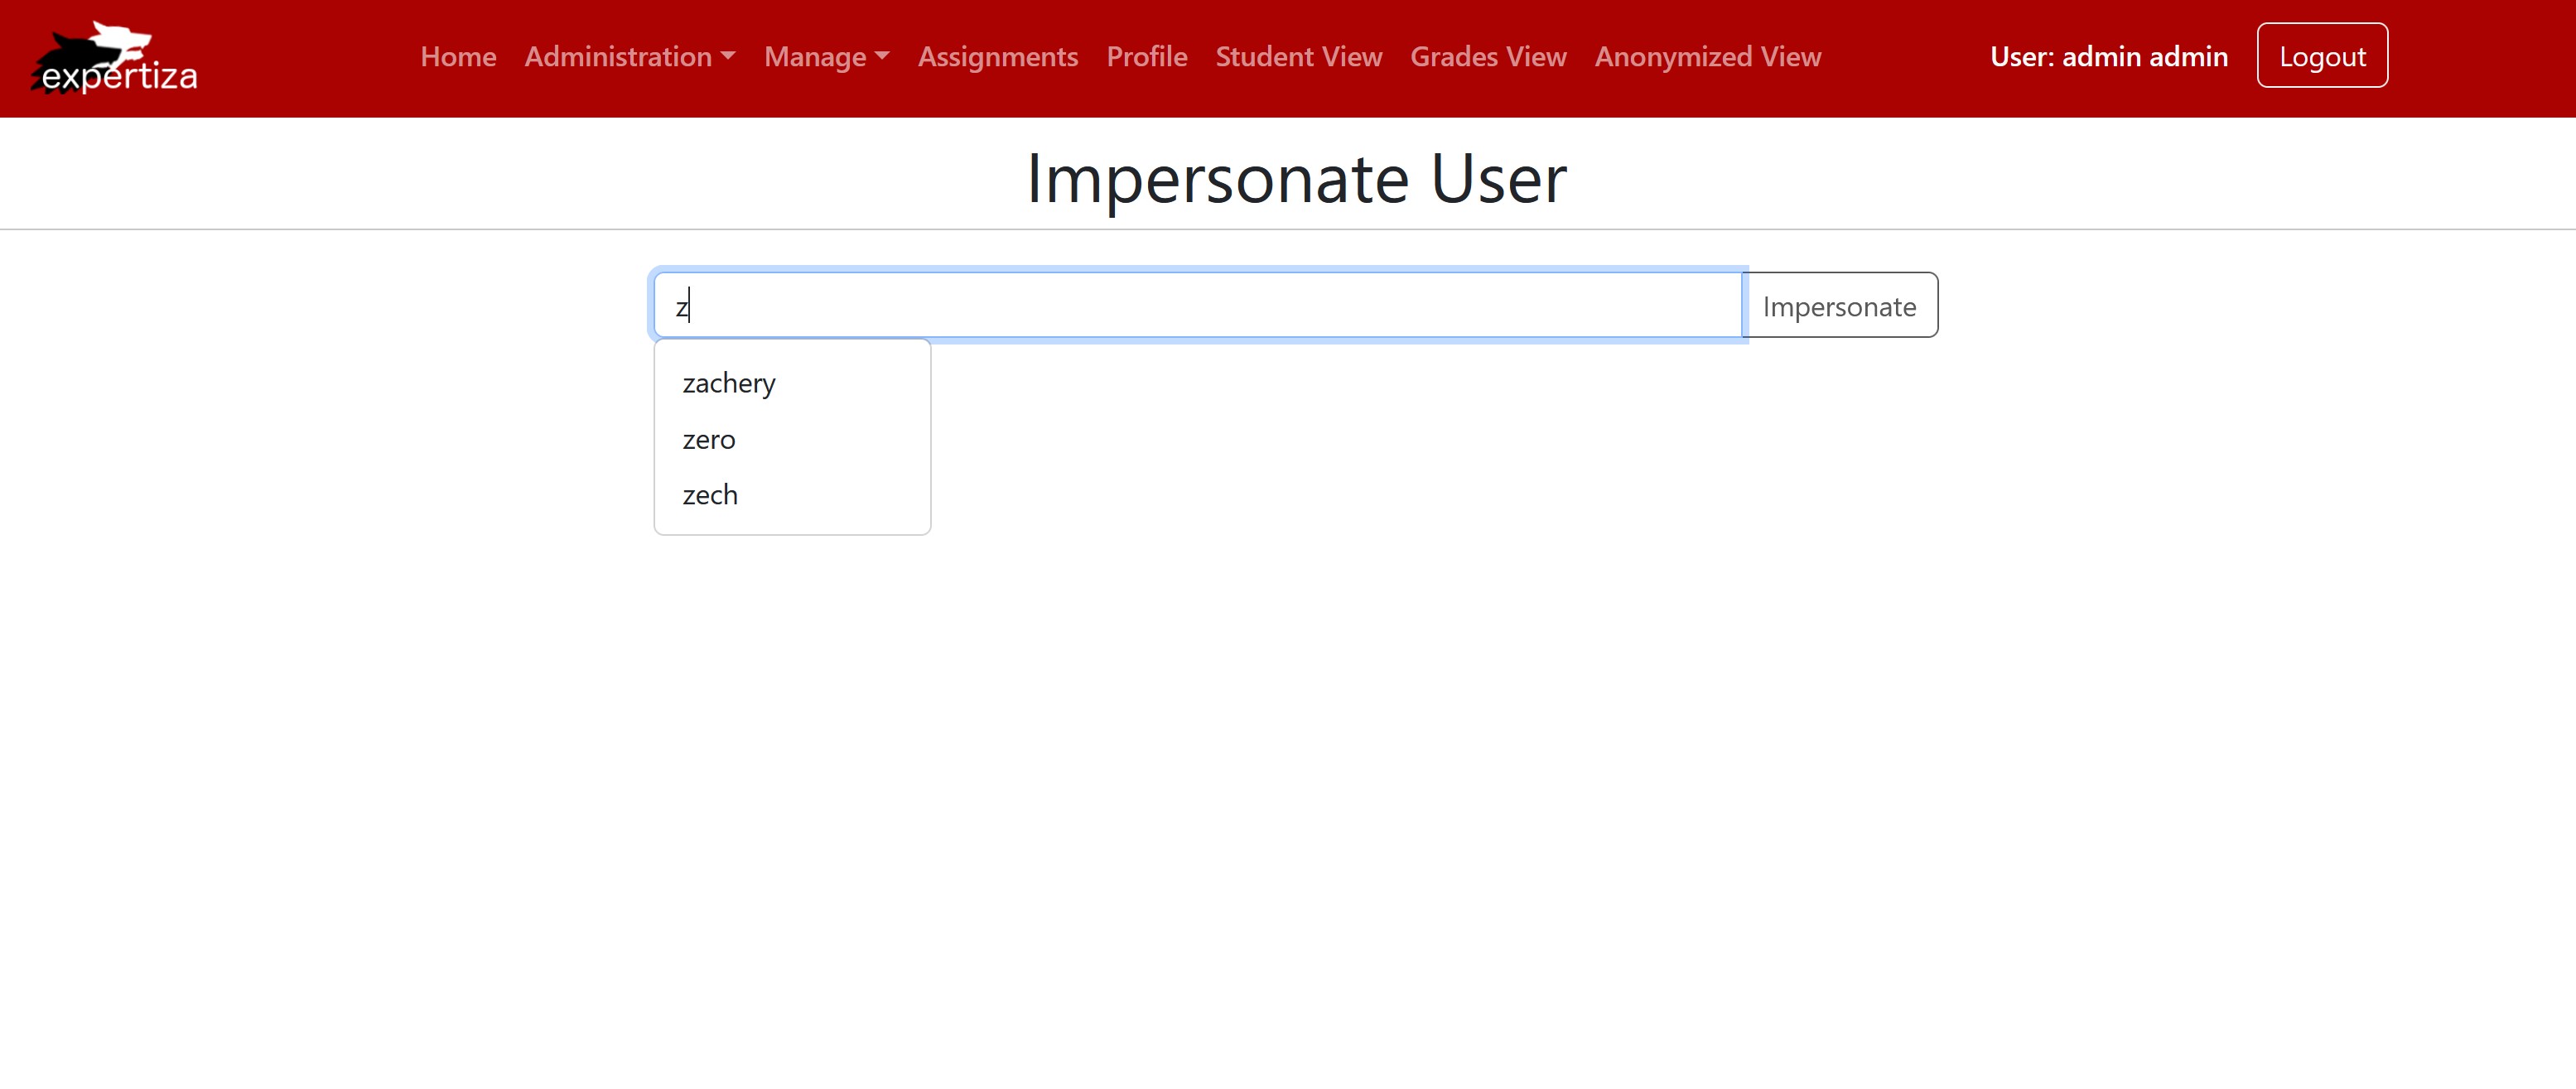
Shows the dropdown is working and getting users with matching letters
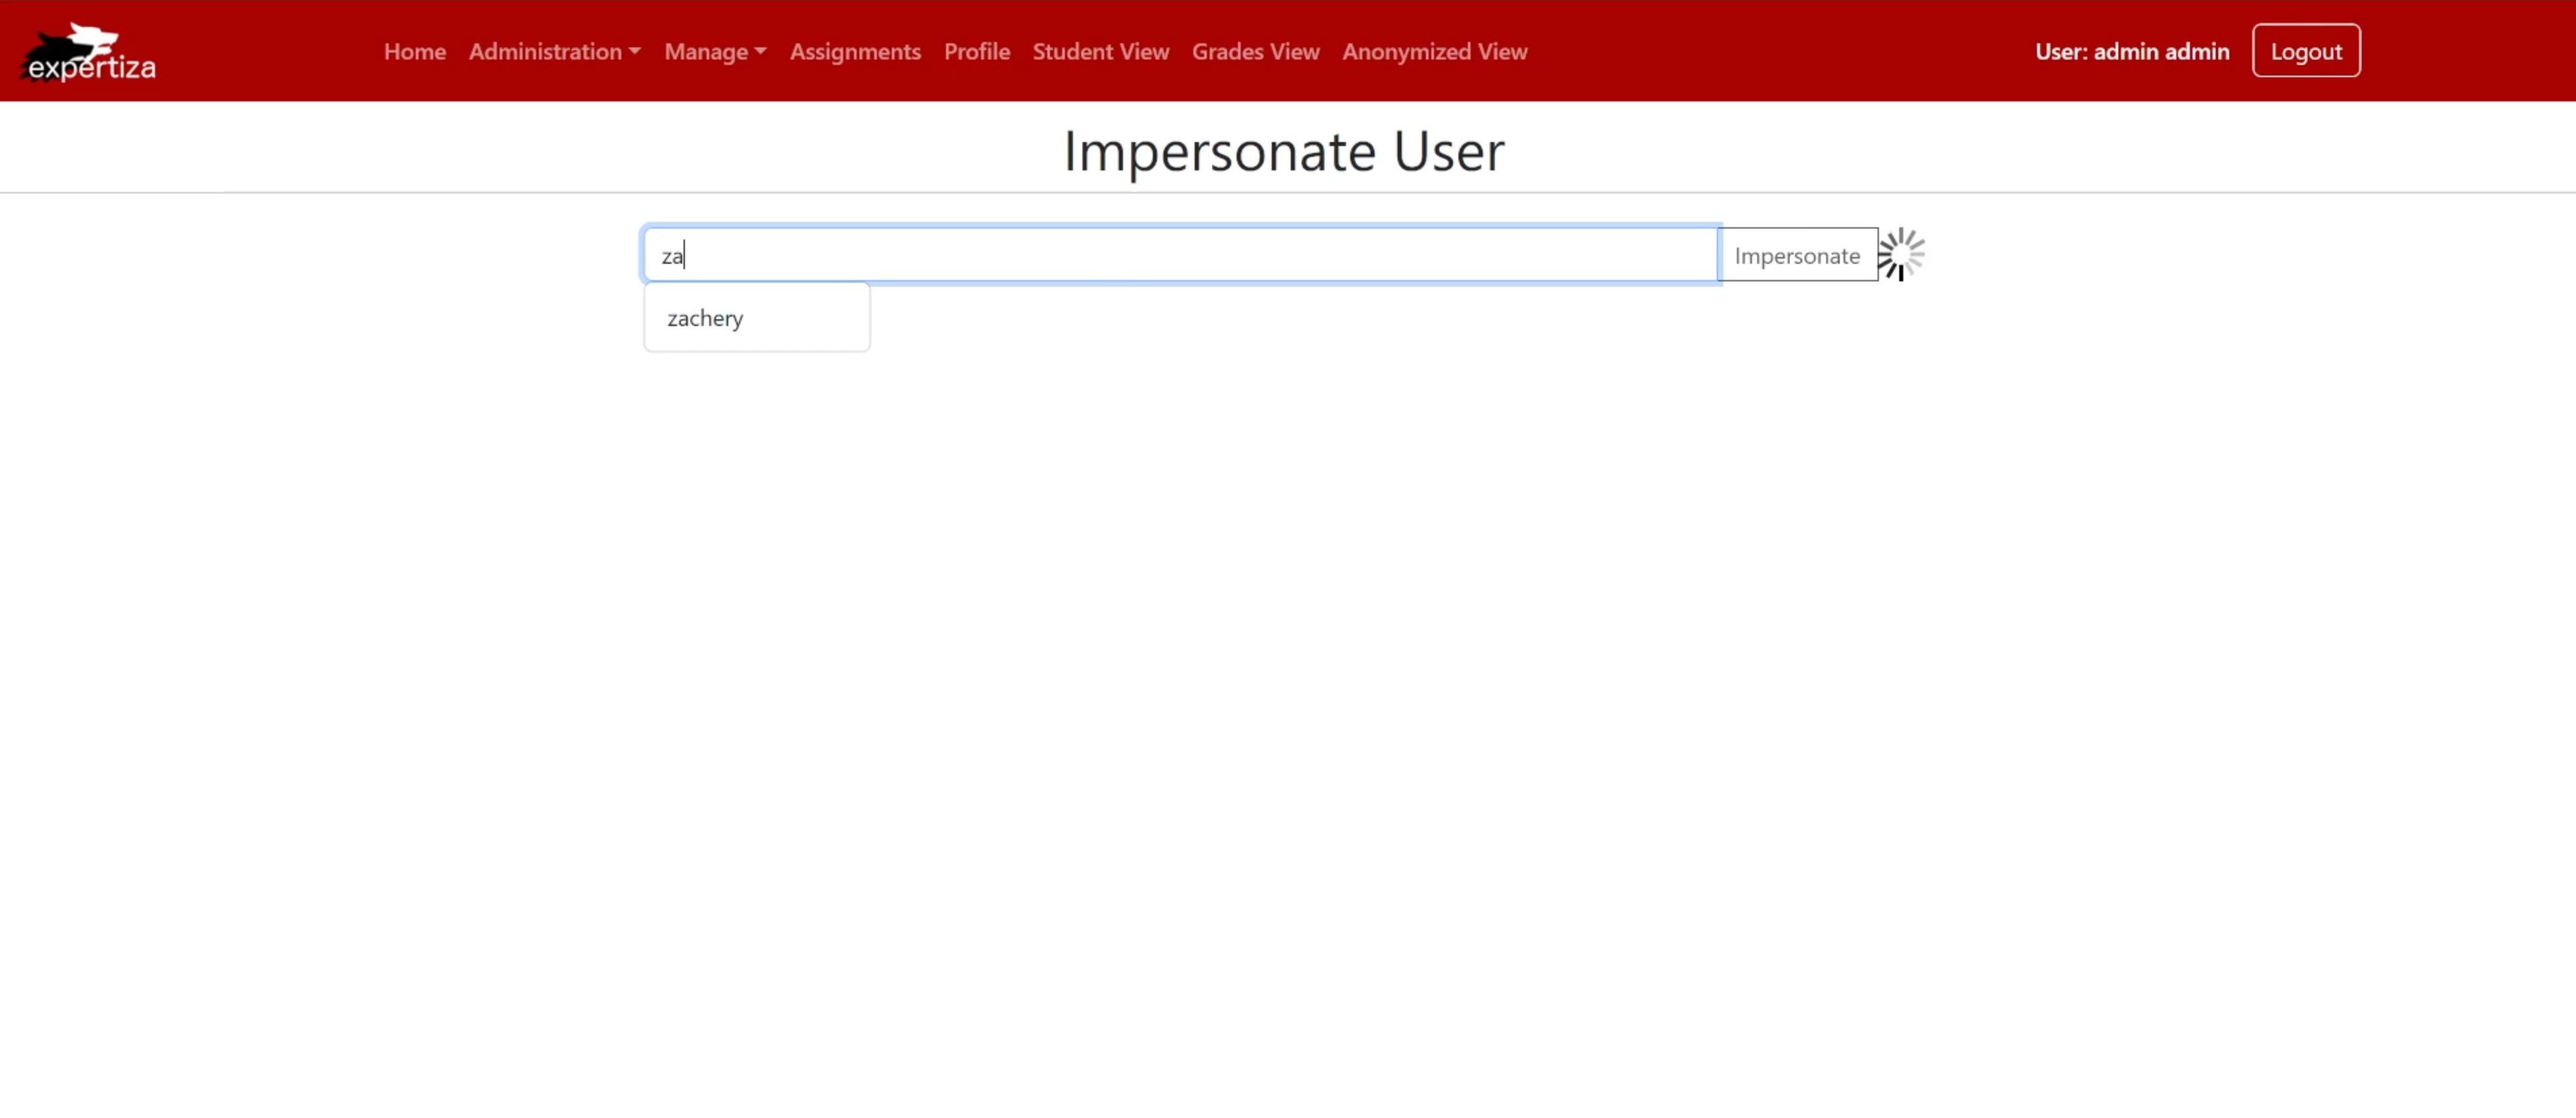
Shows the Impersonate User page and the spinning wheel working
After you have entered the user you wish to impersonate, the "Impersonate" button will be enabled.
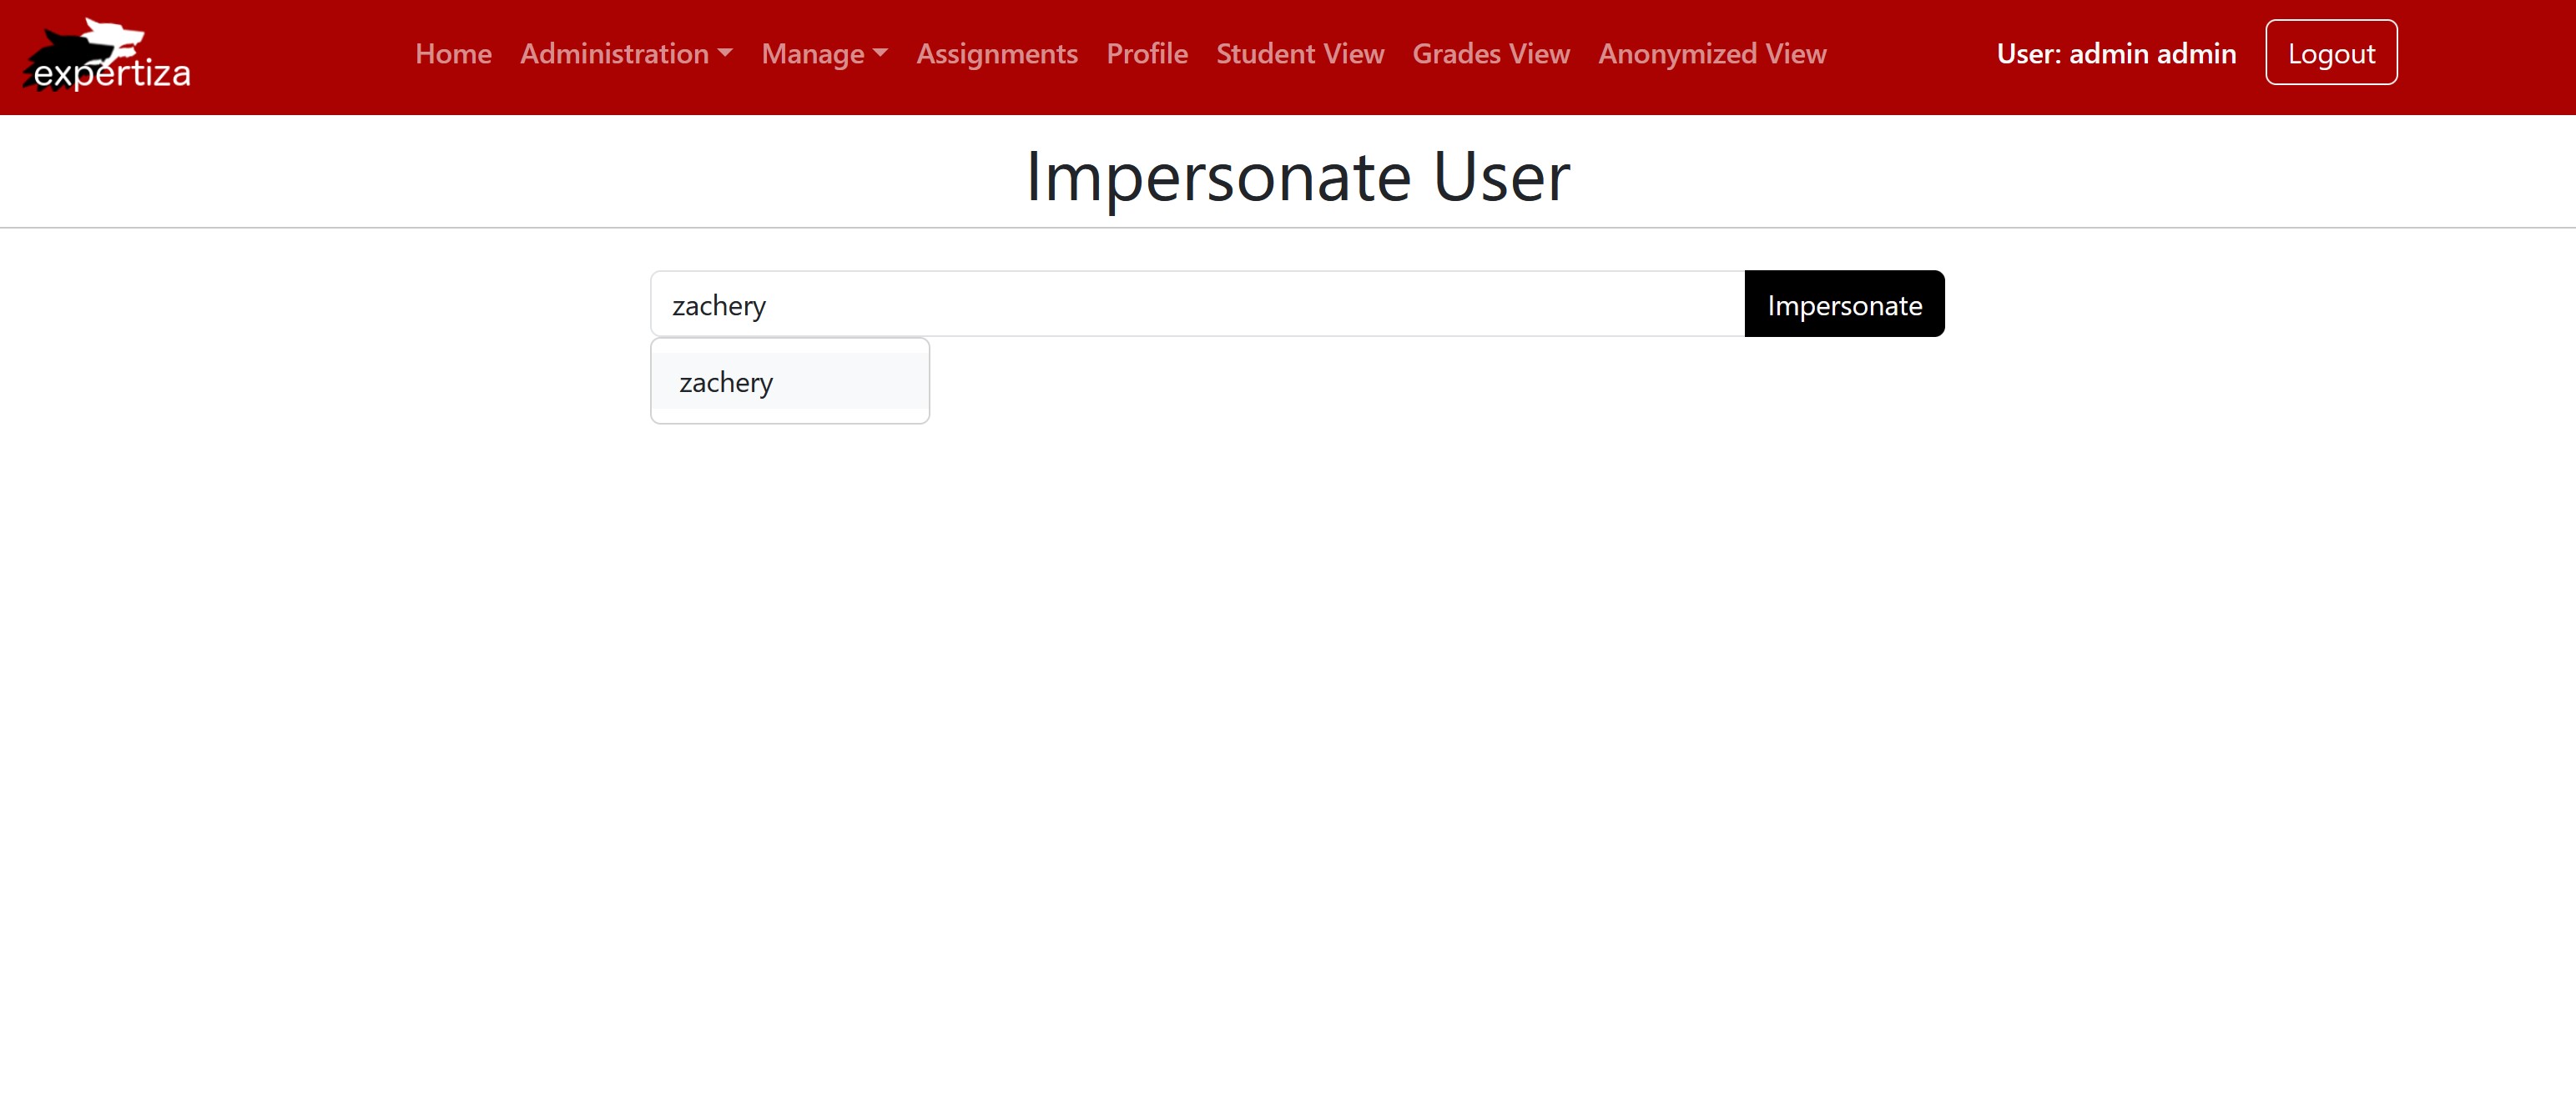
Shows the Impersonate Button is enabled, and we can click to impersonate
You are now impersonating the selected user. A banner will be present in the header while the impersonation session is live.
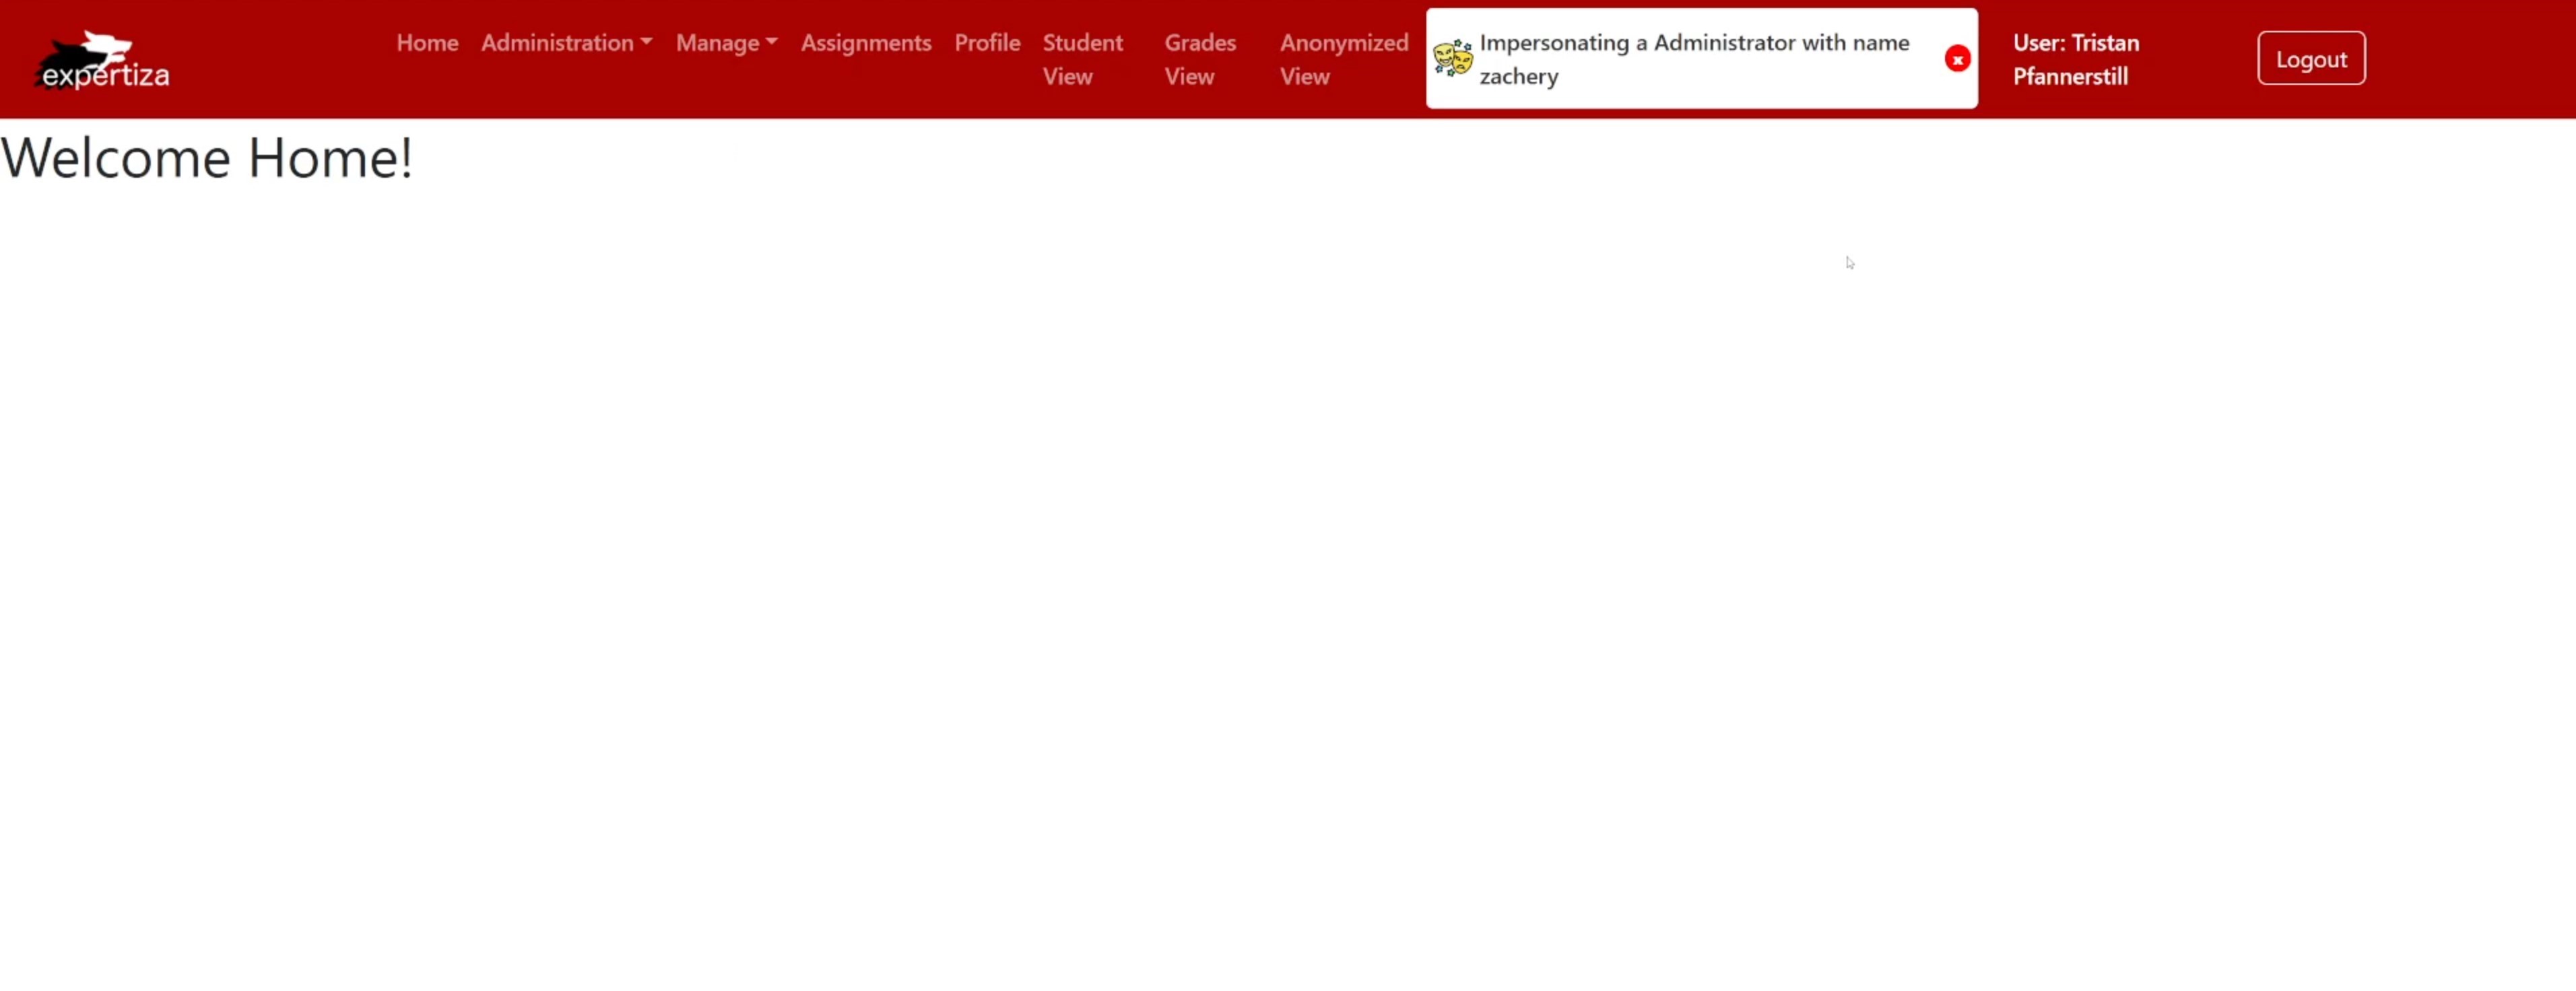
Shows the successful impersonation of Admin with name zachery
Note, margarite (Instructor) is a role below zachery (Admin)

Shows Admin can impersonate an Instructor and that the banner changes based on the impersonated user

Shows the Super Admin is restored and successfully returns to the homepage
Failed Impersonation Workflow - Scenario One
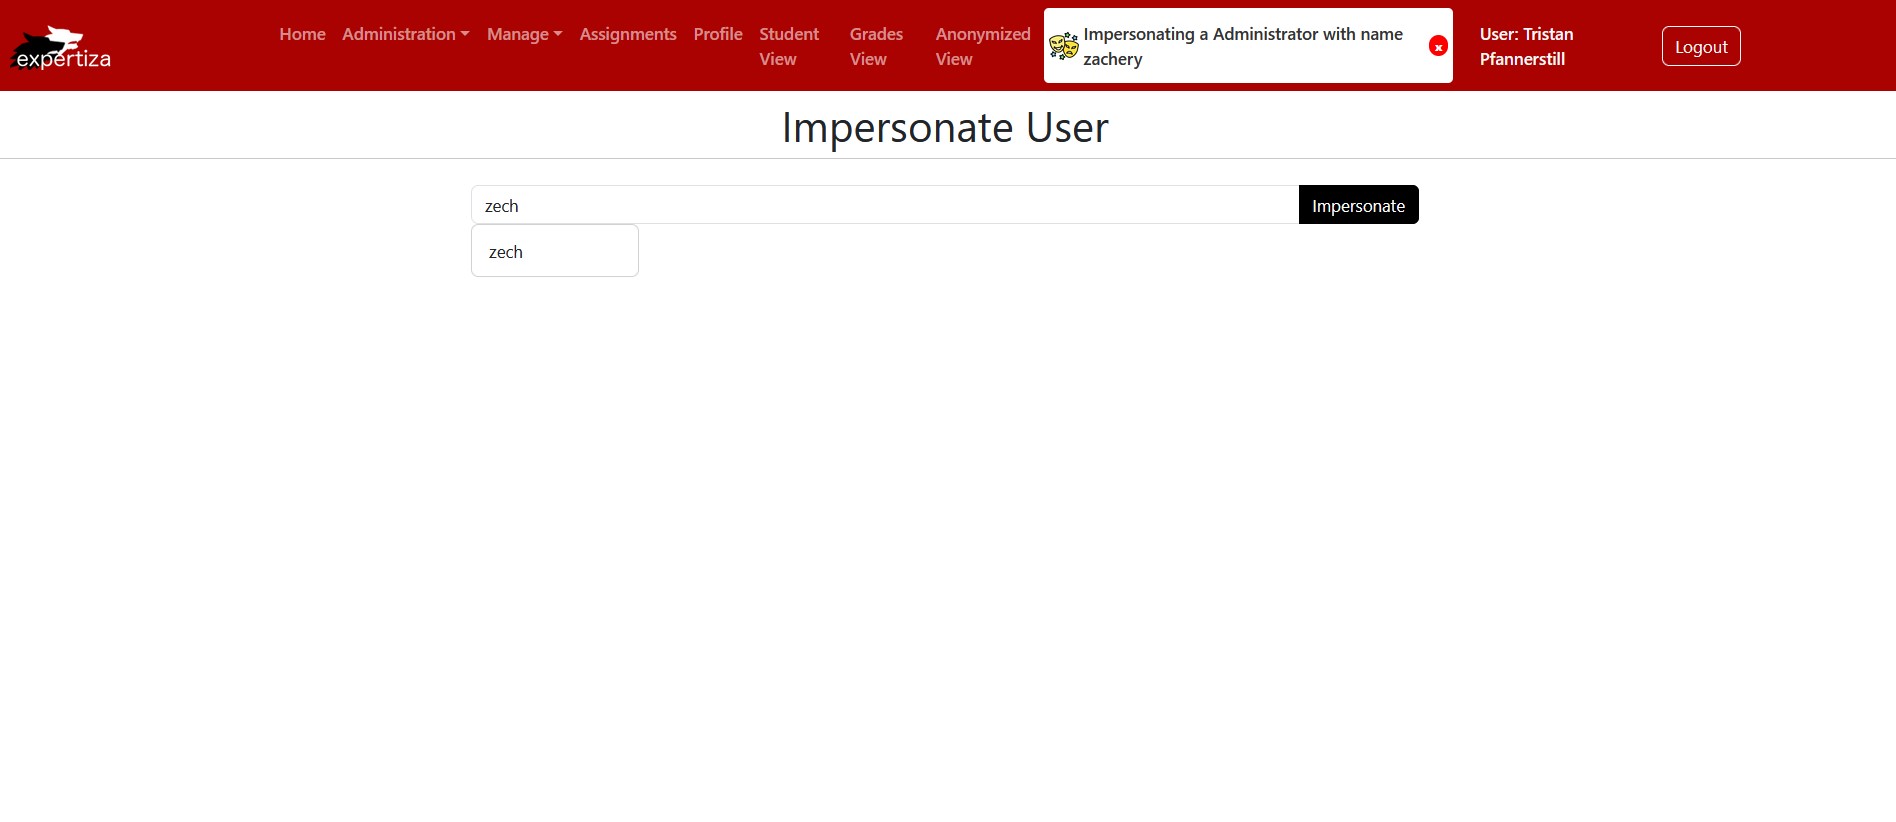
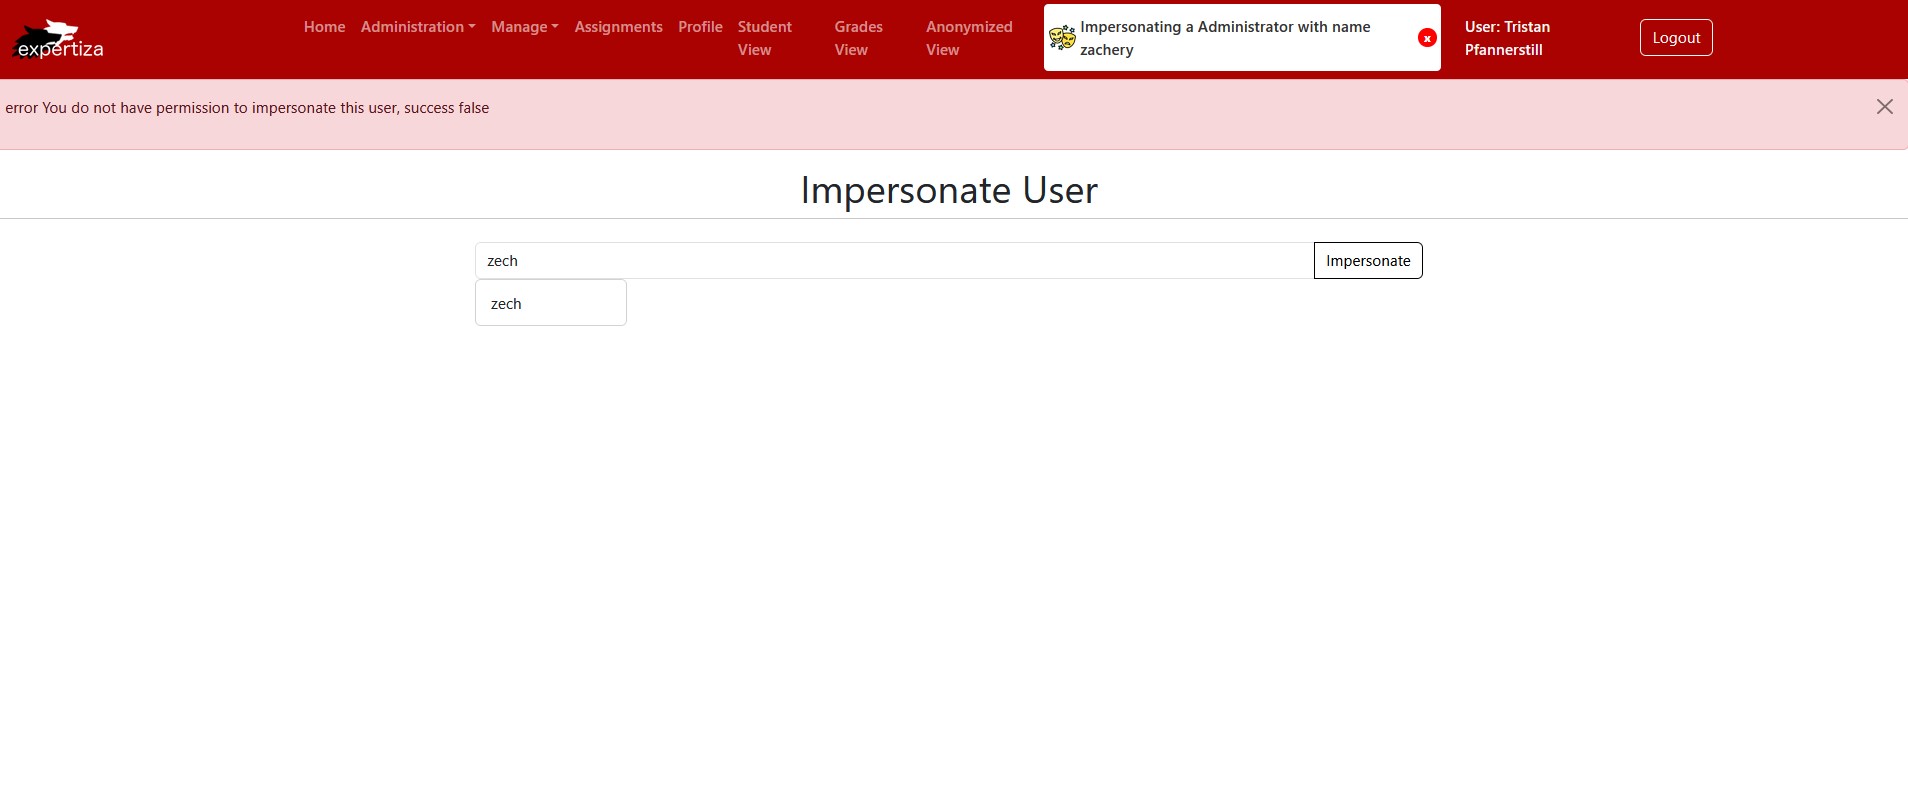
The user zachery (Admin) is trying to impersonate zech (another Admin); however, this is not allowed.
When the user clicks the "Impersonate" button, an error message pops up. This indicates that the user cannot impersonate the selected user due to a permission error.
Failed Impersonation Workflow - Scenario Two
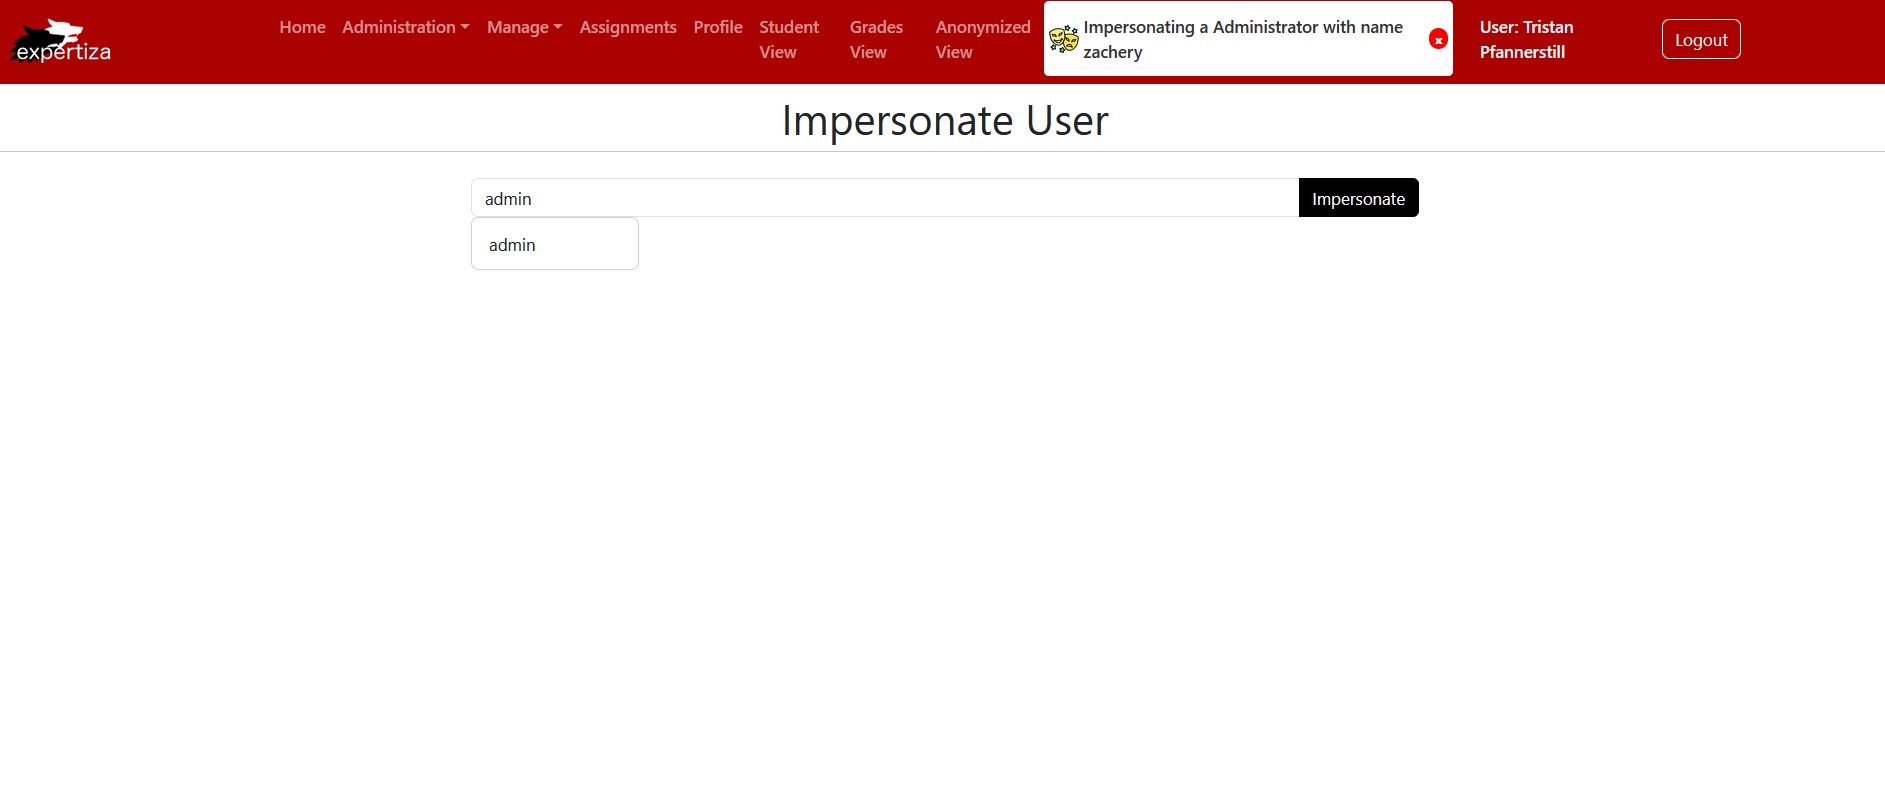
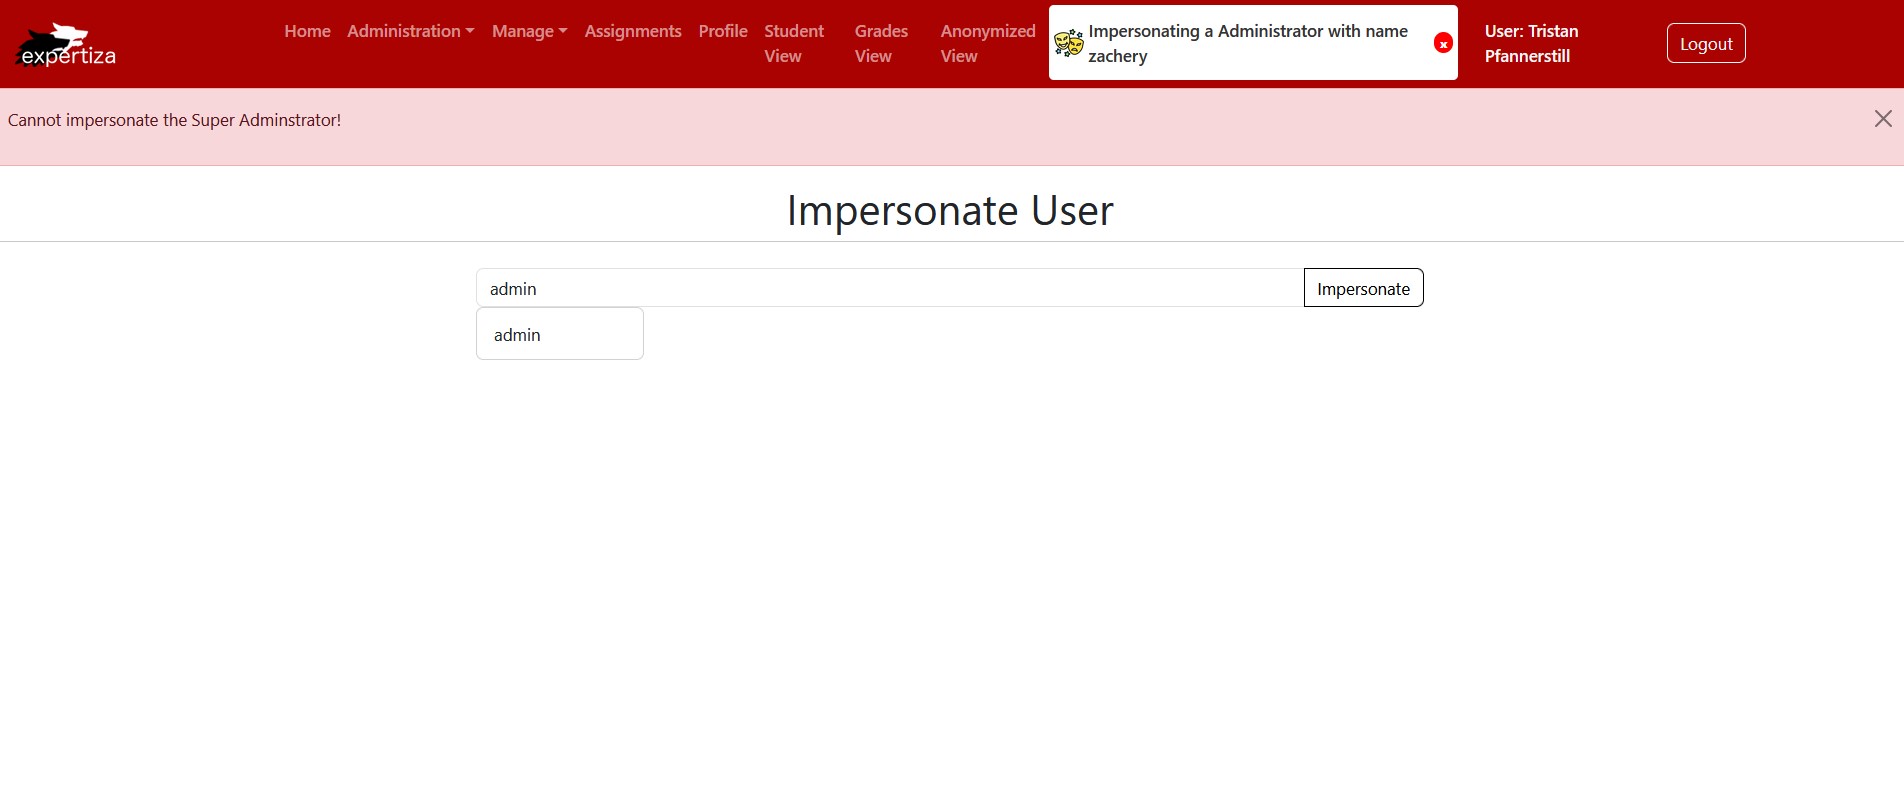
The user zachery (Admin) is trying to impersonate admin (Super Administrator); however, this is not allowed.
When the user clicks the "Impersonate" button, an error message pops up. This indicates that the user cannot impersonate the selected user due to a permission error.
Impersonation UI Testing
Since this project is a front-end implementation, we manually tested the functionality by navigating through the UI - [9]
Note - We were unable to deploy this application since the Impersonation Backend PR [10] has yet to be merged into the Reimplementation Expertiza Backend [11]
Team
Mentor
- Jay Patel <jhpatel9@ncsu.edu>
Students
- Pierce Whelan <pwwhelan@ncsu.edu>
- Calvin Jiang <crjiang@ncsu.edu>
- Hechun Zhang <hzhang56@ncsu.edu>
Pull Request
References
Project Instructions [13]
Impersonation Backend (New Expertiza) [14]
Impersonation Backend (Old Expertiza) [15]

