CSC/ECE 517 Fall 2017/Semester Project - Implement the Microdata API
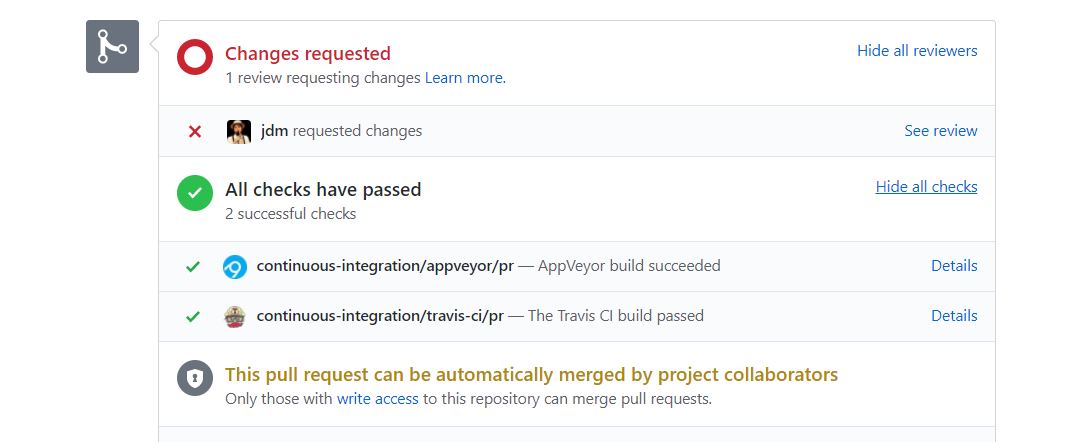
Pull Request Status
We have incorporated the review comments and the build was successful. We are waiting for approval from Josh.
Introduction
HTML Specification
The WHATWG Microdata HTML specification allows web data to be enriched in that it allows machines to learn more about the data in a web page. A typical example of real-world use of Microdata is illustrated below
Here is a simple HTML block that has some information about a student.
  My name is <span>Grad Student</span>, and I am a <span>student</span> at <span>NC State</span>
  I live in  <span><span>Raleigh</span>,<span>NC</span></span>
If a machine (web parses etc) were to read this block as it is, it would not be able to directly interpret what part of the sentence is a Name or an Address.
This is where Microdata shines. It defines attributes to different parts of the HTML block. Below is the same information with Microdata -
<div itemscope itemtype="http://data-vocabulary.org/Person">
  My name is <span itemprop="name">Grad Student</span>, and I am a <span itemprop="title">student</span> at
  <a href="http://ncsu.edu" itemprop="affliation">NC State</a>.
  I live in <span itemprop="address" itemtype="http://data-vocabulary.org/Address"><span itemprop="locality">Raleigh</span>,<span itemprop="region">NC</span>
  </span>
</div>
As it is clear, the attributes itemprop and itemtype are used to enrich data: the value title has been assigned to the word student, the value locality has been assigned to the state, NC. This way any machine that accesses this HTML can understand the content better. More information about the Microdata specification is available here. Some popular websites like Google, Skype and Microsoft use the Microdata from websites to provide additional insights. The number of websites that use Microdata is growing; currently about 13% of websites use Microdata (statistics courtesy w3techs.com).It should also be noted that the presence of Microdata does not change how the HTML block looks.
Servo
Servo is a modern, high-performance browser engine designed for both application and embedded use and written in the Rust programming language. It is currently developed on 64bit OS X, 64bit Linux, and Android.
Servoshell
Servoshell is a work-in-progress front-end for the servo browser engine. In other words, it is a browser user interface that uses Servo engine, and has different GUIs depending on the system platform. It is also written in the Rust programming language.
Rust
Rust is a systems programming language, that focuses on safety, speed, and concurrency. Its design lets you create programs that have the performance and control of a low-level language like C, but with the powerful abstractions of a high-level language like Python. Rust performs the majority of its safety checks and memory management decisions at compile time, so that your program’s runtime performance isn’t impacted. This makes it useful in a number of use cases that other languages aren’t good at: programs with predictable space and time requirements, embedding in other languages, and writing low-level code, like device drivers and operating systems.
More information about the Rust programming language is available here
Overview
A typical flow for our project is as follows:
1. Detect if microdata attributes are present on the webpage
2. If microdata attributes are present, then extract the microdata attributes in servo engine
3. Serialize the microdata attributes as per appropriate algorithm (vCard or JSON)
4. Send the serialized microdata from servo to servoshell embedder
5. Servoshell acts on the microdata received
Steps 1 and 2 were implemented by us in the previous phase.
The key steps in this project are steps 3 and 4. In step 3, we have implemented algorithms to serialize vCard and serialize JSON data, as per the WHATWG Microdata HTML specification linked
In step 4, we augmented the communication channel between servo and servoshell to send the microdata attributes. Completion of this step verifies that servo browser now has the capability to extract microdata attributes from a webpage, and perform action based on the type of microdata attribute received.
Example:
Consider an HTML page that contains Microdata with contact details.
<html>
  <head>
    <title>My vCard</title>
  </head>
  <body>
    <section id="user" itemscope itemtype="http://microformats.org/profile/hcard" >
      <h1 itemprop="fn">
        <span itemprop="n" itemscope>
          <span itemprop="given-name">Nirav</span>
          <span itemprop="family-name">Jain</span>
        </span>
      </h1>
      <h2>Assorted Contact Methods</h2>
      <div>
        <ul>
          <li itemprop="tel" itemscope>
            <span itemprop="value">+1 (919) 000 8888</span>
            <span itemprop="type">work</span>
          </li>
        </ul>
      </div>
    </section>
  </body>
</html>
The serialized vCard for this data should look like this:
BEGIN:VCARD
PROFILE:VCARD
VERSION:4.0
SOURCE:http://jainchirag.com/assets/docs/sample.html
NAME:My Small vCard
N:Jain;Nirav
TEL:+1 (919) 000 8888
END:VCARD
Build
We have opened our pull request and are working on getting it merged based on the reviews received. Please use our forked repository till the pull request is merged.
Forked repositories: https://github.com/CJ8664/servohttps://github.com/vjhebbar/servoshell
Clone command using git:
git clone https://github.com/CJ8664/servo.git
git clone https://github.com/vjhebbar/servoshell.git
Once you have the forked repo, please follow steps here to do a build.
Note that build may take up to 30 minutes, based on your system configuration. You can build on Janitor to reduce the build time.
Building on the cloud
This is the simplest and the fastest way to deploy and test an instance of servo and servoshell. No configuration is required on your machine.
1. Go to http://janitor.technology
2. Click on New Container for Servo
3. Enter your email address to gain access to your container
4. Once logged in, go Containers on the top right.
5. You will now see a container - Click on the IDE button to open your online IDE environment.
6. Change directory to /home/user and create a new directory, say servo_test
7. Go to this new directory and clone our repository as mentioned above
8. Upon cloning you should see a /servo directory within 'servo_test'
9. Go to /servo
10. It is now time to build - run the following command:
./mach build --dev
If all goes well you will see a success message - 'Build Completed'
Building locally
Local build instructions for Windows environments are given below -
1. Install Python for Windows (https://www.python.org/downloads/release/python-2714/).
The Windows x86-64 MSI installer is fine. You should change the installation to install the "Add python.exe to Path" feature.
2. Install virtualenv.
In a normal Windows Shell (cmd.exe or "Command Prompt" from the start menu), do:
pip install virtualenv
If this does not work, you may need to reboot for the changed PATH settings (by the python installer) to take effect.
3. Install Git for Windows (https://git-scm.com/download/win). DO allow it to add git.exe to the PATH (default settings for the installer are fine).
4. Install Visual Studio Community 2017 (https://www.visualstudio.com/vs/community/).
You MUST add "Visual C++" to the list of installed components. It is not on by default. Visual Studio 2017 MUST installed to the default location or mach.bat will not find it.
If you encountered errors with the environment above, do the following for a workaround:
Download and install Build Tools for Visual Studio 2017
Install python2.7 x86-x64 and virtualenv
5. Run mach.bat build -d to build
If you have troubles with x64 type prompt as mach.bat set by default:
you may need to choose and launch the type manually, such as x86_x64 Cross Tools Command Prompt for VS 2017 in the Windows menu.)
cd to/the/path/servo
python mach build -d
Build instructions for all other environments are available here
Verifying a build
We can quickly verify if the servo build is working by running the command
'./mach run http://www.google.com'
This will open a browser instance rendering the Google homepage.
This should be straightforward on any environment that has rendering support - Linus, Windows, MacOS, Android
If you are on Janitor environment, it's IDE will not provide rendering support. You might receive an error along the lines of 'No renderer found' upon executing the command.
Workaround: On the 'Container' page on janitor.technology click on VNC for your container. Click Connect on the new tab that opens up.
You should now have remote access to a UI with a command line. Simply run the above command and the web page should render.
Design
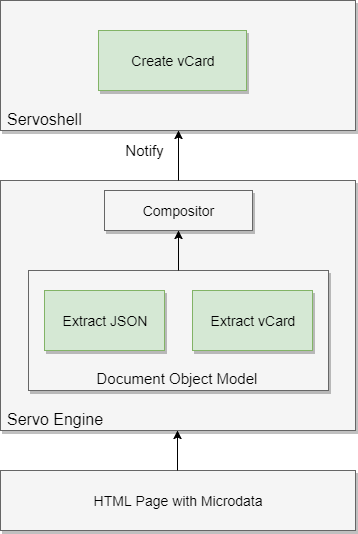
The design consists of the following procedures -
1) The DOM parser parses the HTML page and adds the microdata elements, along with the other html elements, to the DOM tree.
2) The JSON and vCard extraction algorithms are invoked on the Microdata present in the DOM.
3) These algorithms are executed to convert the Microdata to the respective formats
4) The notification algorithm sends a data structure to notify servoshell that microdata elements exist on the page.
5) Servoshell changes the 'Title' of the page, demonstrating that servoshell has received the JSON/vCard microdata.
The below diagram provides details on the components involved in the process flow.
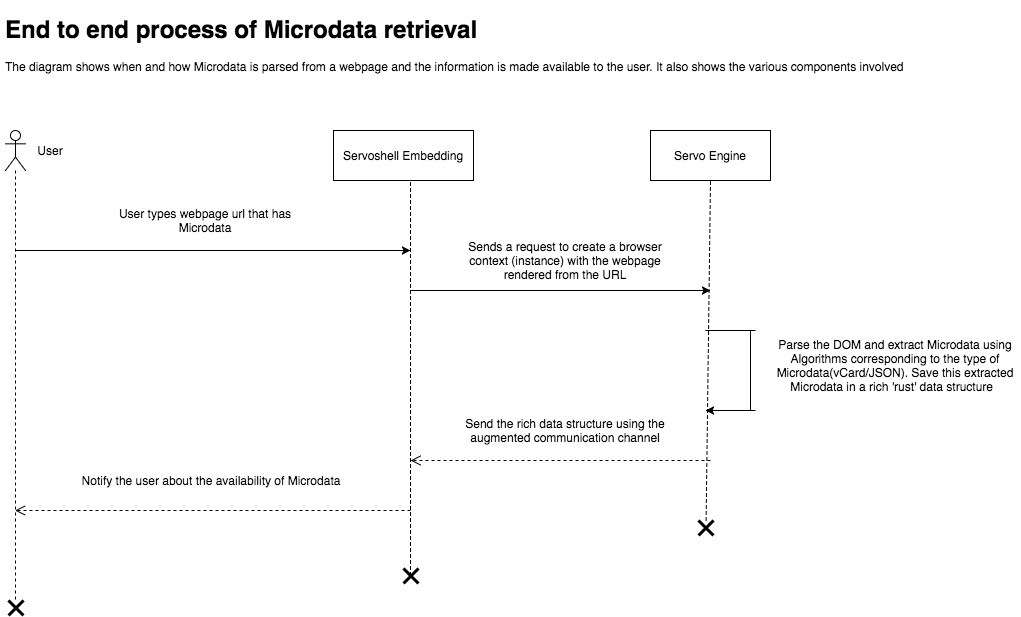
The diagram below outlines the sequence of operations that take place in order for servoshell to interpret the microdata (in a bottom-up manner) sent by servo
Implementation
The following steps are implemented-
1) Implement and test the algorithm to extract JSON from microdata. Specification Details
2) Implement and test the algorithm to extract a vCard from microdata. Specification Details
3) Use these algorithms to extract metadata from each page after it finishes loading and send it to the compositor
4) Notify any embedding code of the newly-extracted metadata
5) Modify the servoshell embedding to use the new notification and create a vCard file if available
Files added
Filename: servo/components/script/microdata.rs
Majority of our changes are implemented here in this separate module itself. Functions like parse_json, parse_vcard, traverse are implemented here.
Files changed
Filename: servo/components/script/dom/document.rs
| Changes made | Function | Description |
|---|---|---|
| Serializing Microdata | Calling Microdata::parse(self, htmlelement.unwrap().upcast::<Node>()) | Microdata::parse is a function implemented by us, that serializes the Microdata as per it's type |
| Sending microdata to servoshell | Calling send_to_constellation(event) | We create an event and send it to servoshell using this existing function |
| Changing 'Title' element in servoshell's UI | We simply change the UI element by changing the page's title. Servoshell can basically perform any action as per it's requirement |
Filename: servo/components/compositing/compositor_thread.rs
| Changes made | Function | Description |
|---|---|---|
| Function definition added | SendMicrodata(String, String) | Added function to augment the communication channel between servo and servoshell |
Filename: servo/components/compositing/windowing.rs
| Changes made | Function | Description |
|---|---|---|
| Function declaration added | print_microdata(&self, _data: String, _datatype: String) {} | Added function declaration to augment the communication channel between servo and servoshell |
Filename: servo/components/script_traits/script_msg.rs
| Changes made | Function | Description |
|---|---|---|
| Event declaration added | SendMicrodata(String, String) | Event to send microdata to the embedder |
Filename: servo/components/constellation/constellation.rs
| Changes made | Function | Description |
|---|---|---|
| Function added | FromScriptMsg::SendMicrodata(data, datatype) | Sends microdata to the embedder |
Filename: servoshell/src/main.rs
| Changes made | Function | Description |
|---|---|---|
| Updated function | Added ServoEvent::PrintMicrodata(data, datatype) to handle_servo_event() | Servoshell can perform any action it wants, based on the type of microdata received from servo |
Filename: servoshell/src/servo.rs
| Changes made | Function | Description |
|---|---|---|
| Implemented function for ServoCallbacks | Added print_microdata(&self, data: String, datatype: String) | Servo sends multiple events to servoshell which gets queued |
Test Plan
Testing Approach
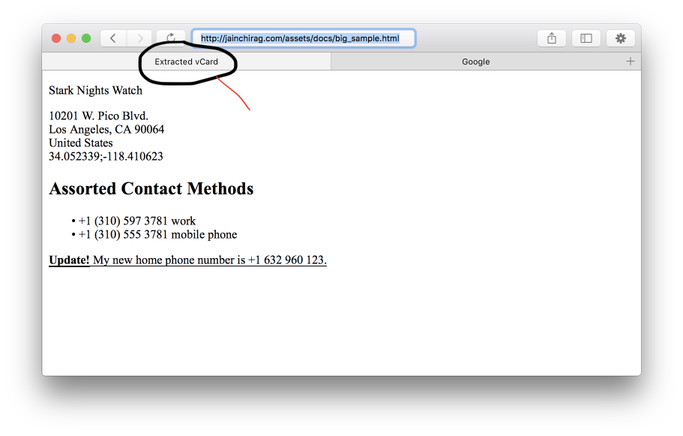
The interaction between servo and servoshell is tested by populating the title element in servoshell UI with values if microdata is detected. For example, if a webpage contains microdata, the servoshell tab title (Not the HTML title!) says 'Extracted vCard'
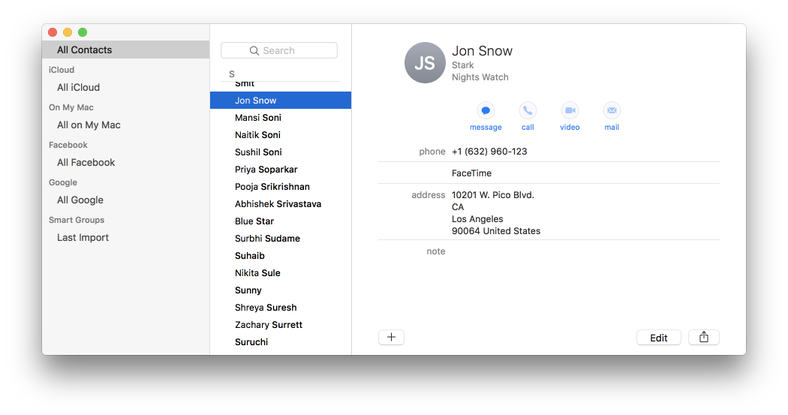
For verifying the validity of the VCF file that is downloaded, we import it using Contacts app on MacOS, note that we can use any other tool that supports VCF and verify whether the individual fields are populated correctly. Some other tools we can use are - Outlook, Windows Contacts, Android Contacts
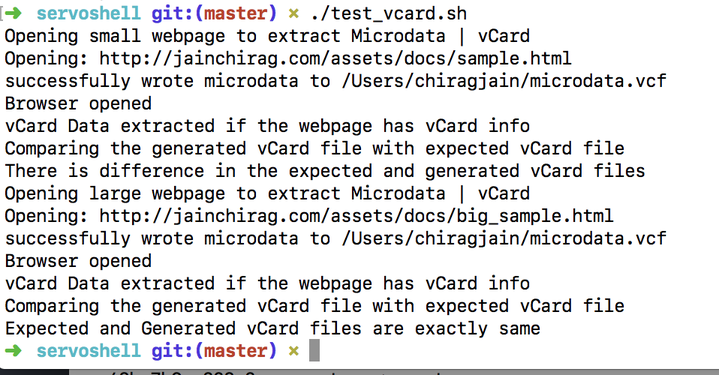
We have also created automated test cases, to match the expected serialized vCard / JSON strings in test pages that we have created.
Test Data
1) Sample local html page containing variety of microdata is created.
2) A live webpage containing microdata is used.
Test Scenarios
Testing the interaction between servo and servoshell
1. Open a webpage containing microdata
2. Verify if the servoshell tab title shows - Extracted vCard
Testing the vCard file
1. Open a webpage containing vCard related microdata
2. Download it using the servoshell
3. Verify using the test script
4. Import it using an external contacts application that supports VCF and note the results.
Testing JSON file
1. Open a webpage containing microdata
2. Download it using the servoshell
3. Verify using the test script
References
http://html5doctor.com/microdata/
http://web-platform-tests.org/writing-tests/testharness-api.html
https://html.spec.whatwg.org/multipage/microdata.html
https://code.tutsplus.com/tutorials/html5-microdata-welcome-to-the-machine--net-12356
