CSC/ECE 517 Fall 2011/ch4 4e ar
Lecture 10
Model, View and Controller
Model
Definition: The model represents all the data in the application.
A model is typically mapped to a table in the database. It maintains the state of an application and responds to changes to alter it. The model provides the developer with a consistent interface to handle and manipulate the data in an application. It hides a object-relation-mapping underneath, allowing the application to be portable to various database management systems. The model also validates the data before storing it. The code for a model can be found in the apps/models directory of a rails project.
View
Definition: A view renders the model in a form suitable for the user to comprehend.
A view queries the model to obtain data and generates an interface to display it. Typically, the controller instructs a view to render itself. However, in some cases, the view is automatically notified by the model of changes in state. The view can render itself to the user in many ways, HTML, CSS, XML, Javascript, JSON are the common ones. The code for the views can be found in the app/views directory of a rails project.
Controller
Definition: A controller accepts input from the user and instructs the rest of the framework to respond to it.
Typically, the user input is modeled as an event and the controller converts it to a user action, understandable by the model. Based on the input, it also decides which views to render. The controller is also responsible for a number of auxiliary services like session management, caching and helper modules. Code for a controller can be found in the app/controllers/ directory of a rails project.
A Rails Project
- RubyMine is an IDE for Ruby. We will be developing out rails project using it.
Start a rails project
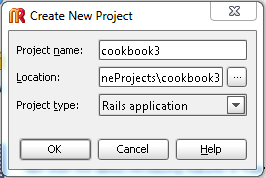
- To start a new rails project, click on the "New Project” link or select it from File Menu.
- Enter the project name, location and its type. In this case, it is a 'Rails application'.
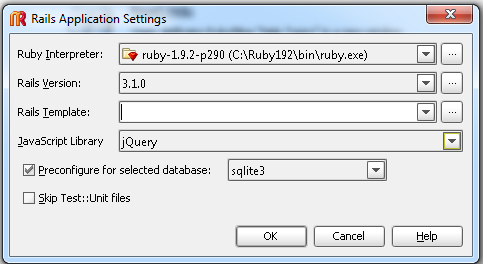
- Select the ruby interpreter you want to use.
- Select the rails version. There are significant differences among different rails version, so it is important to select the correct version.
- Select a JavaScript library for your views.
- Rails can work with a variety of databases like SQLite, MySQL, PostgreSQL. Select the one that you want from the drop down menu. We use SQLite3 for this project
- Click Ok to finish your initial project configuration
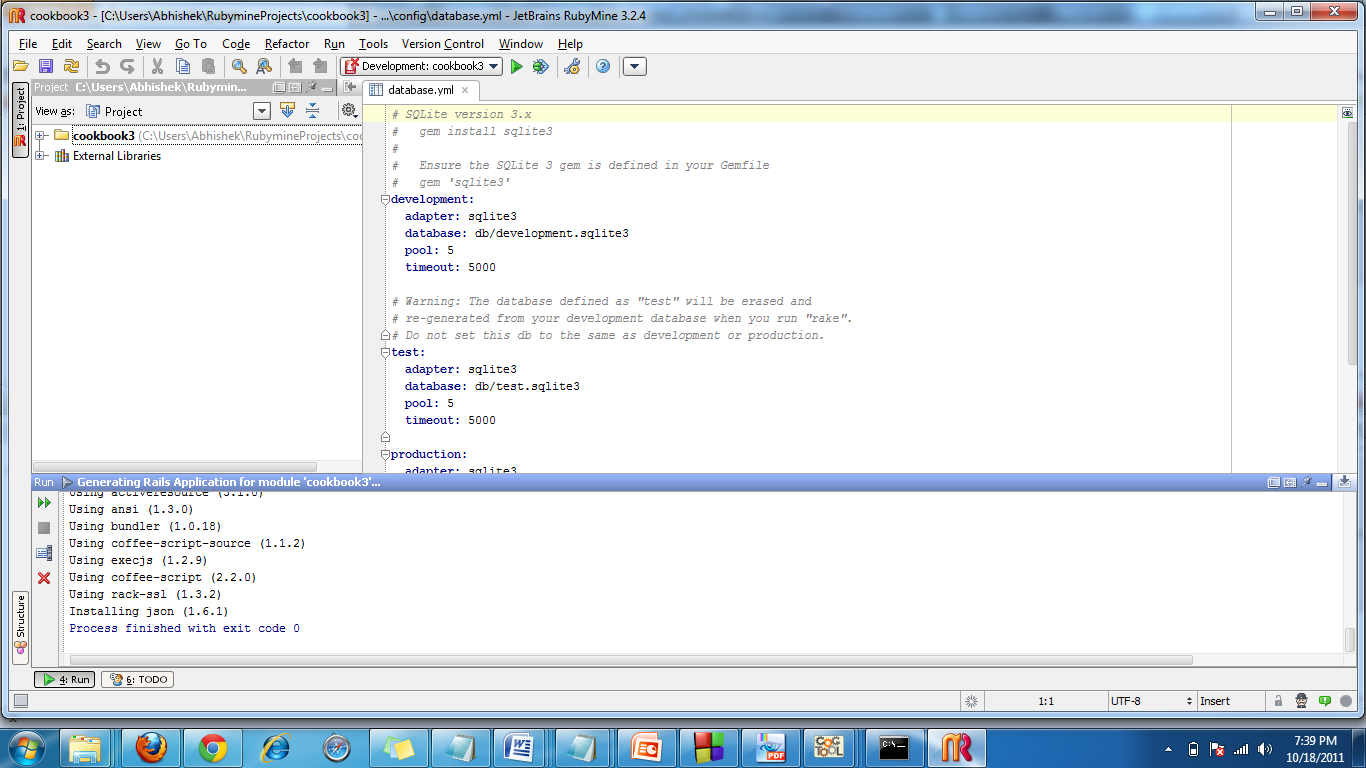
- You can see Ruby Mine executes a command for you. If the projects gets successfully created then you will see “Process finished with exit code 0”.
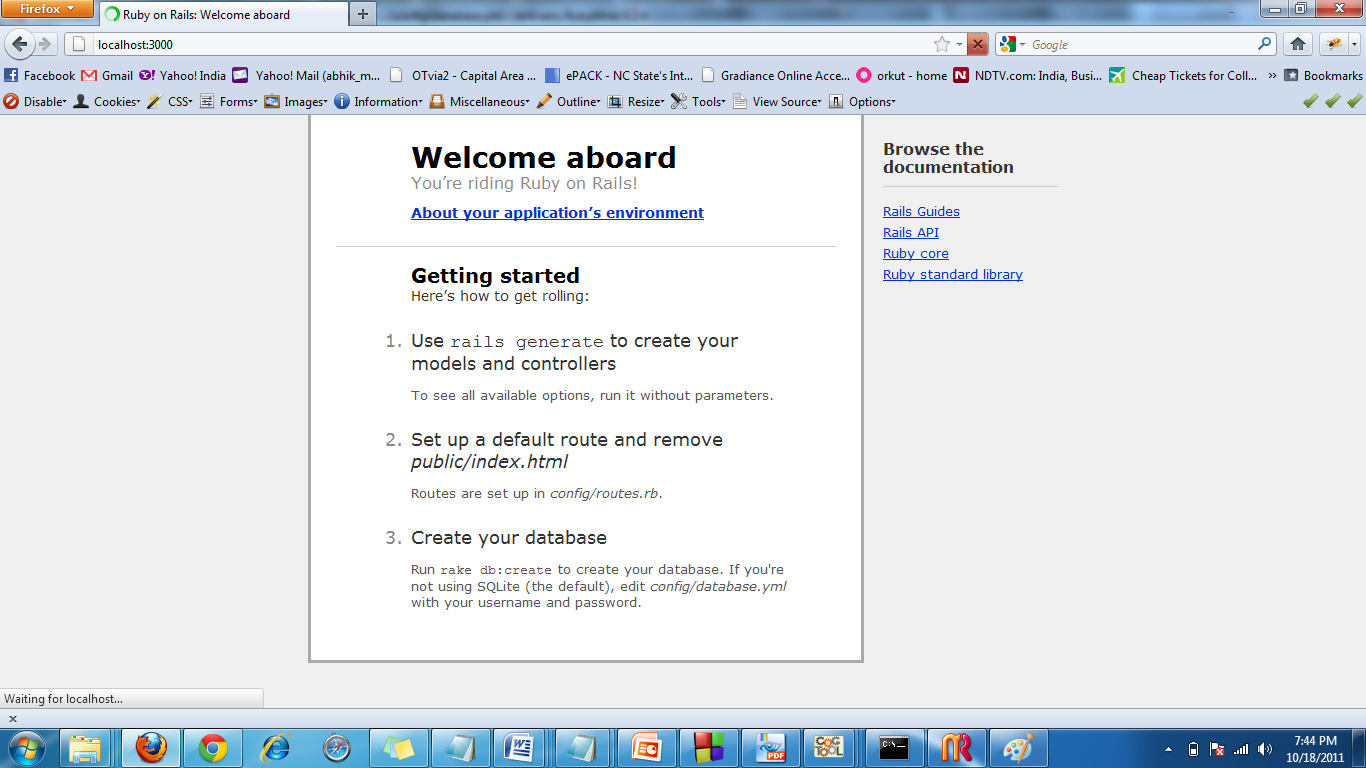
- Once the project gets created it is important to test if your project is running. To do this, start the server by pressing the green button on the top. On doing so, you should see a welcome screen if the server was started successfully.
The three things
Before you start actual development of your application, there are three things that you need to do.
- Remove the index.html file from the public directory of your rails project. This is a static file, and static files are given preference over dynamic ones. Hence unless this file is deleted, it will the home page of your application.
- Modify the default route in the config/routes.rb file to point to the page that you want to be the home page of your application.
- Use rake to create tables in your database corresponding to your models (explained in subsequent section).
Use scaffolds to build
- Now generate the other components of the project. This is done using scaffolds.
- 'Scaffolding' is rails way to models, views, and controllers for a new resource in a single operation.
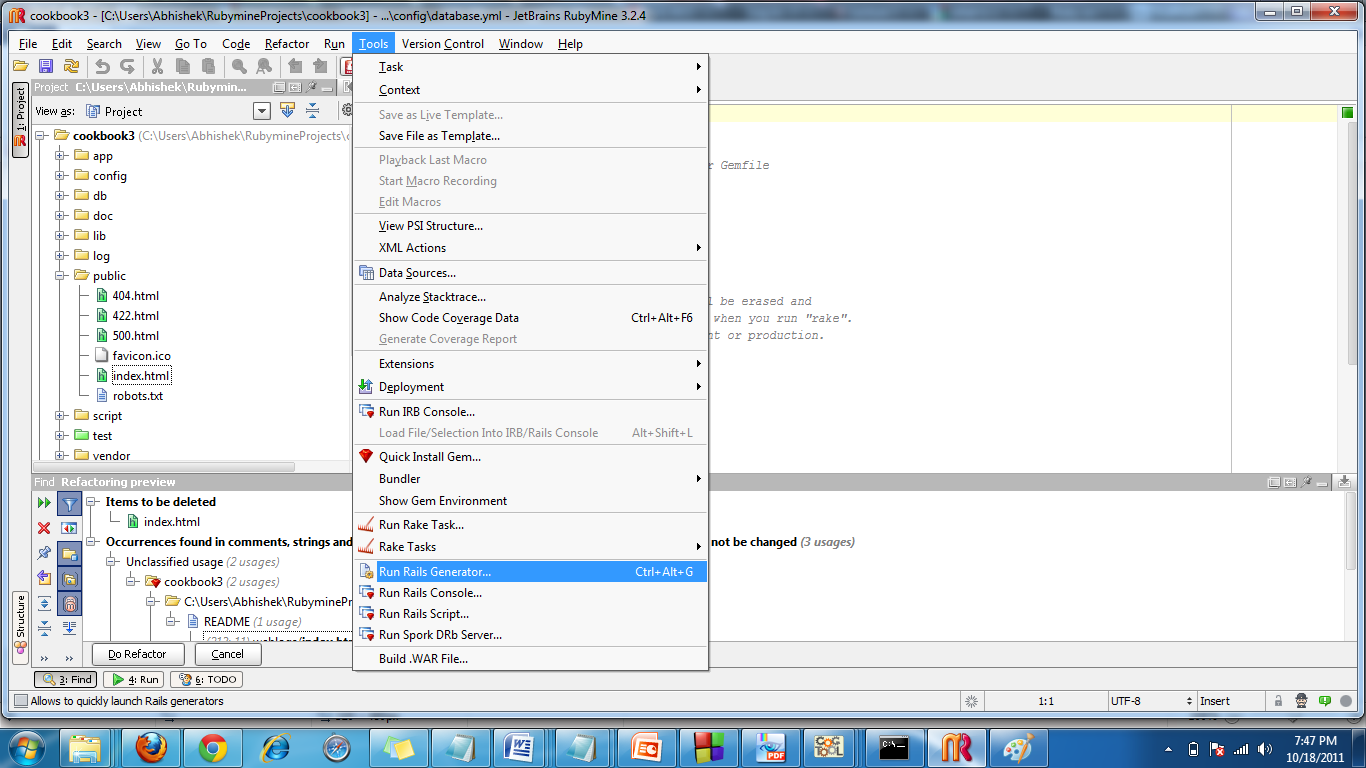
- To generate a scaffold, go to “Tools” and use “Run Rails Generator”. You will be prompted with what type of generator you want.
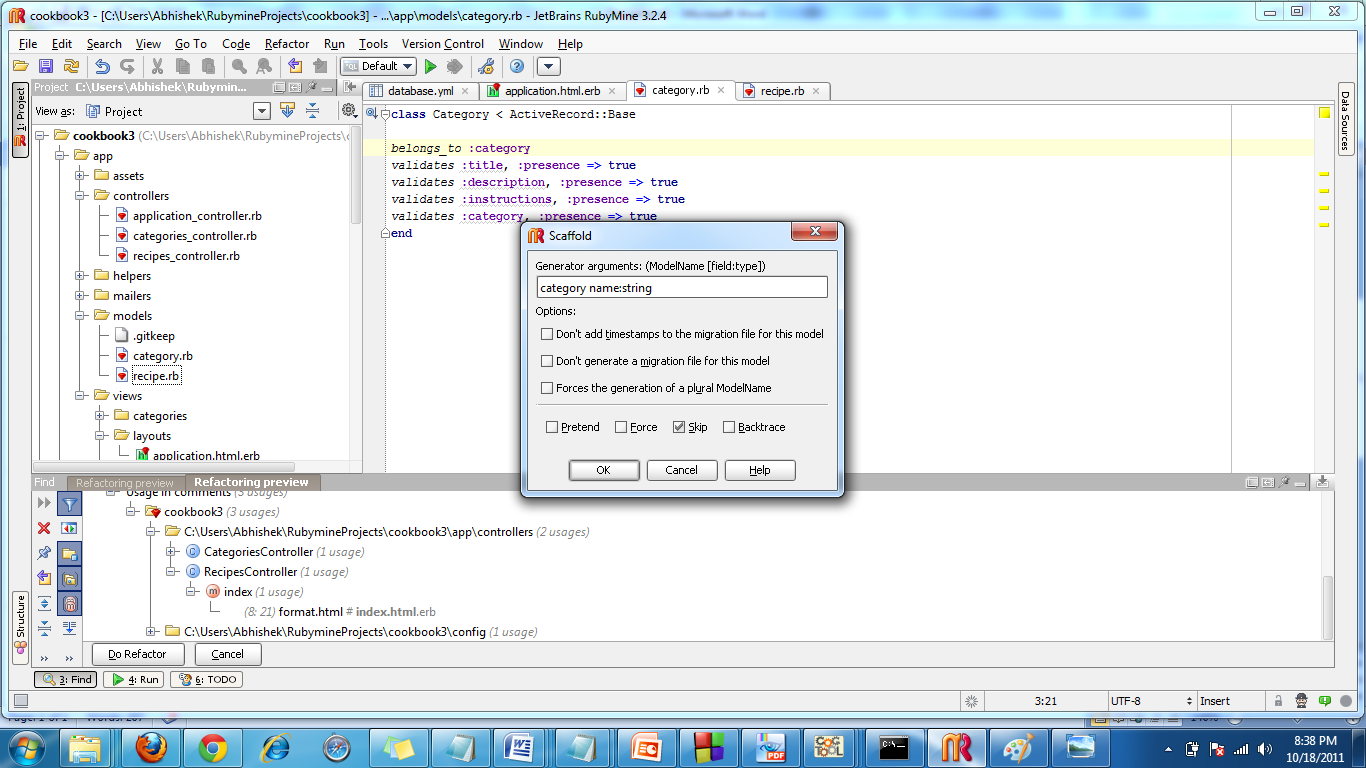
- Type Scaffold and press enter.
- Enter the scaffold name and the attributes along with their data types. Scaffold name should be singular.
- Attributes and data types are inserted as <Atrribute_name>:. Multiple attributes can be space separated.
- Scaffolding provides the application developer with a template that has some of the common operations implemented. The developers needs to extend the scaffold by adding functionality required by that specific application
- For this project, we have created a scaffold for the 'category' resource.
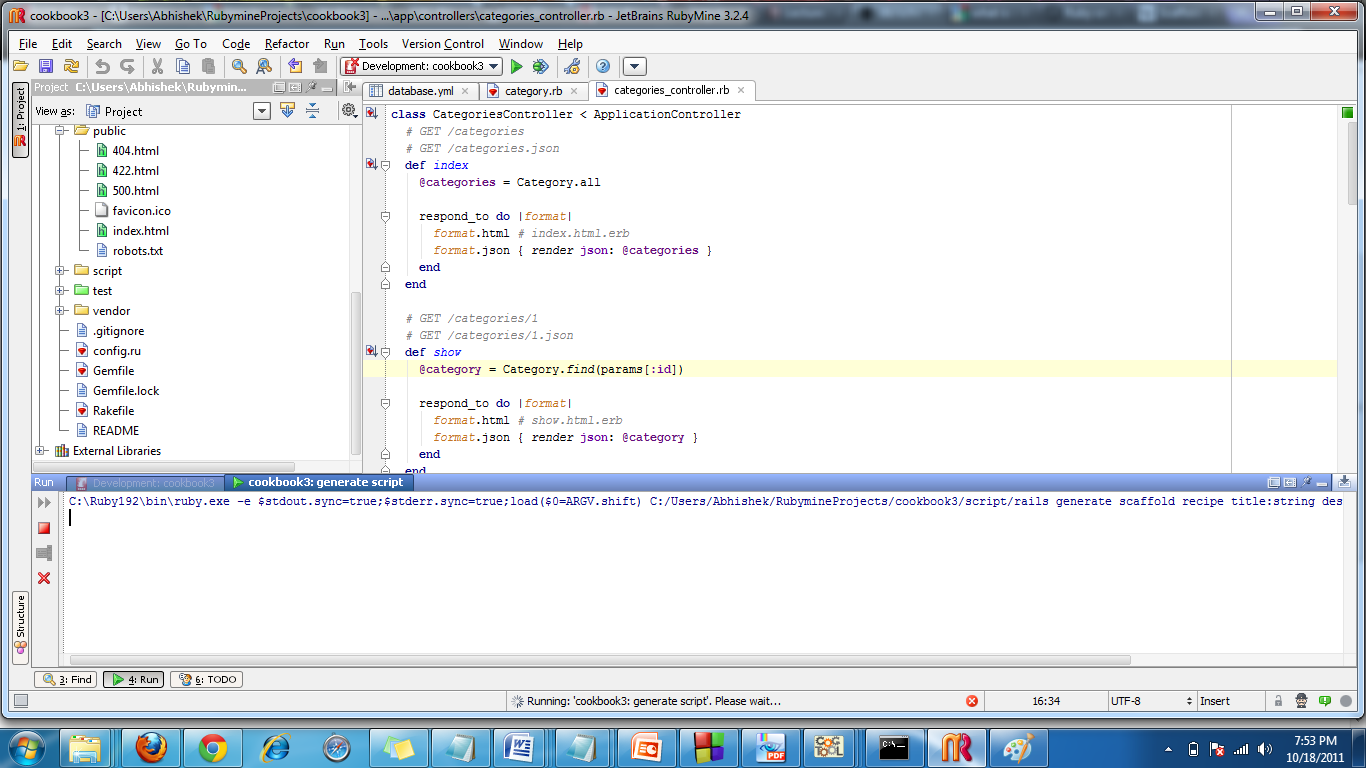
- The image below shows some of the methods generated by scaffolding in the controller for category.
Migrations
- Migrations are ruby ways to alter the database in a structured and organized manner.
- Although, it is possible for a developer to write SQL statements and alter it, migrations make the changes noticeable to other developers as well.
- One of the major advantages of migrations is that they allow version control on the database schema.
- When you move between different versions of your code, Active Record will work out which migrations should be run. It will also update the db/schema.rb file to match the structure of your database at that version.
- Another advantage of migrations is that they allow database portability. Use migrations is similar to using an interface, using SQL is similar to using an implementation. Hence, using migrations can allow you to use SQLite3 for development and say MySQL in production. The migrations will transform you schema into the database specific construct, without having you worry about it.
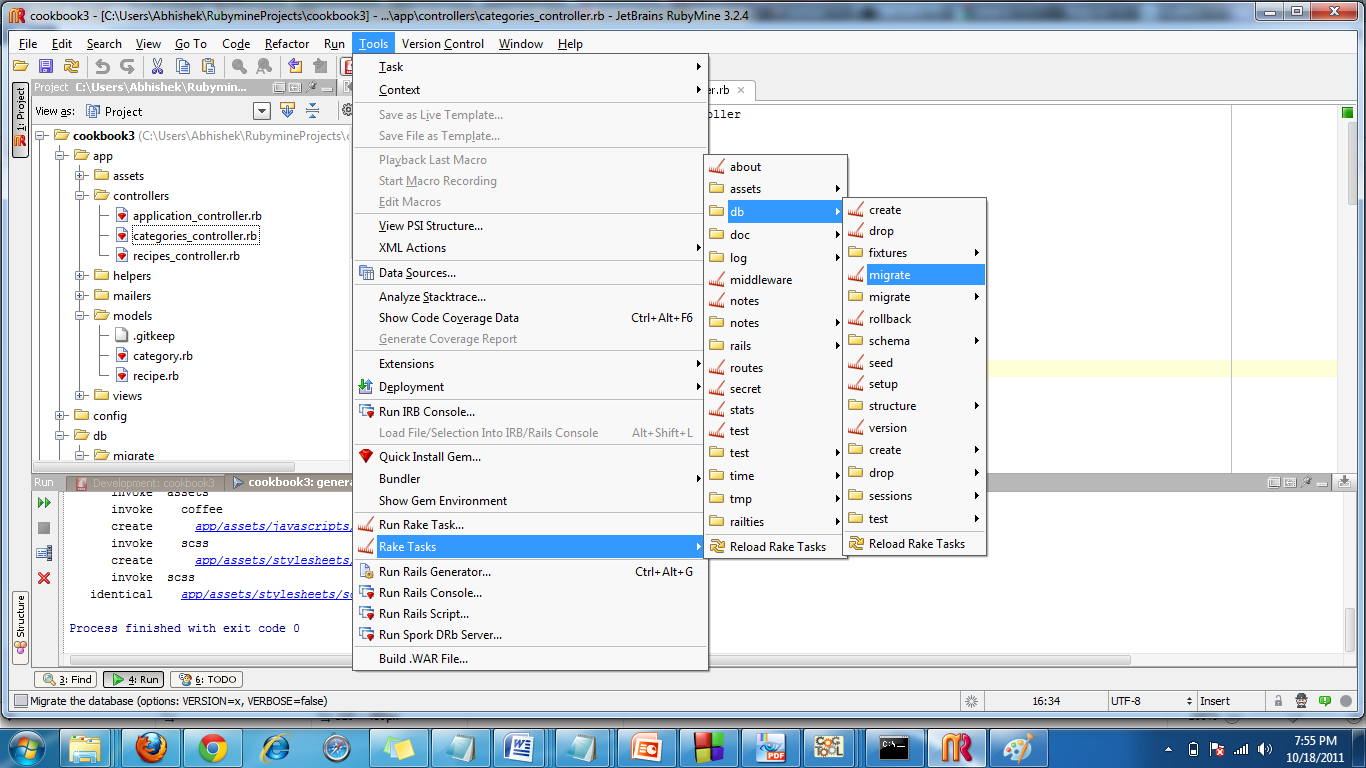
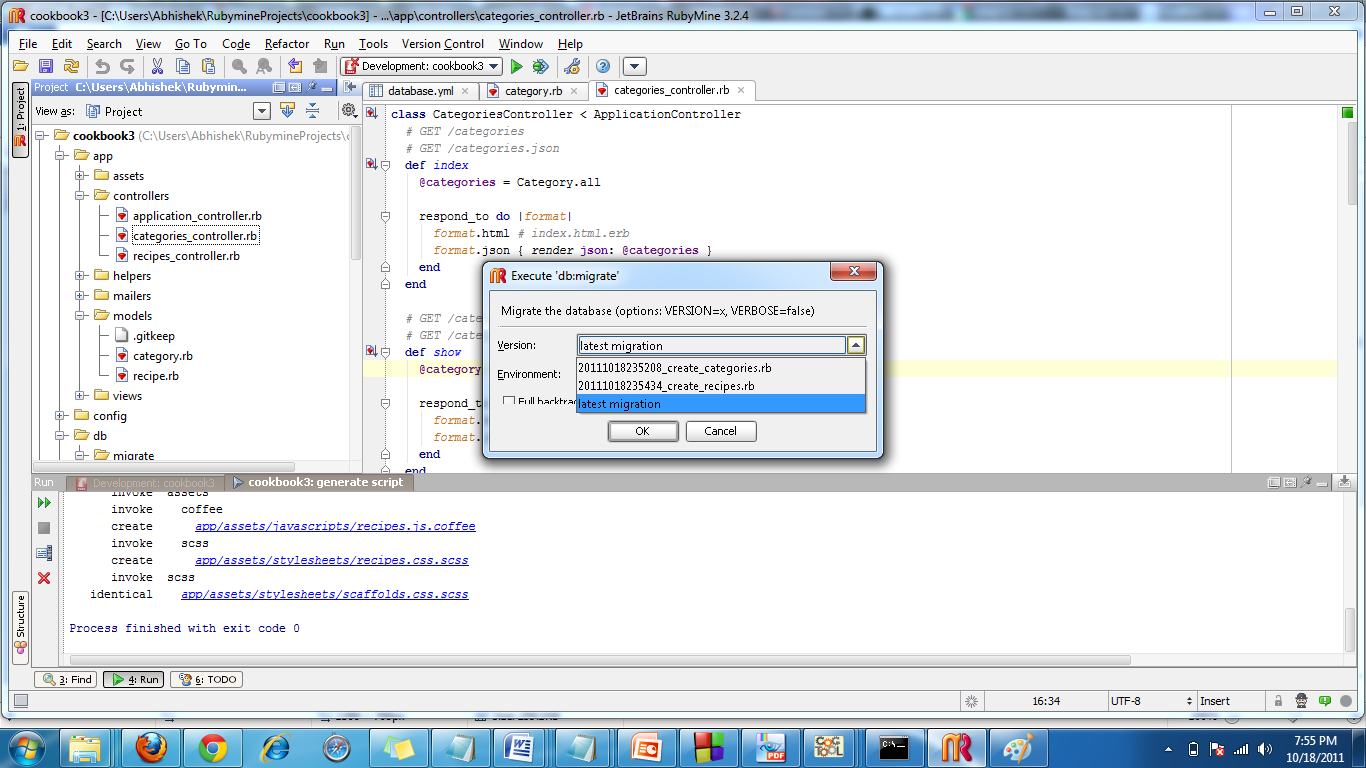
- To create a migration, go to "Tools" menu, then "Rake tasks", then "db" and click on "migrate".
- Now, select which migration you want to run from the drop down menu.
Testing
Fixtures
Fixtures are used to provide our tests with data i.e. sample data[1]. They come in three flavors:
- YAML fixtures
- CSV fixtures
- Single-file fixtures
YAML is the default format. It is a cleaner version of XML for representing data. Each model has a corresponding fixture file with the same name in test/fixtures/ path of your app’s root directory. The fixture file ends with .yml extension. Each YAML fixture is given a name and is followed by an indented list of key/value pairs in “key:value” format.
In the above fig. one is a name of fixture. It does not matter what name you use. The entries after one are the “column_name:value” for the record one. You can use scaffold to generate the fixtures for you. But it’ll give just the basic features. If there are any relationships then you have to explicitly specify them. You can do it by adding just foreign key name and it’ll figure out from where to populate the foreign key[2]. For example if you have used scaffold to generate MVC components of categories and recipes then it’ll generate categories.yml and recipes.yml for you. But now you’ll need to add the relationships manually, as shown below
One thing you need to think is that for how long you want the data in test database. You need it just for testing and once it is finished you can throw it away. Also for the testing it does not make sense to read the data from a remote server or from a file because of the life span of a test. So instead it’s just handy to load the database into memory, run your tests and throw it away. Because when we run the tests the data gets corrupted anyway for the next sets of tests.
Steps to make changes in your app for fixtures
- Go to gem file and (bundler uses the gem file) and add a gem “memory_test_fix” inside “group :test” as shown in fig below. It’s a monkey patch which is specially written to load the database and throw in the end. If we do just the “rake:db:migrate” task then it is not sufficient as it’ll bring the data in memory but as soon as the task finishes everything is gone away. So we’ll not be able to run our tests. This patch will keep the data in memory during the iteration of our tests.
- Also add a gem “test_unit” to get a GUI to see the test results.
- Go to database.yml file (config/database.yml) and change the test database to “:memory:”. It’ll keep the test database in memory and never look at disk so our test will run fast. It is not required but will help when we are having so many tests to run.
- Update bundler as you have added new packages.
Sometimes for testing the content of the data is not as much important as is the volume. In those cases, you can mix ERB in your fixtures. For example if you want 100 categories in your category table then instead of writing them manually you can do it as –
Now in the unit and functional tests you can use fixtures by specifying which fixture you want. For example, if you want recipes fixture in one of your tests then you can specify it as
Unit tests
Unit tests are used for testing models. When we generate a model using the scaffold it also generates a unit test script for the model in the tests directory[3]. In unit tests we can use the data generated using fixtures. As we write code in model classes we must write corresponding unit tests. For example consider you want all the fields for Recipe to be present. It can be tested as shown below –
- assert – It evaluates an object (or expression) for expected results.
If you have used “test_unit” gem then on executing tests you will get a result screen as
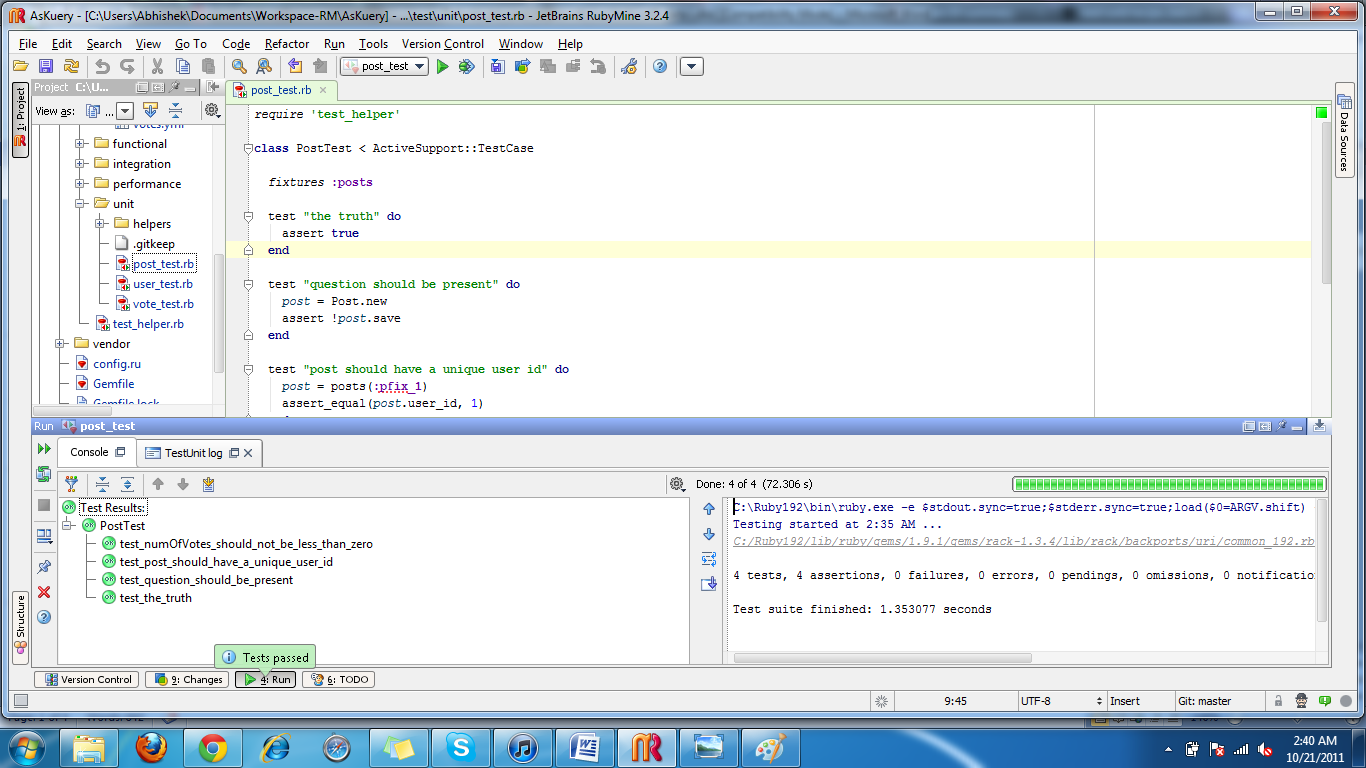
The green bar means that all the tests have passed. If any of the tests fails then you’ll get a red var.
Functional Tests
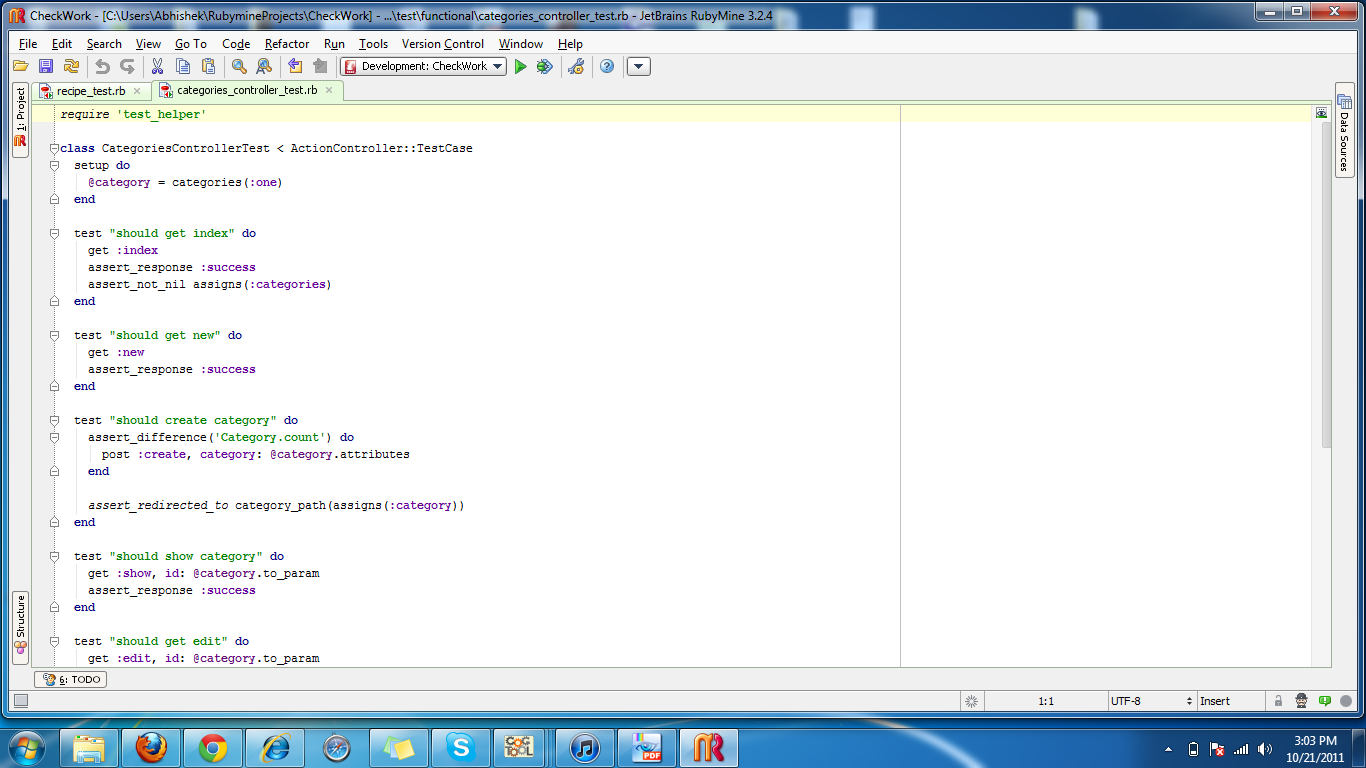
Functional testing is a type of black-box testing which verifies the system behavior according to the specifications. In a rails projects, we apply functional tests on controllers to validate the workflow that they setup and verify if it results in the intended outcome. In rails, the controllers are primarily responsible for tasks such as routing of requests, handling user authentication, validating correctness of output produced etc. Of three entities in a rails project, there is tight coupling between the controller and the view. Hence, as a part of functional testing we also validate if the the content displayed by the view is of the correct format and content and the layout of the page is as expected.
The image below shows some of the functional test written for the categories controller. As you can see, tests like "should create category" checks if the categories controller can function as per specifications i.e. if it can create a new category.
Integration Tests
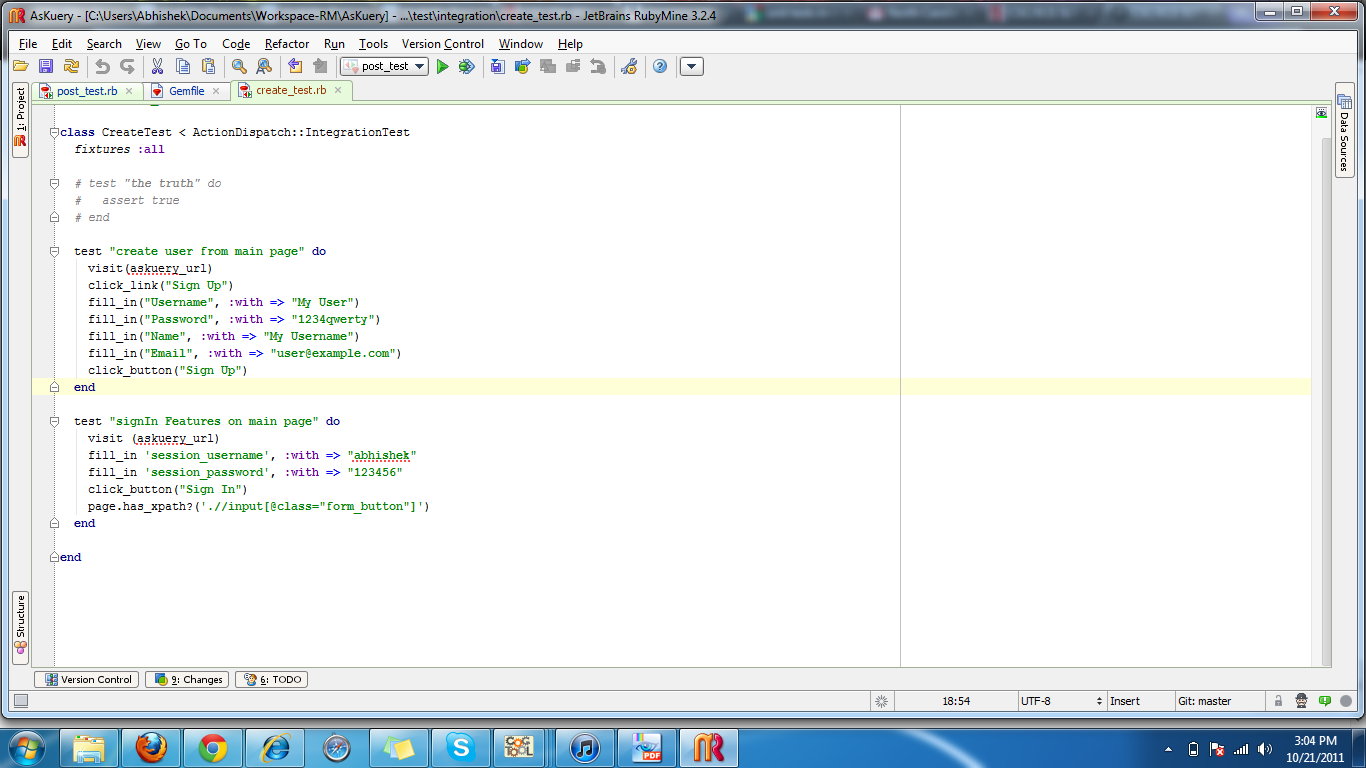
Integration testing is a testing technique in which various software modules are combined and tested as a group[4]. Although each of the modules might function correctly, it is not necessary that they will function correctly as a group. In a rails project, integration tests are most useful to verify the interactions between controllers. Integration testing generally occurs in the latter part of the project testing life cycle. Unit and functional tests are written along with development. Once each component has been completed, its functionality tested in isolation, integration tests take precedence. In rails, a generator can create a integration test skeleton. In the image below some integration test for our rails application:
