CSC/ECE 517 Fall 2014/ch1a 3 zq
CherryPy Framework
CherryPy is a python based, object-oriented web framework that enables developers to quickly create lightweight and fast web applications.<ref>http://www.cherrypy.org/</ref><ref>http://en.wikipedia.org/wiki/CherryPy</ref>
Background
CherryPy is a lightweight web server framework written in python. It has an object-oriented design and also provides a basic HTTP web server as defined in RFC 7321. It includes built-in profiling, coverage, and testing tools to assist in development.
CherryPy does not have any built-in templating or database engines, and instead relies on external libraries and plugins. <ref>http://www.cherrypy.org/</ref> The users of CherryPy also have the rich set of python modules to choose from which can be used to provide many of the complex functionalities. All of these result in a very simple, yet powerful framework having a very steep learning curve.
It is distributed under the BSD License<ref>https://bitbucket.org/cherrypy/cherrypy/src/697c7af588b8/cherrypy/LICENSE.txt</ref>. The latest stable version is 3.6 as on August 19, 2014<ref>https://pypi.python.org/pypi/CherryPy</ref>.
Some of the popular websites using it are Hulu<ref>http://tech.hulu.com/blog/2013/03/13/python-and-hulu/</ref> and Netflix<ref>http://techblog.netflix.com/2013/03/python-at-netflix.html</ref>. The full list can be found here.
Basic Example
The following code demonstrates the most basic webserver using the CherryPy framework.
WebApp.py
import cherrypy

class WebApp(object):
    @cherrypy.expose
    def index(self):
        return "Hello, CherryPy!"

cherrypy.quickstart(WebApp())
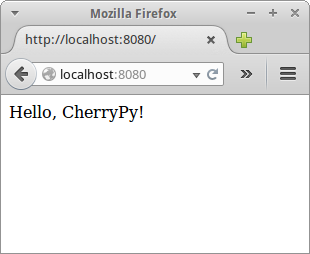
Start the application by running the above python file "WebApp.py" and open your web browser to http://localhost:8080. The following page is displayed
Features
Query Strings
CherryPy will automatically parse the query string of a URL. Fields are passed as method arguments with matching names, and can take advantage of default argument values.
import cherrypy

class WebApp(object):
    @cherrypy.expose
    def test(self, value=1):
        return "Value = " + str(value)

cherrypy.quickstart(WebApp())
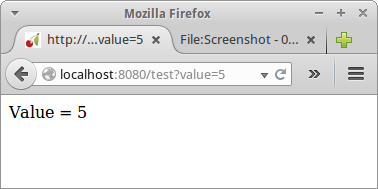
A URL of http://localhost:8080/test?value=5 gives the following
Cookies
CherryPy can set browser cookies with cherrypy.response.cookie and read browser cookies with cherrypy.request.cookie by accessing these variables as python dictionary objects.
import cherrypy

class WebApp(object):
    @cherrypy.expose
    def set(self, value = "Test"):
        cookie = cherrypy.response.cookie
        cookie['Value'] = value
        return "Cookie set"

    @cherrypy.expose
    def get(self):
        cookie = cherrypy.request.cookie
        return "Cookie value = " + str(cookie['Value'].value)

cherrypy.quickstart(WebApp())
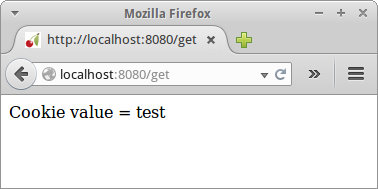
Navigating to http://localhost:8080/set?value=test followed by http://localhost:8080/get gives the following
Logging
CherryPy provides the following method for application logging
cherrypy.log("Hello, CherryPy!")
By default, all logging is written to the console. The configuration keys log.access_file and log.error_file are also available for writing logging and errors to a text file.
In-built HTTP Server to host single or multiple applications
CherryPy comes with its own HTTP server which can be used to host web applications.
Single application
The easiest way to do that is by calling the cherrypy.quickstart() function. The function takes at least one argument.
cherrypy.quickstart(WebApp())
This starts the application 'WebApp' at http://localhost:8080/.
It can also take 2 more arguments.
cherrypy.quickstart(WebApp(), '/hello', {'/': {'tools.gzip.on': True}})
This starts the application 'WebApp' at http://localhost:8080/hello. The third argument defines the configuration for our application. It can either be a dictionary object or a file.
Multiple applications
The function cherrypy.tree.mount is used to host multiple applications.
cherrypy.tree.mount(MyApp1(), '/app1', app1_conf)
cherrypy.tree.mount(MyApp2(), '/app2', app2_conf)

cherrypy.engine.start()
cherrypy.engine.block()
This will host two applications having paths http://localhost:8080/app1 and http://localhost:8080/app2.
Server Configuration
The cherrypy.config.update function can be used to configure the HTTP server.
import cherrypy

class WebApp(object):
    @cherrypy.expose
    def index(self):
        return "Hello, CherryPy!"

cherrypy.config.update({'server.socket_port': 9999})
cherrypy.quickstart(WebApp())
This will start the server on port 9999 instead of the default port 8080. The application can then be accessed at http://localhost:9999/.
We can also pass a file (containing configuration) as an argument to this function.
cherrypy.config.update("WebAppServer.conf")
WebAppServer.conf
[global]
server.socket_port: 9999
Sessions
In CherryPy, sessions are disabled by default. To enable sessions, set the configuration tools.sessions.on to True. <ref>http://docs.cherrypy.org/en/latest/basics.html#using-sessions</ref>
Session variables can be accessed with cherrypy.session, which is a python dictionary object.
import cherrypy

class WebApp(object):
    @cherrypy.expose
    def index(self):
        if 'number' not in cherrypy.session:
            cherrypy.session['number'] = 0
        else:
            cherrypy.session['number'] += 1
        return "Number = " + str(cherrypy.session['number'])

cherrypy.config.update({'tools.sessions.on': True})
cherrypy.quickstart(WebApp())
This example shows a number that increments by 1 every time the user navigates to localhost:8080.
Serve Static Content
Static contents like files, images, stylesheets etc. can be easily served by adding the following lines in the the application configuration file.
[/images]
tools.staticdir.on = True
tools.staticdir.dir = "/site/public/images"
This will allow the user to access some file "user.jpg" present in the folder "/site/public/images/user.jpg" using the url http://localhost:8080/images/user.jpg.
Publish REST APIs
CherryPy can be used to expose the APIs as RESTful Web Services. This allows third party applications to easily communicate with the system.
import cherrypy


class MyAppRestMode(object):
    exposed = True

    def GET(self):
        return "Hello, CherryPy!"


conf = {
    '/': {
        'request.dispatch': cherrypy.dispatch.MethodDispatcher(),
        'tools.response_headers.on': True,
        'tools.response_headers.headers': [('Content-Type', 'text/plain')],
    }
}
cherrypy.quickstart(MyAppRestMode(), '/', conf)
The above code exposes the GET API at with http://localhost:8080/. The API returns the string "Hello, CherryPy!".
Multiple HTTP Servers
The default HTTP server started by CherryPy can only be used to host the application on one port. But, it is also possible to host the application on multiple ports by starting additional servers.
from cherrypy._cpserver import Server

server = Server()
server.socket_port = 443
server.subscribe()

cherrypy.quickstart(WebApp())
The above code hosts the application with one more server, which runs on port 443. It is possible to create any number of additional servers.
Authentication
CherryPy supports two authentication mechanisms: Simple and Digest. It follows the specification defined by RFC 2617
WSGI Support
CherryPy supports the WSGI (Web Server Gateway Interface) specification defined by PEP 0333 and PEP 3333.
This allows two things:
- Instead of using the default CherryPy server, a CherryPy application can be hosted on an external WSGI server.
- The CherryPy server can be used independently to host an external WSGI application.
Test Suite
CherryPy framework provides a class, named helper which can be used as a base class for writing functional tests.
Running a test will start the complete application and thus can be used to simulate the scenario when a user actually tries to access the server on web.
The sample code to run a test can be found here
References
<references/>


