CSC/ECE 517 Spring 2015/ch1a 6 TZ
Snap CI
Snap CI is a hosted continuous integration and continuous delivery service.
Background
Continuous integration (CI) is the practice of merging all developer working copies with a shared mainline several times a day. It was adopted as part of extreme programming (XP). The main aim of CI is to prevent integration problems, referred to as "integration hell" in early descriptions of XP.
CI was originally intended to be used in combination with automated unit tests written through the practices of test-driven development (TDD). Initially this was conceived of as running all unit tests in the developer's local environment and verifying they all passed before committing to the mainline. This helps avoid one developer's work in progress breaking another developer's copy.
Later elaborations of the concept introduced build servers, which automatically run the unit tests periodically or even after every commit and report the results to the developers. The use of build servers (not necessarily running unit tests) had already been practised by some teams outside the XP community. Nowadays, many organisations have adopted CI without adopting all of XP.
In addition to automated unit tests, organisations using CI typically use a build server to implement continuous processes of applying quality control in general — small pieces of effort, applied frequently. In addition to running the unit and integration tests, such processes run additional static and dynamic tests, measure and profile performance, extract and format documentation from the source code and facilitate manual QA processes. This continuous application of quality control aims to improve the quality of software, and to reduce the time taken to deliver it, by replacing the traditional practice of applying quality control after completing all development. This is very similar to the original idea of integrating more frequently to make integration easier, only applied to QA processes.
Example
Getting started on Snap CI.
■ Step1: Sign in
To sign up with Snap, visit Snap CI and click in the Sign in with Github link at the top. When you sign in, GitHub will ask if you want to give a set of permissions to Snap.

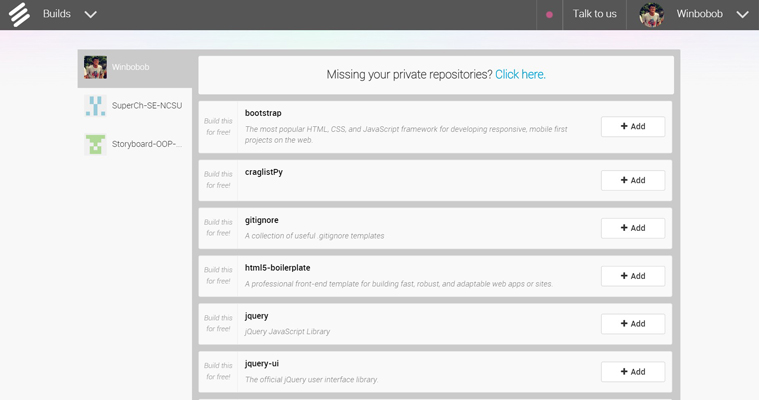
■ Step2: Add your repository
Once you are signed in, Snap will present a list of all the repositories you have access to. You may only build repositories. If you are an administrator on any of those repositories, you may build that repository on Snap.

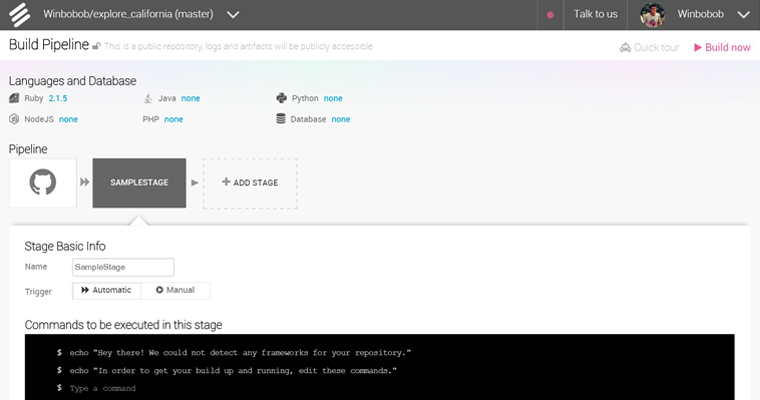
■ Step3: Config your build
When you select a repository to build on Snap, we will attempt to automatically detect some popular configurations for your build. We look for languages versions, build tools files, dependency managers and other conventions that may indicate how your build could be set up. In this guide we'll use a ruby repository, but we do support lots of other languages.

As most of the ruby repositories, this one uses a dependency manager tool call bundler and the rspec testing framework. Because of that, Snap automatically added the default command for each of them: bundle install --path ${SNAP_CACHE_DIR}/.bundle and rake spec respectively. Most of the times that would be everything needed to run your tests. However, there may be some tasks that are pre-requisites to it. In this specific build, we need to execute the command bundle exec foreman start &. It can be done simply by adding it before bundle exec rake spec.
■ Step4: Build
All that's left to do is click Build now and let Snap run our build.
