CSC/ECE 517 Fall 2013/ch1 1w19 rj
Using secure API authorization via OAuth
OAuth is the de facto standard authentication mechanism used by prominent websites like Facebook and Twitter. This wiki discusses Ruby support for OAuth and highlights using examples.
| Revision history | |||||
|---|---|---|---|---|---|
| Date | Changes | ||||
| 09/24/2013 | Revised based on review comments: - Added OAuth 1.0a and 2.0 guides and comparison to Further reading - Added OAuth official Wiki to Further reading - Added an additional example for Google APIs - Added a video explaining OAuth to Further reading - Added a few more terms to Terminology section - Using thumbnails instead of full size screenshots in Creating an OAuth Provider and Creating an OAuth Provider - Added Conclusion | ||||
| 09/18/2013 | Initial version | ||||
Introduction to OAuth
What is OAuth?
The OAuth protocol was originally created by a small community of web developers from a variety of websites and other Internet services who wanted to solve the common problem of enabling delegated access to protected resources.<ref name='ietf'>E. Hammer-Lahav, E. (2010, April). The oauth 1.0 protocol. Retrieved from http://tools.ietf.org/html/rfc5849</ref> The Web Authorization (OAuth) protocol allows a user to grant a third-party Web site or application, access to the user's protected resources, without necessarily revealing their long-term credentials, or even their identity. For example, a photo-sharing site that supports OAuth could allow its users to use a third-party printing Web site to print their private pictures, without allowing the printing site to gain full control of the user's account and without having the user share his or her photo-sharing sites' long-term credential with the printing site.<ref name='guide'>Hammer, E. (2011, July). The oauth 1.0 guide. Retrieved from http://hueniverse.com/oauth/guide/</ref> An area where OAuth is more evolved than some of the other protocols and services is its direct handling of non-website services. OAuth has built-in support for desktop applications, mobile devices, set-top boxes, and of course websites.<ref name='guide'/>
Terminology
Some terminology used throughout this page<ref name='ietf'/>:
- Client/Consumer
- An HTTP client capable of making OAuth authenticated requests.
- Server/Provider
- An HTTP server capable of accepting OAuth authenticated requests.
- Protected resource
- An access-restricted resource that can be obtained from the server using an OAuth authenticated request.
- Resource owner
- An entity capable of accessing and controlling protected resources by using credentials to authenticate with the server.
- Credentials
- Credentials are a pair of a unique identifier and a matching shared secret. OAuth defines three classes of credentials: client, temporary and token, used to identify and authenticate the client making the request, the authorization request, and the access grant, respectively.
- Token
- A unique identifier issued by the server and used by the client to associate authenticated requests with the resource owner whose authorization is requested or has been obtained by the client. Tokens have a matching shared-secret that is used by the client to establish its ownership of the token, and its authority to represent the resource owner.
- Shared secret
- Tokens have a matching shared-secret that is used by the client to establish its ownership of the token, and its authority to represent the resource owner.
- HMAC
- keyed-hash message authentication code – used to verify the data integrity and authentication.
- HMAC-sha1
- HMAC can be used in combination with any iterated cryptographic hash function. SHA1 is one such hash function.
- Model
- Model is where the application’s data objects are stored.
- Subclass
- Derived or child class.
- Plugin
- A software component that adds a specific feature to the software application.
- Migrate
- Process of altering the database schema in a consistent and easy way.
How OAuth operates?
In the traditional client-server authentication model, the client uses its credentials to access its resources hosted by the server. OAuth introduces a third role to this model: the resource owner. In the OAuth model, the client (which is not the resource owner, but is acting on its behalf) requests access to resources controlled by the resource owner, but hosted by the server. In order for the client to access resources, it first has to obtain permission from the resource owner. This permission is expressed in the form of a token and matching shared-secret. The purpose of the token is to make it unnecessary for the resource owner to share its credentials with the client. Unlike the resource owner credentials, tokens can be issued with a restricted scope and limited lifetime and revoked independently. This specification consists of two parts. The first part defines a redirection-based user-agent process for end-users to authorize client access to their resources, by authenticating directly with the server and provisioning tokens to the client for use with the authentication method. The second part defines a method for making authenticated HTTP requests using two sets of credentials, one identifying the client making the request, and a second identifying the resource owner on whose behalf the request is being made.<ref name='guide'/>
The workflow
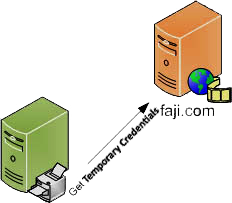
OAuth uses tokens to represent the authorization granted to the client by the resource owner. Typically, token credentials are issued by the server at the resource owner's request, after authenticating the resource owner's identity (usually using a username and password). There are many ways in which a server can facilitate the provisioning of token credentials. This redirection-based authorization method includes the following steps as shown in the diagram:

- Step 1
- The resource owner requests the client to perform an action on the server.
- Step 2 to 3
- The client obtains a set of temporary credentials from the server (in the form of an identifier and shared-secret). The temporary credentials are used to identify the access request throughout the authorization process.
- Step 4 to 5
- The resource owner authorizes the server to grant the client's access request (identified by the temporary credentials).
- Step 6 to 7
- The client uses the temporary credentials to request a set of token credentials from the server, which will enable it to access the resource owner's protected resources.
The server must revoke the temporary credentials after being used once to obtain the token credentials. It is recommended that the temporary credentials have a limited lifetime. Servers should enable resource owners to revoke token credentials after they have been issued to clients.<ref name='ietf'/>
Real life example
Following is a real life example for an OAuth interaction:<ref name='guide'/>
- Jane is back from her Scotland vacation and wants to share some of her vacation photos with her friends. Jane uses Faji, a photo sharing site, for sharing journey photos. She signs into her faji.com account, and uploads two photos which she marks private.
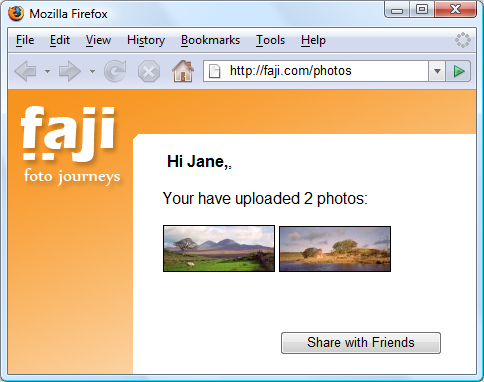

Using OAuth terminology, Jane is the resource owner and Faji the server. The 2 photos Jane uploaded are the protected resources.
- After sharing her photos with a few of her online friends, Jane wants to also share them with her grandmother. But grandma doesn’t have an internet connection so Jane plans to order prints and have them mailed to grandma. Being a responsible person, Jane uses Beppa, an environmentally friendly photo printing service.
Using OAuth terminology, Beppa is the client. Since Jane marked the photos as private, Beppa must use OAuth to gain access to the photos in order to print them.
- Jane visits beppa.com and begins to order prints. Beppa supports importing images from many photo sharing sites, including Faji. Jane selects the photos source and clicks Continue.
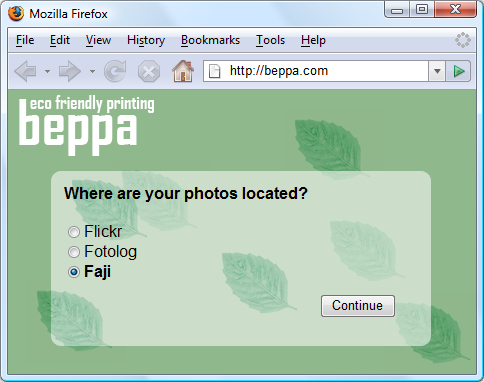

When Beppa added support for Faji photo import, a Beppa developer known in OAuth as a client developer obtained a set of client credentials (client identifier and secret) from Faji to be used with Faji’s OAuth-enabled API.
After Jane clicks Continue, something important happens in the background between Beppa and Faji. Beppa requests from Faji a set of temporary credentials. At this point, the temporary credentials are not resource-owner-specific, and can be used by Beppa to gain resource owner approval from Jane to access her private photos.
- Jane clicked Continue and is now waiting for her screen to change. She sips from her prized Black Bowmore while waiting for the next page to load.

When Beppa receives the temporary credentials, it redirects Jane to the Faji OAuth User Authorization URL with the temporary credentials and asks Faji to redirect Jane back once approval has been granted to http://beppa.com/order.
Jane has been redirected to Faji and is requested to sign into the site. OAuth requires that servers first authenticate the resource owner, and then ask them to grant access to the client.
- Jane notices she is now at a Faji page by looking at the browser URL, and enters her username and password.
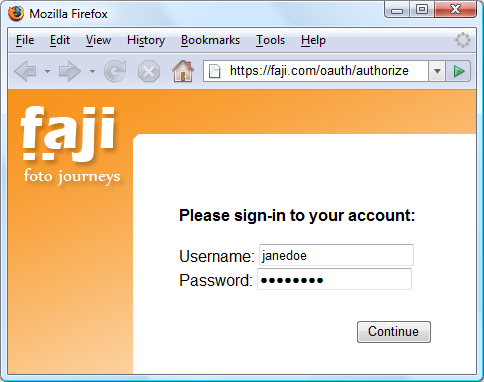

OAuth allows Jane to keep her username and password private and not share them with Beppa or any other site. At no time does Jane enters her credentials into beppa.com.
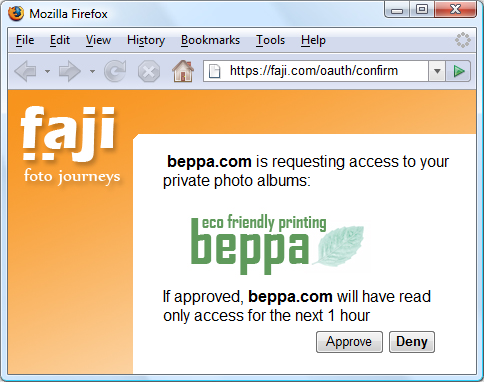
After successfully logging into Faji, Jane is asked to grant access to Beppa, the client. Faji informs Jane of who is requesting access (in this case Beppa) and the type of access being granted. Jane can approve or deny access.
- Jane makes sure Beppa is getting the limited access it needs. She does not want to allow Beppa to change her photos or do anything else to them. She also notes this is a onetime access good for one hour which should be enough time for Beppa to fetch her photos.

Once Jane approves the request, Faji marks the temporary credentials as resource-owner-authorized by Jane. Jane’s browser is redirected back to Beppa, to the URL previously provided http://beppa.com/order together with the temporary credentials identifier. This allows Beppa to know it can now continue to fetch Jane’s photos.
- Jane waits for Beppa to present her with her photos fetched from her Faji account.
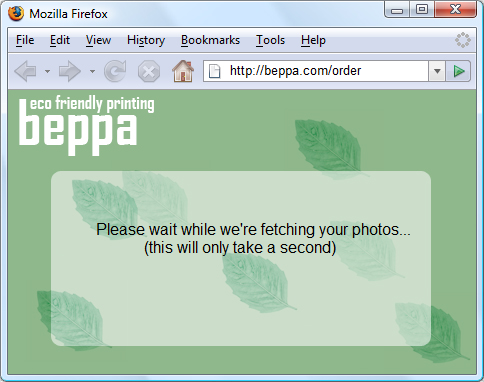

While Jane waits, Beppa uses the authorized Request Token and exchanges it for an Access Token. Request Tokens are only good for obtaining User approval, while Access Tokens are used to access Protected Resources, in this case Jane’s photos. In the first request, Beppa exchanges the Request Token for an Access Token and in the second (can be multiple requests, one for a list of photos, and a few more to get each photo) request gets the photos.

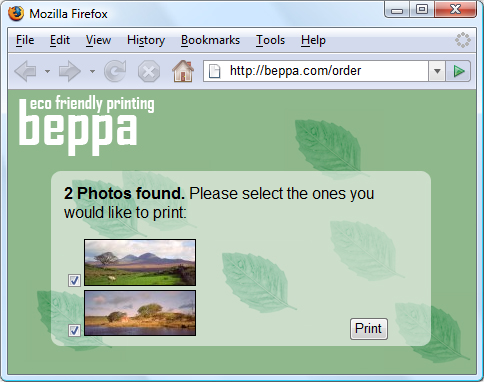
When Beppa is done, Jane’s browser refreshes to complete the order.
Beppa successfully fetched Jane’s photo. They are presented as thumbnails for her to pick and place her order.
- Jane is very impressed how Beppa grabbed her photos without asking for her username and password. She likes what she sees and place the print order.

OAuth in Ruby
OAuth does not come out of the box with Ruby. However, there are many generic and site-specific (Twitter, Facebook, etc.) gems to enable OAuth in your Ruby application. Some of the popular ones are discussed below.
OAuth Provider support
The following gems provide support for turning your application into an OAuth Provider:
oauthandoauth-plugin
oauthis a Ruby gem for implementing both OAuth consumers and providers in Ruby applications. However, this is NOT a Rails plugin, but could easily be used as a foundation for a Rails plugin. As a matter of fact it has been pulled out from a Rails plugin calledoauth-pluginwhich now requires this gem.<ref name="oauthgem">Braendgaard, P. (2010, April 21). Ruby oauth gem. Retrieved from https://github.com/pelle/oauth</ref>- The
oauth-plugincan generate an OAuth Provider that supports the following features out of the box:<ref name="oauthplugin">Braendgaard, P. (2012, April 2). OAuth plugin. Retrieved from https://github.com/pelle/oauth-plugin</ref> - 1. User can register their own applications to receive consumer key/secret pairs.
- 2. Provider supports standard best practices out of the box hmac-sha1, etc.
- 3. Users can manage and revoke tokens issued in their name
- 4. Easy before filter to provide OAuth protection on your actions
- This gem provides a toolkit for adding OAuth2 provider capabilities to a Ruby web app. It handles most of the protocol for you. It is designed to provide a sufficient level of abstraction such that it can implement updates to the protocol without affecting your application code at all. Thus, the providers only have to be concerned about authenticating users and letting them grant access to client apps.<ref>Coglan, J. (2013, August 19). oauth2-provider gem. Retrieved from https://github.com/songkick/oauth2-provider</ref>
OAuth Consumer support
oauthandoauth-plugin
- The oauth-plugin can generate an OAuth Consumer which includes a controller to manage the authentication flow between your application and any number of external OAuth secured applications that you wish to connect to.<ref name="oauthgem"/>
omniauthis a mega-authorization gem, giving you access to the OAuth processes for a whole list of web services (Twitter, Facebook, Foursquare, Gowalla, Netflix, YouTube, etc.), so you can call specific functions for each service and set it up quickly.<ref name="omniauth">Drake, K. (2012, November). Omniauth. Retrieved from https://github.com/intridea/omniauth/wiki</ref><ref name="oauthvsomniauth">Rhode, J. (2011, July). Omniauth vs oauth-plugin. Retrieved from http://stackoverflow.com/a/6830090/1617100</ref>
twitter_oauthis an example of a site-specific OAuth gem that generates OAuth consumer for Twitter.
Sample OAuth Application
This section will help you create two web applications:
- OAuthProviderApp: A web application that allows access to it's services through OAuth.
- OAuthConsumerApp: A web application that accesses services provided by OAuthProviderApp through OAuth.
These tutorials were created on the following system configuration:
Windows 7
Ruby 1.9.3
Rails 3.2
Creating an OAuth Provider
Following steps will create a basic Rails application that uses OAuth to authenticate the requests.
1. Create a Rails application and remove public/index.html
rails new OAuthProviderApp
2. Add devise, oauth-plugin and dynamic_form gems to your Gemfile
gem 'dynamic_form'
gem 'devise'
gem 'oauth-plugin'
dynamic_form- DynamicForm holds a few form helper method that are required by
oauth-plugin. devise- Flexible authentication solution for Rails with Warden.
3. Run bundle install to install the Gems
bundle install
4. Run the devise:install and devise User generators to generate the User model, migration, controller and views
rails generate devise:install
rails generate devise User
5. Run the oauth_provider generator
rails generate oauth_provider
This will generate the migrations, models, controllers, views and routes for the following:
- OAuthToken or AccessToken - The token used to associate the request with the resource owner.
- ClientApplication - Client application that needs access to the services offered by the Server on behalf of the Resource owner
- OAuthNonce - Used for verifying requests from the client
6. Run db:migrate to create tables for User, OAuthToken, ClientApplication, and OAuthNonce in the database
rake db:migrate
7. To test the application, add the following route to your config/routes.rb
root :to => 'oauth_clients#index'
Thus, the home page will display the list of OAuth clients registered by a user (developer of OAuth client).
8. Add ClientApplication and OAuthToken associations to User model (app/models/user.rb)
has_many :client_applications
has_many :tokens, :class_name => 'Oauth2Token', :order => 'authorized_at desc', :include=>[:client_application]
9. Add the following accessors to the corresponding models
attr_accessor :expires_at                                                       # Add this to OauthToken
attr_accessible :user, :client_application                                      # Add this to AccessToken
attr_accessible :nonce, :password, :timestamp                                   # Add this to OauthNonce
attr_accessible :callback_url, :client_application                              # Add this to RequestToken
attr_accessible :user, :client_application, :scope                              # Add this to Oauth2Token
attr_accessible :client_application, :user, :scope, :callback_url               # Add this to Oauth2Verifier
attr_accessible :name, :url, :callback_url, :support_url, :token_callback_url   # Add this to ClientApplication
This is required since the generator for oauth_provider is outdated.
10. Add the following alias to app/controllers/oauth_controller.rb and app/controllers/oauth_clients_controller.rb after the class declaration
alias :login_required :authenticate_user!
This is required because oauth-plugin uses login_required method to determine whether the user is authenticated or not. In order to do this, we use the authenticate_user! method provided by devise gem.
11. Add the following filter to config/application.rb
require 'oauth/rack/oauth_filter'               #Add before declaration of module OAuthProviderApp
config.middleware.use OAuth::Rack::OAuthFilter  #Add after declaration of class Application
This adds the OAuthFilter to the middleware layer and thus allows filtering out unauthorized calls.
12. Add the following method to app/controllers/application_controller.rb
def current_user=(user)
  current_user = user
end
This method is required by oauth-plugin to let devise know who the user is.
13. Generate a new controller that will define the services provided by the this provider
rails generate controller API::V1::Data
14. Add a dummy service method to this controller (app/controllers/api/v1/data_controller.rb) and have it render some response. This will be the service that the OAuth client will try to access.
class Api::V1::DataController < ApplicationController
respond_to :json, :xml
oauthenticate :interactive=>false # Actions in this controller can only be accessed via OAuth
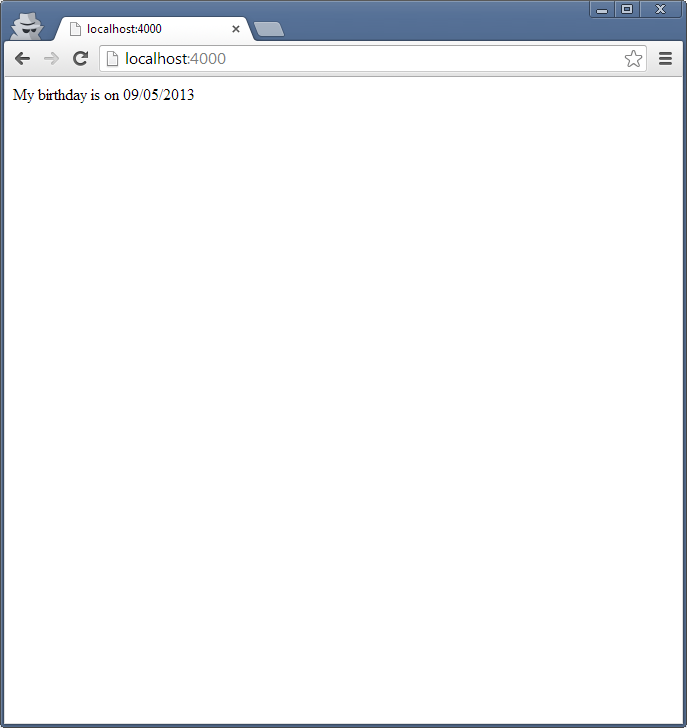
def show # This is the service OAuth client will call
respond_with 'My birthday is on 09/05/2013'
end
end
15. Add the following to config/routes.rb
namespace :api do
  namespace :v1 do
    match "show" => "data#show"
  end
end
16. Run the Rails server
rails server -p 3000
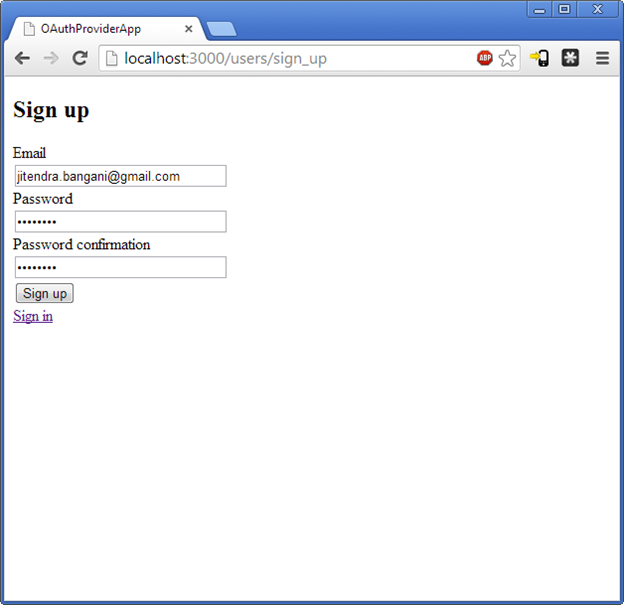
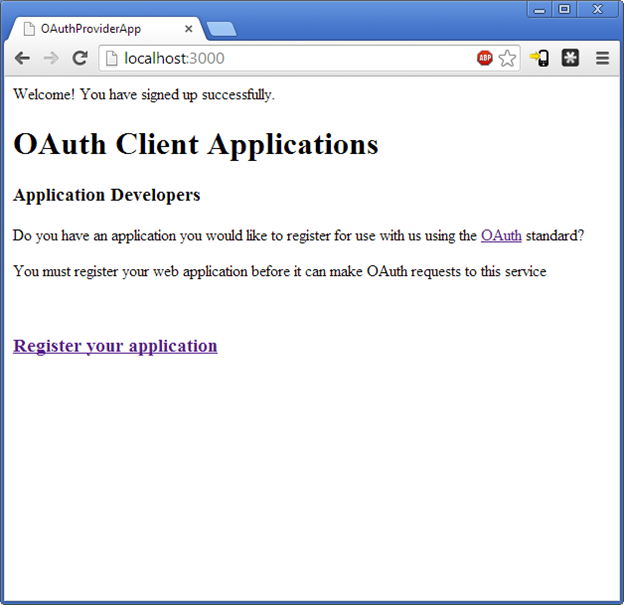
17. Sign up as a client developer for the OAuthProviderApp at http://localhost:3000/users/sign_up
| Client registration | Client registration success |
|
|
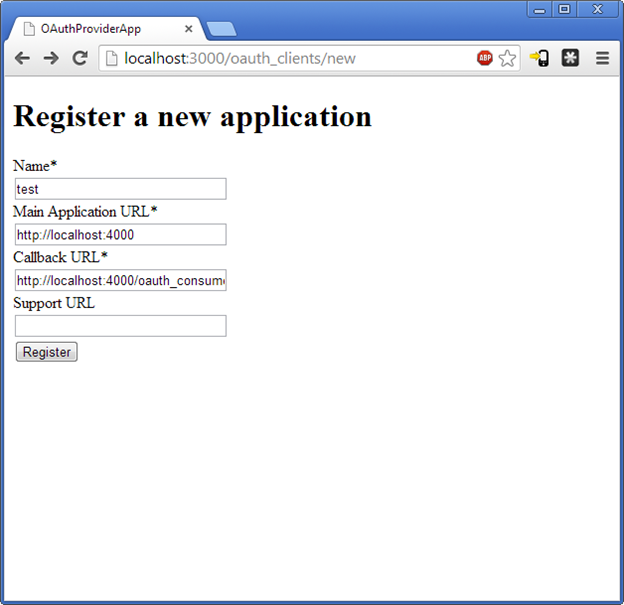
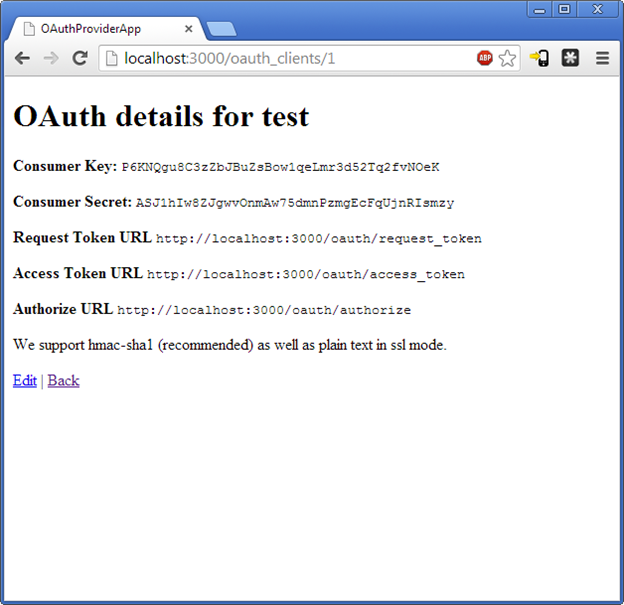
18. Register your application with the following parameters and Note down the Consumer key and Consumer secret
Name:                 test
Main Application URL: http://localhost:4000/
Callback URL:         http://localhost:4000/oauth_consumers/test/callback
In the next section, we will create an OAuthConsumerApp with these parameters. OAuthConsumerApp will act as a client for OAuthProviderApp.
| Application registration | Application registration success |
|
|
Creating an OAuth Consumer
Following steps will create a basic Rails application that uses OAuth to access data from the show() action that we just defined.
1. Create a Rails application and remove public/index.html
rails new OAuthConsumerApp
2. Add devise and oauth-plugin gems to your Gemfile
gem 'devise'
gem 'oauth-plugin'
3. Run bundle install to install the Gems
bundle install
4. Run the devise:install and devise User generators to generate the User model, migrations, controller and views
rails generate devise:install
rails generate devise User
5. Run the oauth_consumer generator
rails generate oauth_consumer user
This will generate the migrations, models, controllers and routes for ConsumerToken which is used by this Consumer to authenticate with the Provider.
6. Migrate the database to create tables for User and ConsumerToken
rake db:migrate
7. Add the following alias to app/controllers/oauth_consumers_controller.rb after the class declaration
alias :login_required :authenticate_user!
This is required because oauth-plugin uses login_required method to determine whether the user is authenticated or not. In order to determine whether the user is authenticated or not, we use the authenticate_user! method provided by devise gem.
8. Add the following methods to app/controllers/application_controller.rb
def current_user=(user)
  current_user = user
end
def logged_in?
  user_signed_in?
end
This method is required by oauth-plugin to let devise know who the user is and whether (s)he is logged in or not.
9. Create a new model that subclasses ConsumerToken for the above OAuthProvider service
class TestToken < ConsumerToken
  TEST_SETTINGS={
      :site => "http://localhost:3000",
      :request_token_path => "/oauth/request_token",
      :access_token_path => "/oauth/access_token",
      :authorize_path => "/oauth/authorize"
  }
  def self.consumer(options={})
    @consumer ||= OAuth::Consumer.new(credentials[:key], credentials[:secret], TEST_SETTINGS.merge(options))
  end
end
The purpose of this subclass is to define the consumer method that is based on the Provider.
11. Add the following association to the User model
has_one :test, :class_name=>"TestToken", :dependent=>:destroy
10. Add the following to config/initializers/oauth_consumers.rb defining the Consumer key and secret provided by the OAuthProviderApp
OAUTH_CREDENTIALS={
   :test => {
       :key => "CRcIJ15MwSqlDTxsH8MpO3En4wjaOxkqeofLioH4",      # From Step 18 of previous section
       :secret => "C7uci8xkyMShCf4SNXWPclKbBo3ml1Zf2W2XWu4W",   # From Step 18 of previous section
       :expose => true
   }
}
11. Generate a controller for testing the application
rails generate controller welcome index
12. Add logic to a controller action that performs the OAuth workflow as discussed in Introduction
class WelcomeController < ApplicationController
  def index
    if(current_user)
      @consumer_tokens = TestToken.all :conditions => {:user_id => current_user.id}
      if(@consumer_tokens.first)
        @token = @consumer_tokens.first.client
        render inline: @token.get("/api/v1/show").body
      else
        redirect_to '/oauth_consumers/test'
      end
    else
      redirect_to new_user_registration_path
    end
  end
end
13. Add the following route to config/routes.rb
root :to => 'welcome#index'
14. Run the rails server on port 4000
rails server -p 4000
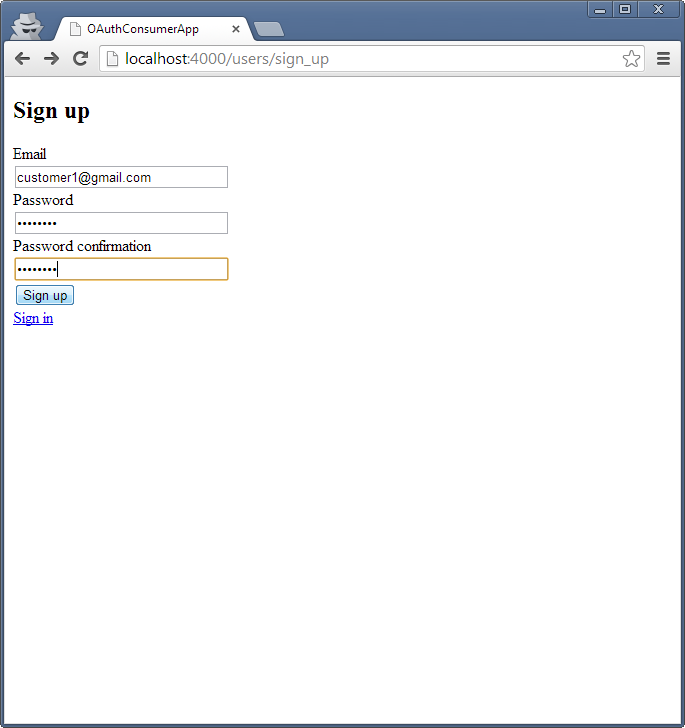
14. Experience the OAuth workflow
| Screen 1 | Screen 2 | Screen 3 | Screen 4 |
|
|
|
|
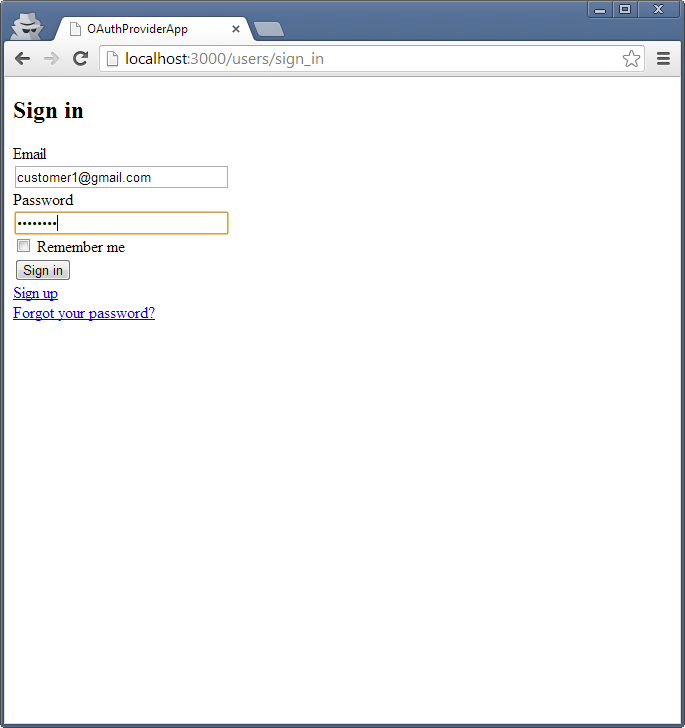
- Screen 1
- A customer (who has an account with OAuthProviderApp) registers with OAuthConsumerApp
- Screen 2
- Upon registration, the customer is redirected to OAuthProviderApp to import data from OAuthProviderApp to OAuthConsumerApp
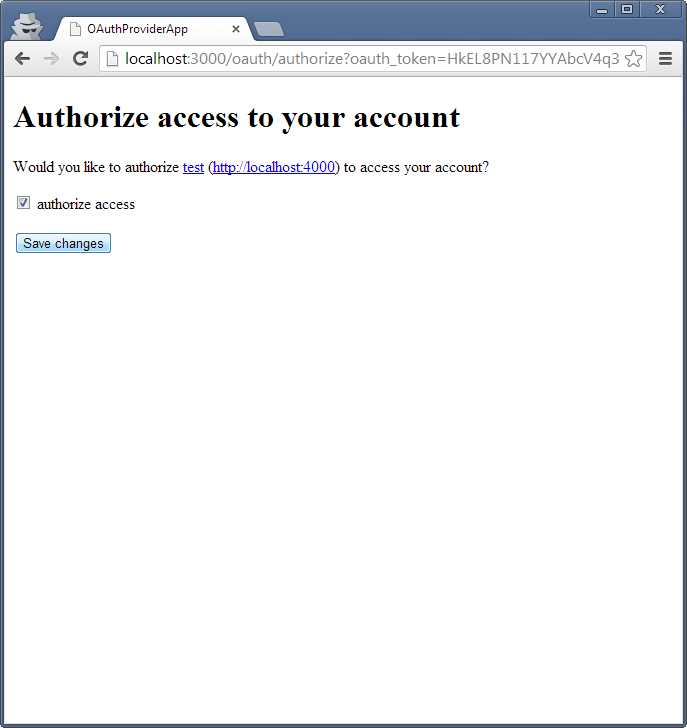
- Screen 3
- Customer authorizes OAuthConsumerApp to access his/her data from OAuthProviderApp
- Screen 4
- OAuthConsumerApp can now access Customer's data from OAuthProviderApp
Additional examples
Following are some full-length tutorials for OAuth creating consumers for popular web applications:
- Facebook Authentication by RailsCasts
- This will show how to create a new Facebook application and configure it. Then add some authentication with the omniauth-facebook gem and top it off with a client-side authentication using the JavaScript SDK.
- Koala gem for Facebook
- Koala is a Facebook library for Ruby, supporting the Graph API (including the batch requests and photo uploads), the REST API, realtime updates, test users, and OAuth validation.
- OmniAuth for Twitter by RailsCasts
- Uses omniauth gem to integrate Twitter based authentication in your application.
- Rails Twitter OAuth Sample
- Demonstrates the use of rails with the Twitter RESTful API with OAuth 1.0a.
- Rails 3, Devise, Omniauth, and Google
- Uses omniauth gem to integrate Google authentication in your application.
Conclusion
OAuth is an open standard for authorization that allows users to approve application to act on their behalf without sharing their password. There are several gems such as oauth, oauth-plugin, and omniauth that bring OAuth 1.0a and 2.0 capabilities to your application. These gems hides the internal complexity of the protocol and provides developers with a very simple interface to act as OAuth provider or consumer. The Further reading section has links to guides and comparative study of OAuth 1.0a and OAuth 2.0 specifications and an informative video explaining the internals of the protocol.
References
<references />
Further reading
- Braendgaard, P. (2009, July). Consuming oauth intelligently in rails. Retrieved from http://stakeventures.com/articles/2009/07/21/consuming-oauth-intelligently-in-rails
- Braendgaard, P. (2009, July). How to turn your rails site into an oauth provider. Retrieved from http://stakeventures.com/articles/2007/11/26/how-to-turn-your-rails-site-into-an-oauth-provider
- Yonskai, N. (2013, September 19). OAuth 1a guide. Retrieved from http://oauthbible.com/#oauth-10a-three-legged
- Yonskai, N. (2013, September 19). OAuth 2.0 guide. Retrieved from http://oauthbible.com/#oauth-2-refresh-token
- Brail, G. (2010, July 27). Top differences between OAuth 1.0(a) and OAuth 2.0 for API calls. Retrieved from https://blog.apigee.com/detail/oauth_differences
- Williams, A. (2009, December 3). OAuth official wiki. Retrieved from http://wiki.oauth.net/w/page/12238516/FrontPage
- Van den Enden, S. (2010, July 27). Authorization with OAuth 2.0. Retrieved from https://www.youtube.com/watch?v=zTsyeMV-N0c VIDEO
Notes
- All references and further reading links are in the APA style
- All the content on this page is from websites that have a Attribution-NonCommercial-NoDerivs 3.0 or similar license that allows us to use their content.